 Open Exchange
EDIT: This article has been updated with up-to-date information about the Port project, which now includes a tutorial for basic usage.
The Port project is something that I've introduced more than two years ago but I hadn't enough room to elaborate a tutorial on how to use it till now.
First, the motivation:
I started this project several months years ago when I noticed that most of the Studio's source control implementations weren't project based but instead namespace based. While developing it I noticed some potential keys factors that made me put a bit more of effort on it, even though there were options to handle the source codes already. These factores are:
- Organization: A Project to be used as a finite scope, thus never mixing code that don't belong there.
- Tests: Projects allow restricting test suites to their scope, thus allowing easier execution.
There are another few points that I left out because they aren't directly related as to why use projects.
A word of warning though...
If you want to use Port with a shared instance then I'd recommend you to try something else. Port is not made for usage with shared instances as it strongly favors distributed development. It's ideal for personal projects but might not be suited for big enterprise enviroments.
If you fail to understand this, you'll face code duplication, desynchronization and even overwrites due to your fellow team mates modifying the same source code.
Now back to what matters...
I've been using Port to handle every Caché Studio-based project and I want to share the why, but this time in a pratical sense, so I made this tutorial to help you understand a bit more. Follow the steps below and if you find any problems you're free to open an issue or report it back in this thread, you can even PM me if you want and I'll reply when it seems fit.
1. Download and install the file port-prod.xml
After installing it, Port will ask you to restart the Studio.
2. Create a new project, create a new project item, save the project and the item respectively.
Everytime you create a new item you must save the project before the item, to make sure that the Studio already updated the project reference.
Port will handle creating the directory structure for you, whichs defaults to: /CacheProjects/{NAMESPACE}/{PROJECT}.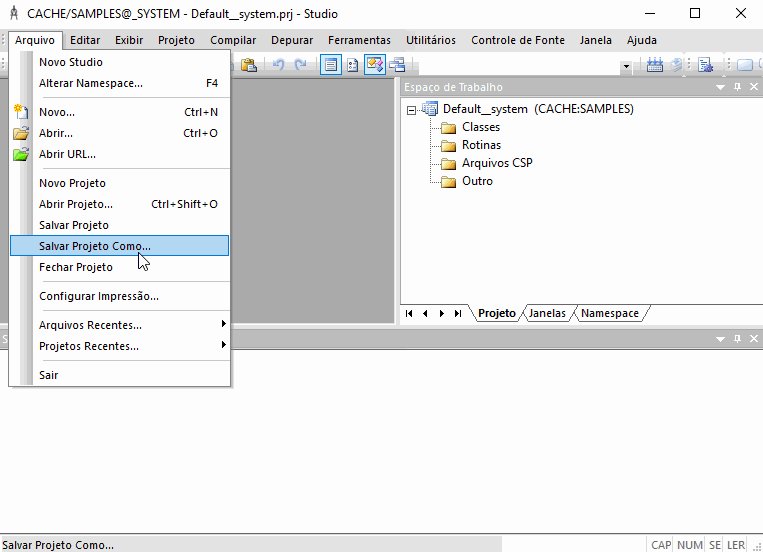
3. Save the recently added item.
This will make the item to be exported. Port will always assume that every project item is a candidate for being exported, this is also why you don't need to worry about Check-In'ing/Check-Out'ing these items.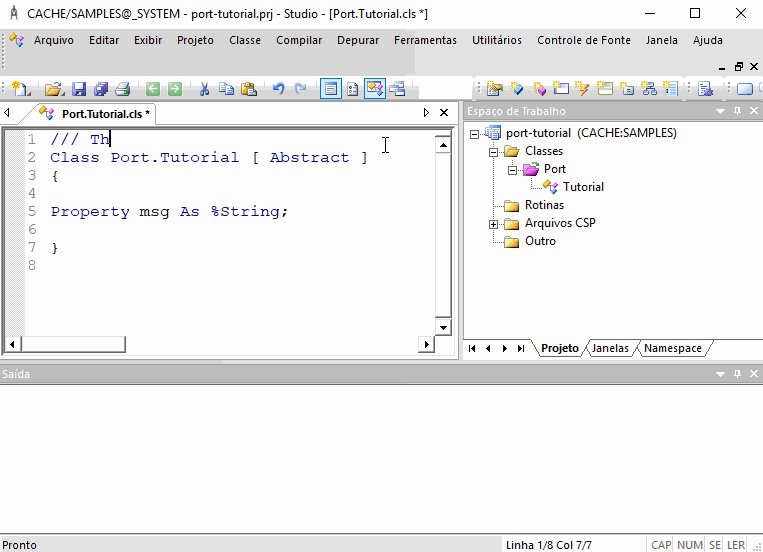
4. Export a project as whole using the menu Source Control->Export.
The first thing that you'll want to do is to export the project as whole. Specially the already existing ones, when doing so Port will check which exported files are outdated and overwrite them with the ones in your project.
NOTE: Port will remove files that aren't related to the project in order to keep clean the directory where the source code is exported. This happens over two circunstances: when removing from the project or deleting the item. So make sure you know what you're doing and commit often!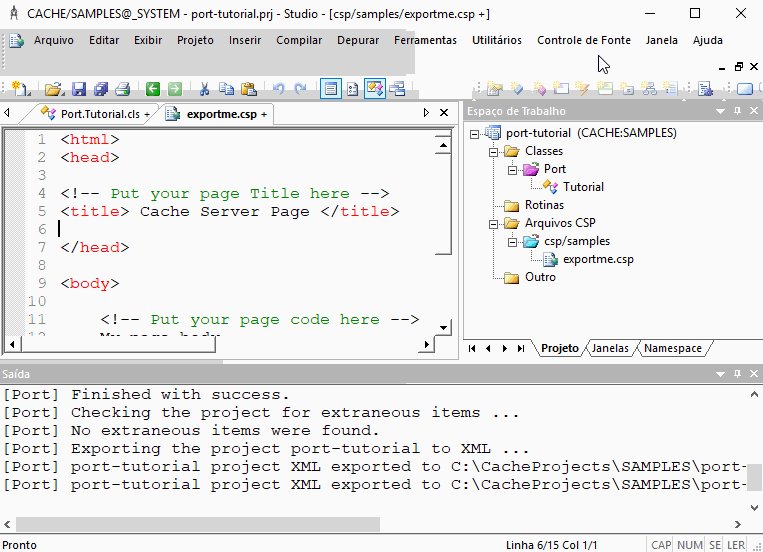
5. Import files modified externally by using the menu Source Control->Import
Let's suppose that you have git pull'ed recent changes from your remote and now you need to put these changes in your project, you can do so by importing it back.
If you just cloned a repository that you want to add to Studio then create an empty project using it and import the files using the same menu option.
Just make sure that the repository path respects the same path used by import (which defaults to /CacheProjects/{NAMESPACE}/{PROJECT} as explained before).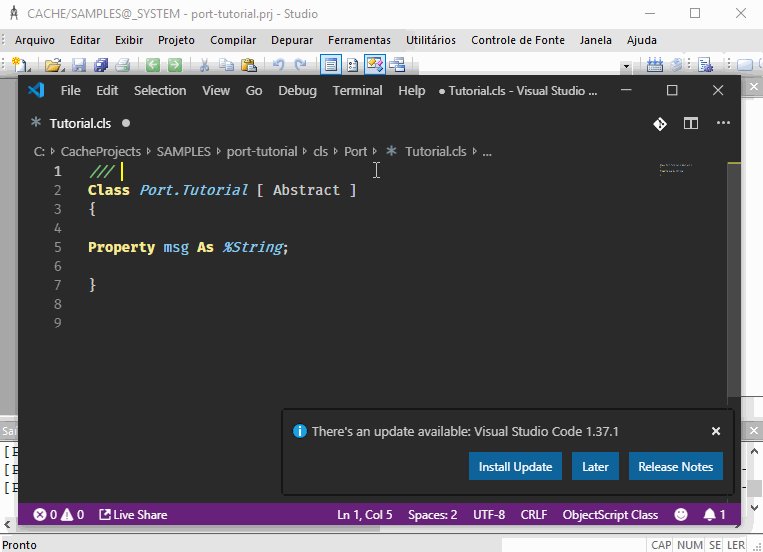
6. Force an item to be exported or imported by using the context menu: Source Control->Export (forced) or Source Control->Import (forced).
You can also force an item or even a whole project to be exported/imported. Forcing it means bypassing the timestamp checks, you might need it eventually.
NOTE: You can also import a folder or a Package, all items that belong to it will be affected as well.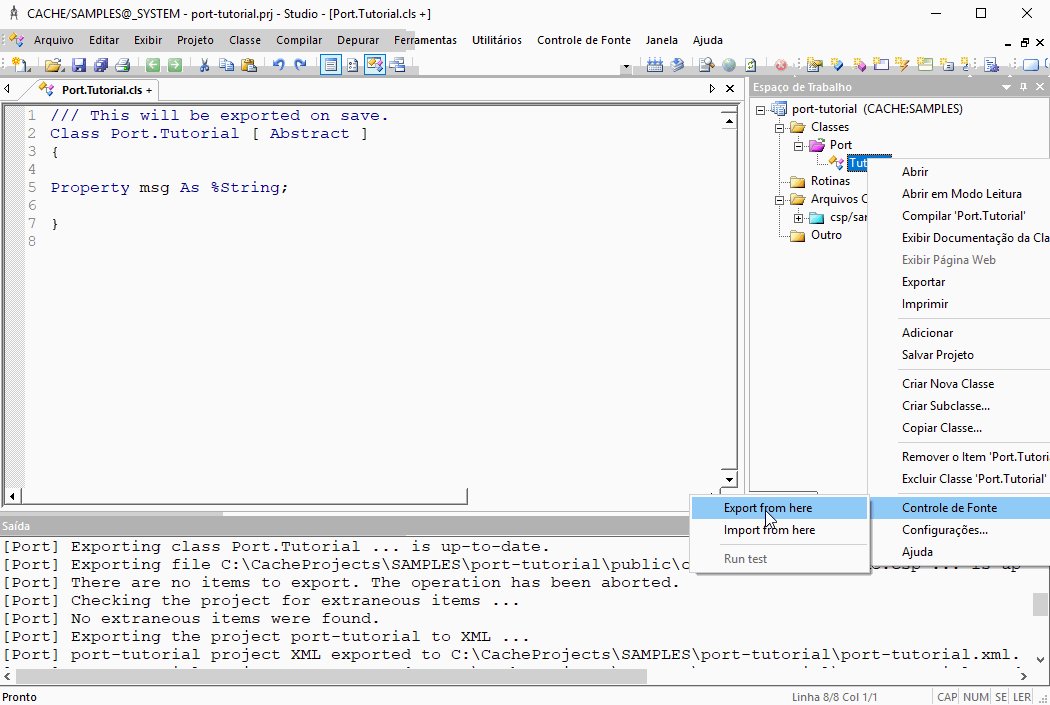
This concludes the tutorial about the basic usage. Next time I'll be covering how to execute unit tests integrated to the project using the Studio.


