Let's write an Angular 1.x app with a Caché REST backend - Part 10
In our last lesson, we implemented a new REST Service to allow us to perform CRU operations on Widgets, and refactored our Controllers to allow the page setup to be decouple from the content.
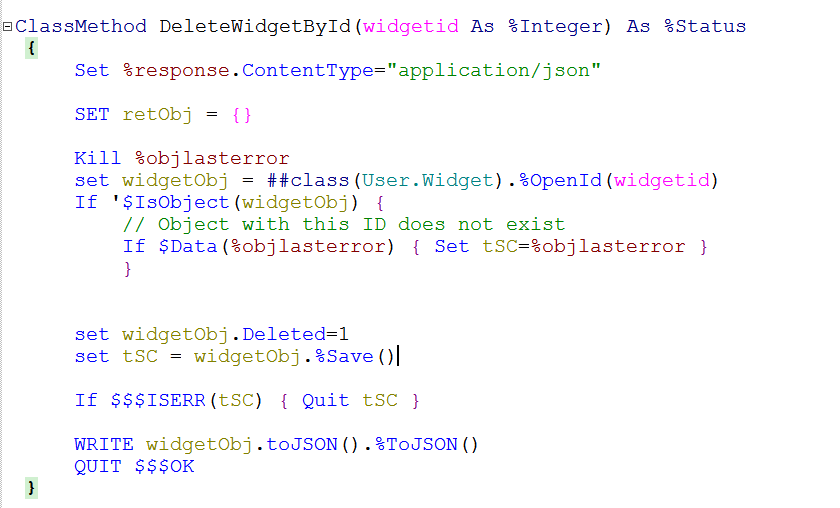
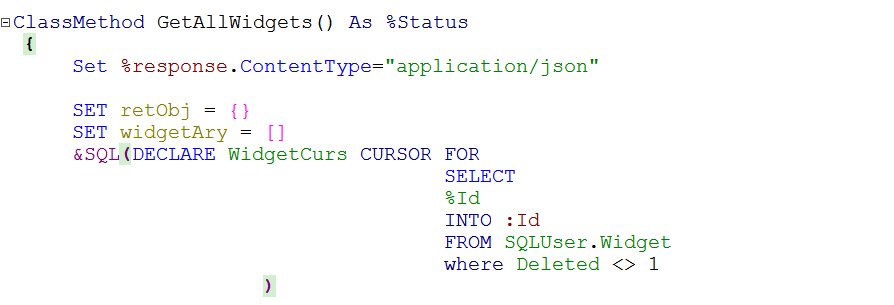
When we created our Widget Services, we did not implement a Deletion operation, which the HTTP Delete verb provides. As this is a base table for other parts of the Widgets Direct empire, we don't want to be able to do a hard Delete of the WIdget values, as this could cause issues with our ordering and billing modules. So, we will add a "Deleted" property to the class, and have the Delete operation set this Boolean flag instead. We will adjust our GetAllWidgets method to ignore any records which are marked as "Deleted"

REST.Widget
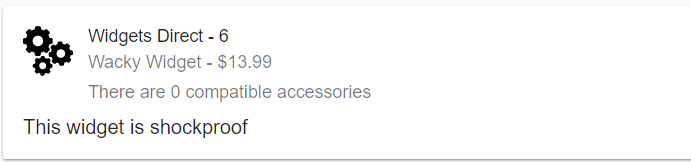
We now have a full CRUD stack in REST for our Widgets (though we do not currently handle any relationships between widgets and their accessories, that will come later)
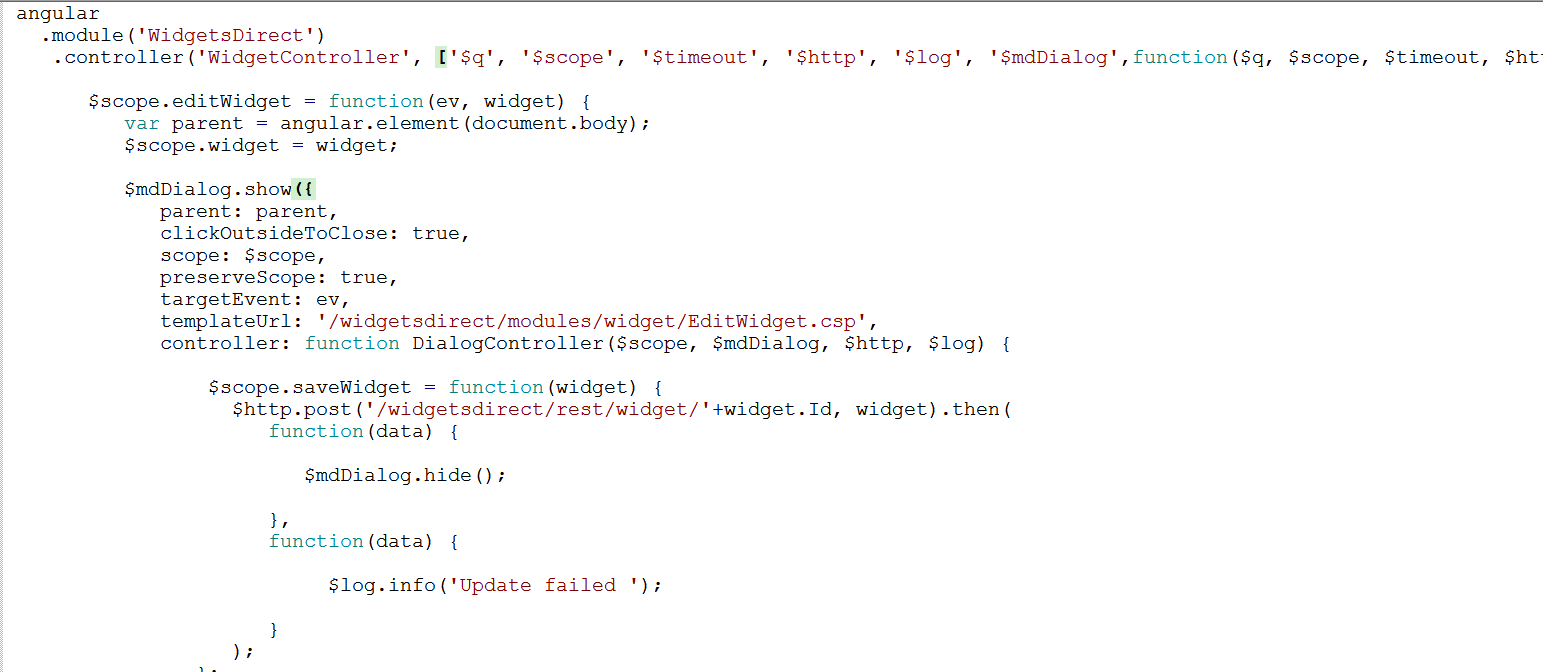
So, now we have our Update and Add methods for Widgets, we need a way to access them from our web application. Since this is Widget Specific code, we will keep things neat by creating a new WidgetController.js and place it in the /modules/widget/ web folder. We will implement a function that pops up a Material Dialog window, using a custom html template. This is set to see the $scope from the calling application, and implements a Controller specific to the Dialog window, with it's own scope. Inside this controller, we implement a function to take a widget object, and PUT it to a specific Widget's Update call (there is a lot going on here, but I've tried to keep this example as simple as I can). If the update call is successful, then the Dialog window closes, if it is not, then the window stays open and an error is written to the Debugger console using the $log service
modules/widget/WidgetController.js
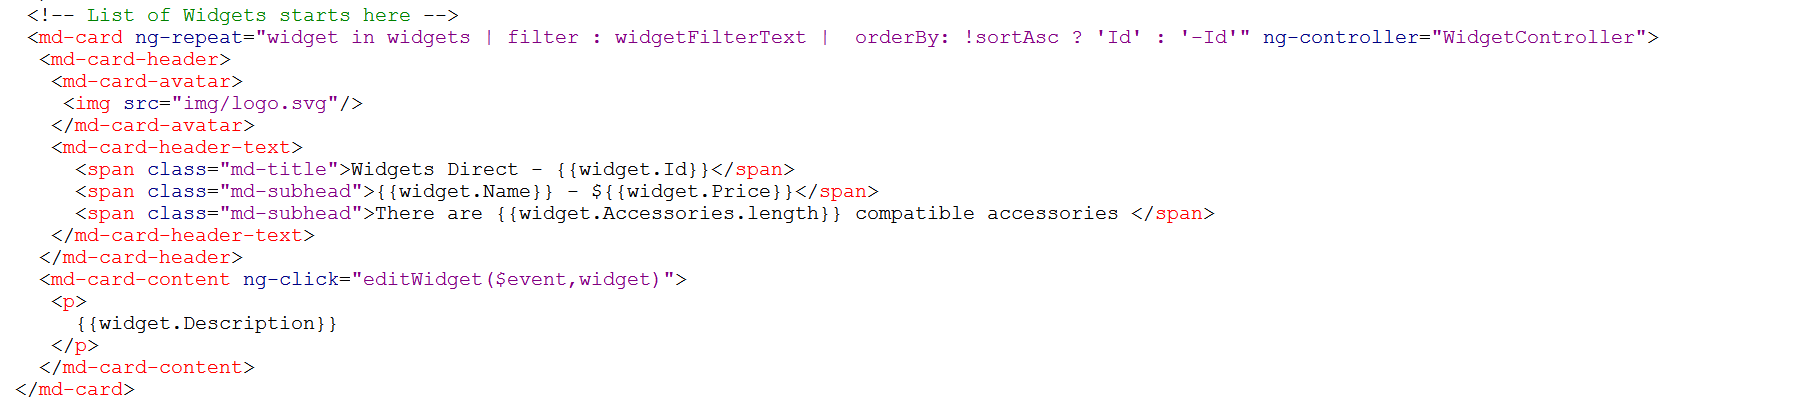
We now need to update our Widget card to be bound to this new Widget Controller, and implement an ng-click somewhere to trigger the function which displays our Dialog Window, For now, we will bind the ng-click to the Description field, so that clicking anywhere in the Description will give us the dialog to edit that record. We pass in the $event variable which allows the Angular runtime to determine where actions were triggered from.
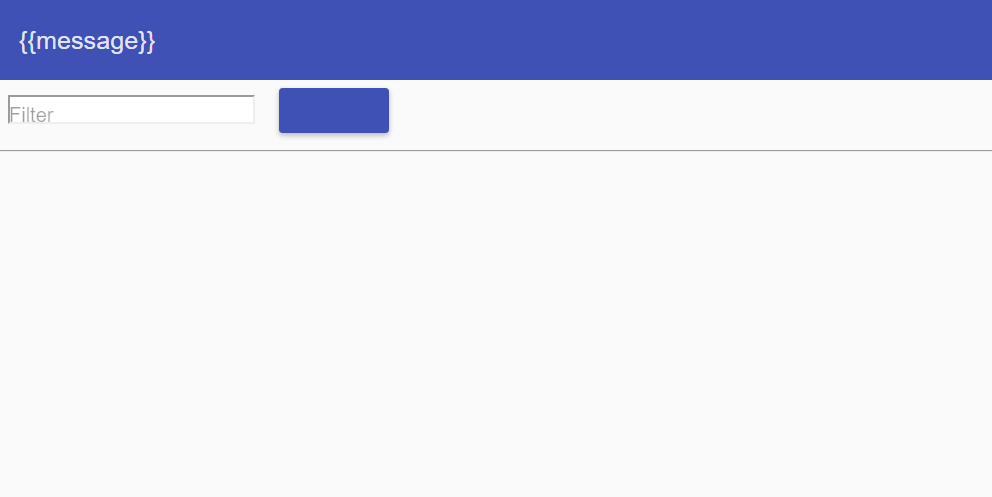
Welcome.csp
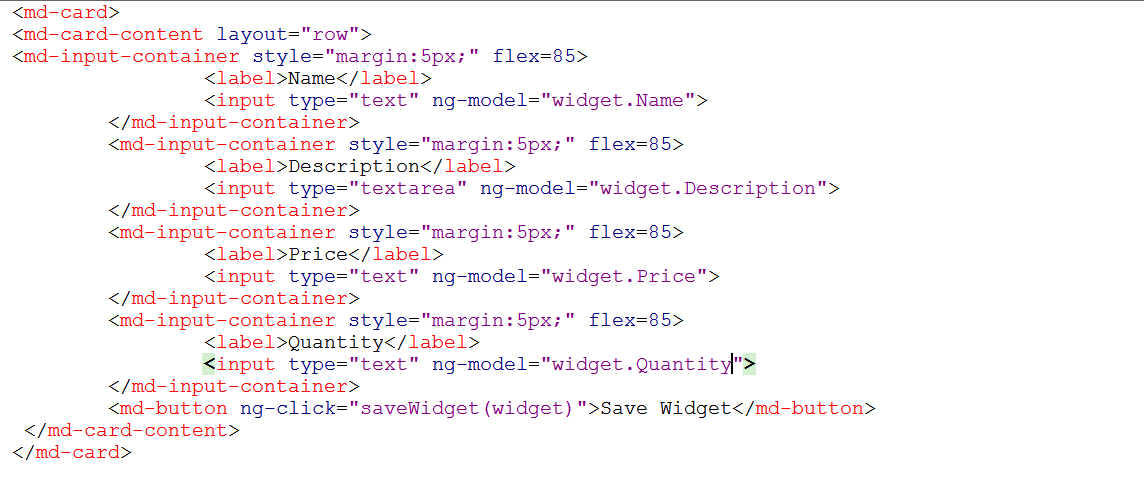
Finally, we need to create the Template file we specified in our mdDialog setup. We create EditWidget in the modules/widget/ folder, and can make a (very) basic form from some Material Input components. We also implement a Button which will trigger the saveWidget method that is located in the Dialog window's scope. We will come back and tidy up this form later. Notice that we do not have to create a full HTML page for the Form template, we can just provide the UI Components that are needed for the form
modules/widget/EditWidget.csp
Now, we can add the new controller to the list of User scripts on the Welcome page, compile everything and refresh our page, so we can start editing!
Welcome.csp

This looks bad. It appears the whole Angular runtime is unhappy. This is actually a trap I laid a few lessons back, when refactoring the Controllers. The syntax for defining an Angular Module is
modules/page/pageController.js

and the syntax for attaching config to an existing module is:
modules/widget/WidgetController.js

There can only be one module definition per application, but we have the injection dependency list ['ngMaterial'] in all of our controllers. We need to remove the second argument from our .module lines in both the Widget and Page Controller, and leave the Module definition in the widgetmaster.js. This is a nasty bug to have in your code, and will pretty much prevent all functionality from running. Once you've encountered this once, you will never fall for it again, so this is a public service message rather so you can learn from my mistakes :)
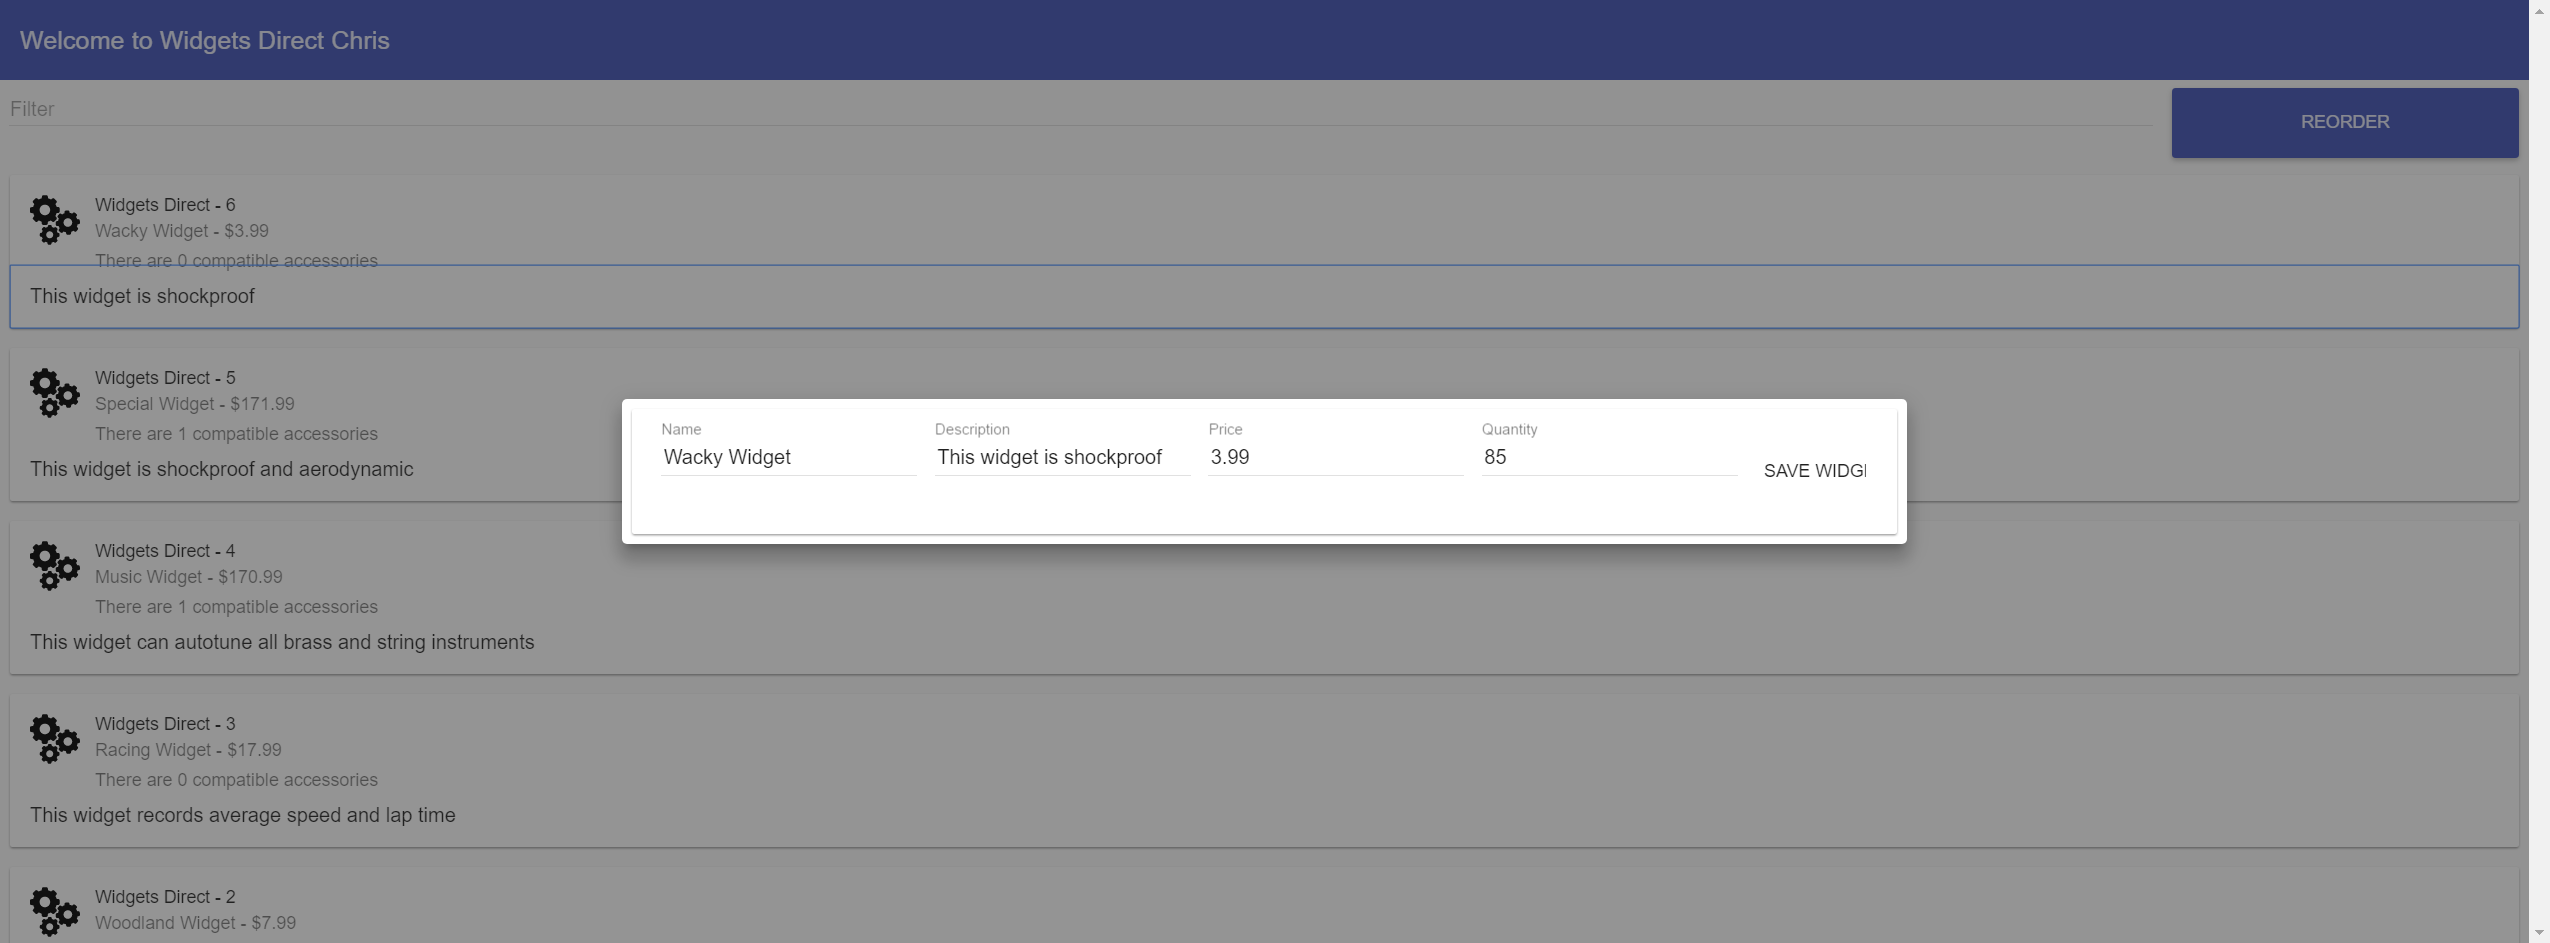
With our Module definition corrected, we can now load our page, and should be able to click a Widget Description to get an Edit form
Excellent, let's load our debugger with F12, and place a breakpoint on our $http.put so we can see our request as it is sent. We will then change the price of the Widget, and hit Save to see our request being sent to the server

WidgetController.js
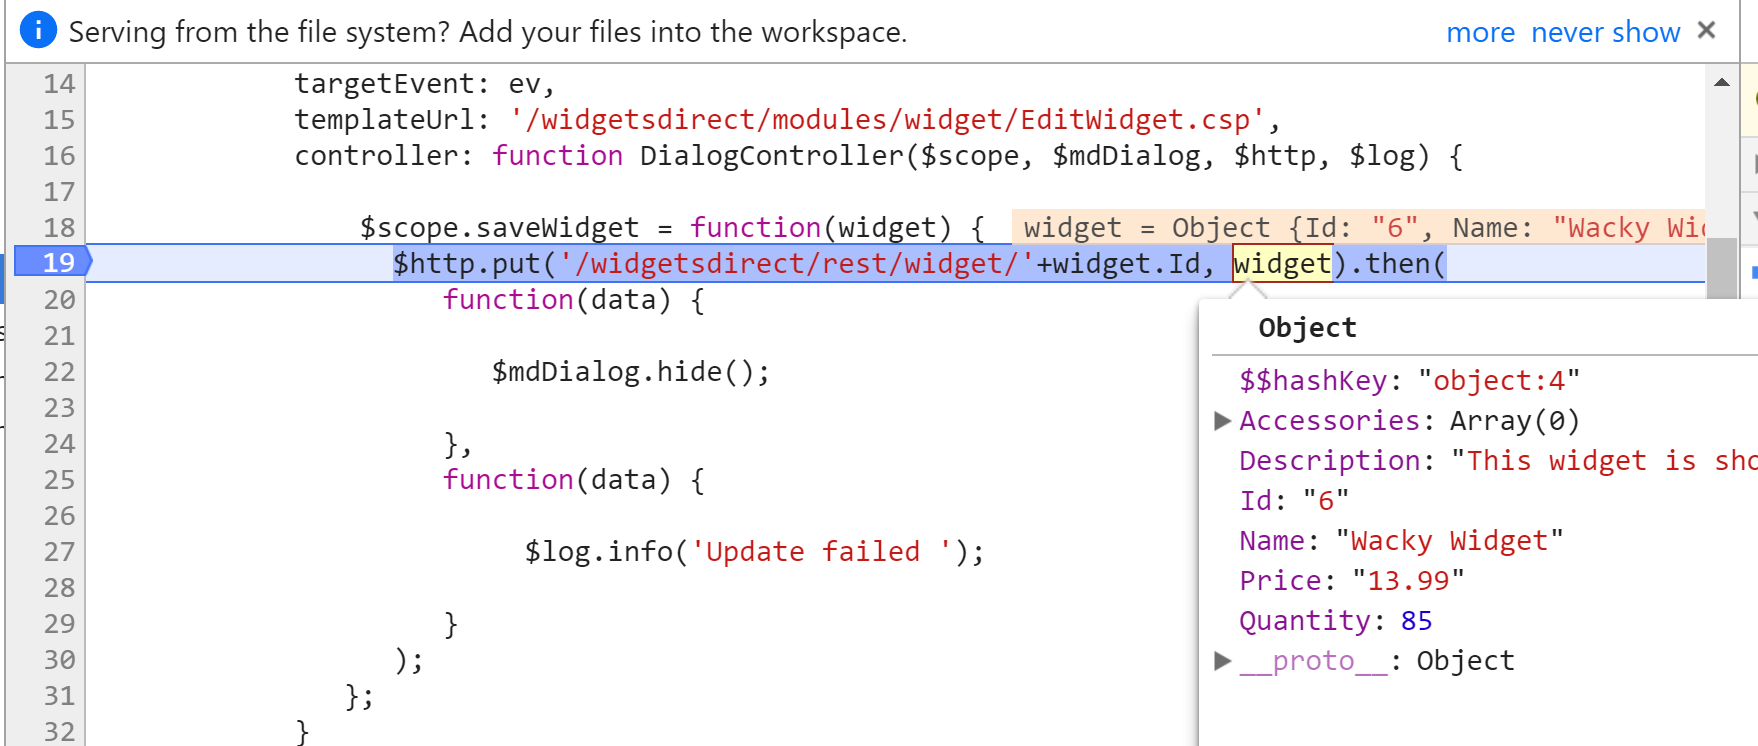
We can see that our update is in the payload object, which is great, but we are also sending all fields, including the Accessories array which seems a bit wasteful (especially when we start adding more properties to our Services). If we hit Play, then the debugger should resume, and we should see our Dialog window close, and our update persisted to the Widget
We now have a method to update our Widgets, though our Form is very very basic, and our update payload isn't optimised. We will cover this in future lessons
Today we:
- Implemented the DELETE verb for Widgets
- Created a templated Dialog window
- Created a new Widget Controller
- Corrected our Module definition
- Performed our first REST PUT call
Next time we will:
- Tidy up our form, by adding styling and validation
This article is part of a multi-part series on using Angular on top of Caché REST services. The listing of the full series can be found at the Start Here page
Comments
Hi Chris
Is it possible to get the names of the files and the changes for part 10 as text ?
Some of the examples the text for the demo are cut off. I also would rather make the changes to the existing project instead of having to reload from get hub.
thanks
Joe
Hi, Joe!
Just as an option I can suggest the nice app to get the fresh version of code from a given github repo to your namespace.
It is CacheUpdater.
Import the CacheUpdater release to the Namespace (Or better import it to USER and map the package to %All).
This command will deliver and compile the current state of code from repository to your namespace:
w ##class(CacheUpdater.Task).Update("iscChris", "CacheRESTStack")I will annotate the screenshots above to make it clear which files are being displayed
Hi Evgeny,
I went to the github earlier and I did not see the changes for part 10.
Sorry, technical delays. I will get the code up soon
Code now updated on Github
All the pictures for this article seem to be missing. I see a bunch of 404 errors in the browser console for the images as well as a couple TypeError errors.
I don't see any screenshots in this instalment. Debug console shows many error 404s, each one for a .png. Have they been deleted somehow?
Hi Jay
This has happened a few times, and I've readded them a few times. I'll see if I still have the images handy and get them reattached again
Thanks Chris, the pictures are there now. While you're at it there are a few missing graphics in part 11 too.