Connecting to Cloud SQL from Microsoft Power BI using ODBC and TLS/SSL
We're excited to continue to roll out new features to InterSystems IRIS Cloud SQL, such as the new Vector Search capability that was first released with InterSystems IRIS 2024.1. Cloud SQL is a cloud service that offers exactly that: SQL access in the cloud. That means you'll be using industry-standard driver technologies such as JDBC, ODBC, and DB-API to connect to this service and access your data. The documentation describes in proper detail how to configure the important driver-level settings, but doesn't cover specific third-party tools as - as you can imagine - there's an infinite number of them.
In this article, we'll complement that reference documentation with more detailed steps for a popular third-party data visualization tool that several of our customers use to access IRIS-based data: Microsoft Power BI.
Step 0: Creating your deployment
First, log into the Cloud Services Portal and create a Cloud SQL deployment. The one thing you need to be mindful of is to check the box to enable external connections. Other than that, all the default settings should work fine.
Step 1: Downloading the certificate
In order to connect securely, we'll use certificates to encrypt everything that gets sent over the wire. You can download the certificate from the deployment details page through the "Get X.509 certificate" button:
.png)
We need to refer to this certificate later on, so you'll want to save it in a proper directory. For example, I'm using C:\Users\bdeboe\odbc\.
Step 2: Creating the SSLDefs.ini file
To know which certificate and encryption settings to use, the InterSystems ODBC driver looks for an SSLDefs.ini file, which we'll create next. By default, it will look for this file in C:\Program Files (x86)\Common Files\InterSystems\IRIS, but you can override this location using the ISC_SSLconfigurations environment variable. To keep all my configuration settings together, I set that variable to C:\Users\bdeboe\odbc\, the directory where I also saved my certificate.
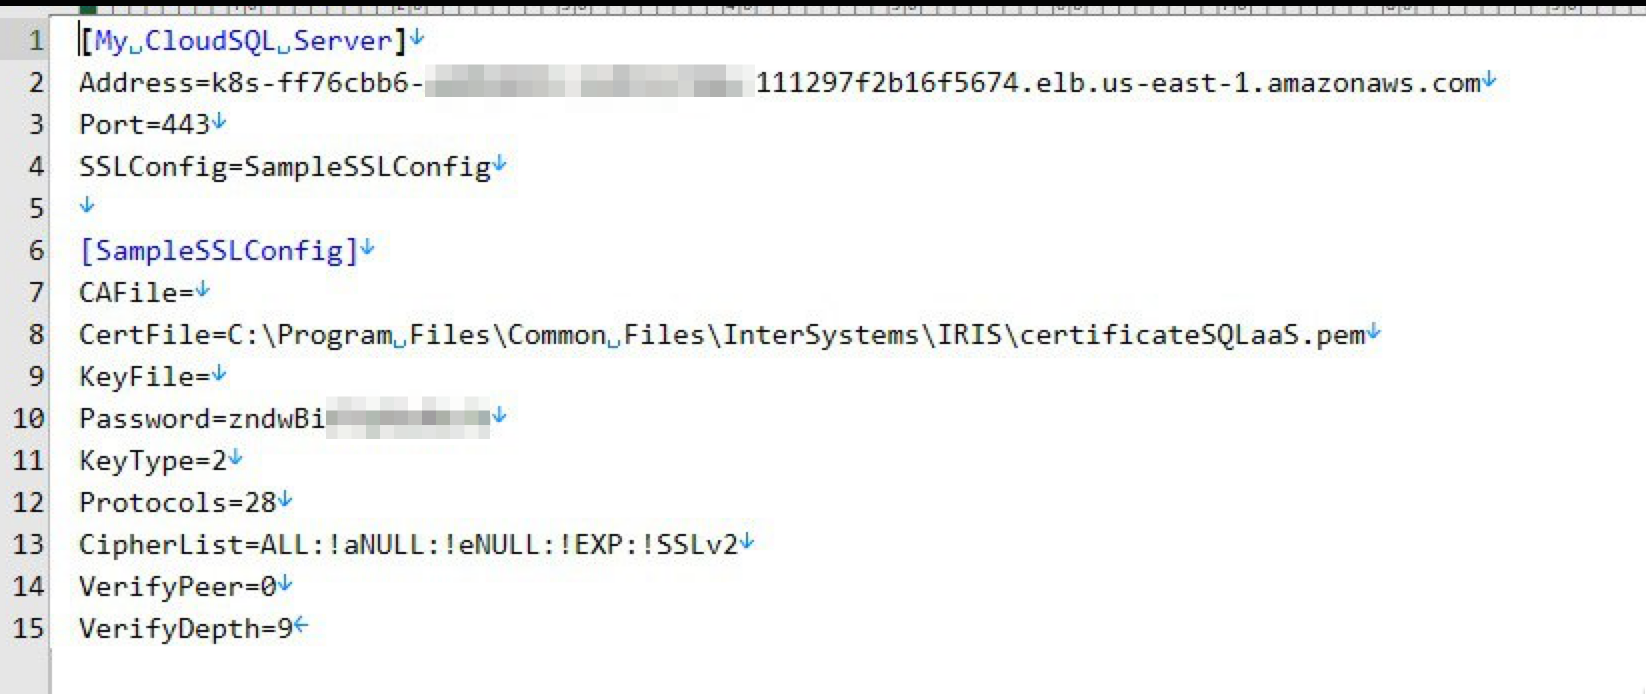
The SSLDefs.ini file needs to contain two things in order for ODBC to know how to connect: a server configuration, and an SSL configuration. The server configuration just declares the name of the SSL configuration to use for a particular hostname and port combination, and the SSL configuration has all the details for establishing the encrypted connection. This makes it straightforward to reuse a single SSL configuration for multiple servers. Here's the contents of my SSLDefs.ini file:
[My CloudSQL Server]
Address=k8s-da0bcd5e-a1b3a0c7-545df92ec8-2e44304cebef1543.elb.us-east-1.amazonaws.com
Port=443
SSLConfig=SampleSSLConfig

[SampleSSLConfig]
CAFile=
CertFile=C:\Users\bdeboe\odbc\certificateSQLaaS.pem
KeyFile=
Password=
KeyType=2
Protocols=28
CipherList=ALL:!aNULL:!eNULL:!EXP:!SSLv2
VerifyPeer=0
VerifyDepth=9
The first section has the server configuration, which you can give a name of your liking. You'll need to change the Address to match your Cloud SQL deployment's hostname, which can be gleaned from the deployment details page where you downloaded the certificate.
The second section has the SSL configuration, which' name needs to correspond to what you specified for SSLConfig in the server configuration section. The CertFile flag obviously needs to match where you saved your certificate.
For more details about the other settings, please refer to the full TLS settings documentation.
Step 3: Creating the ODBC DSN
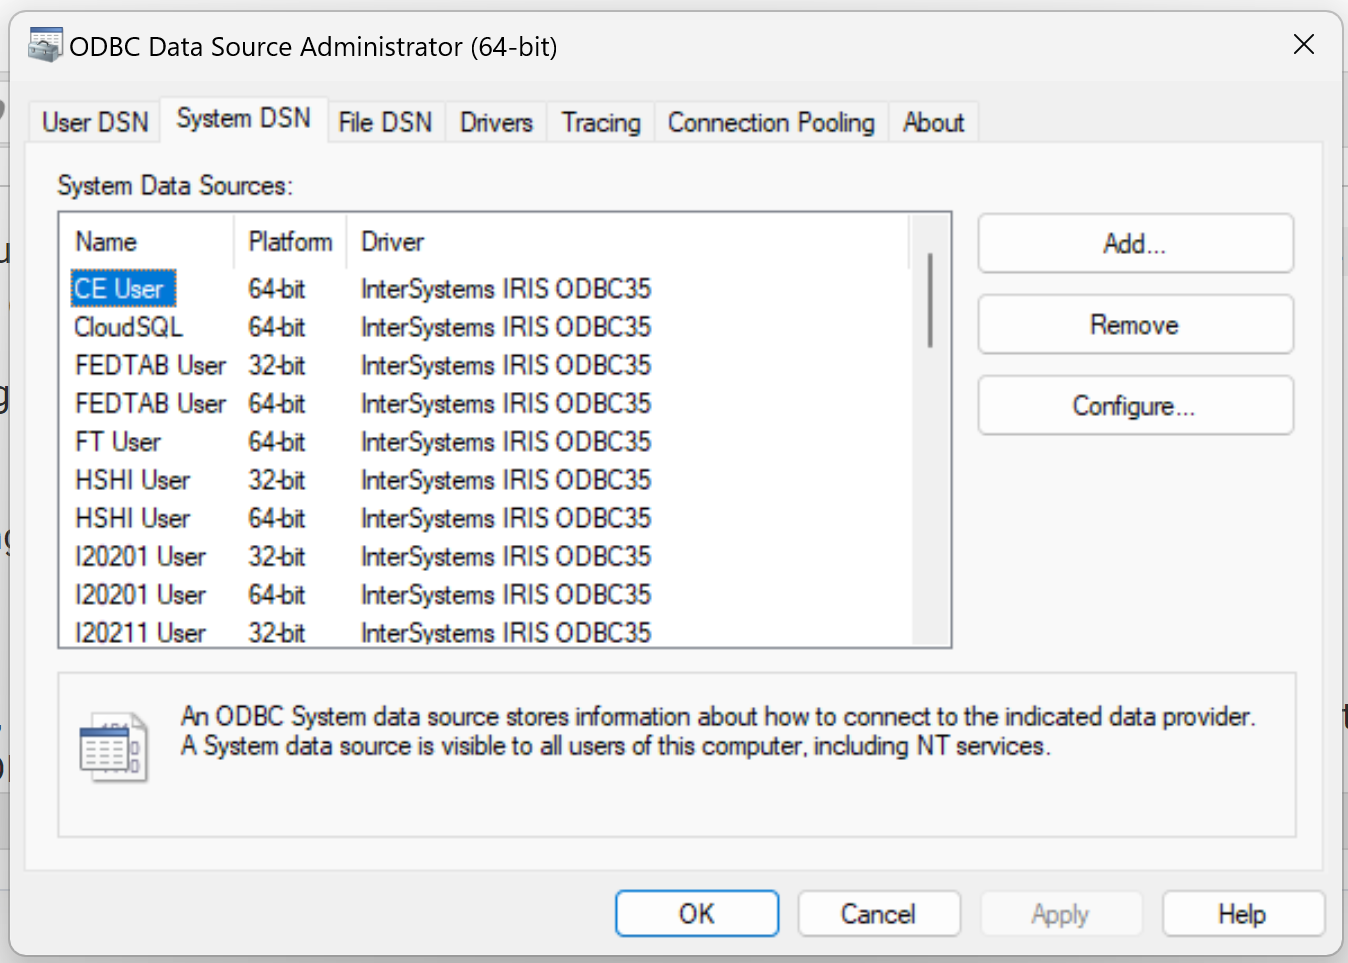
Power BI, like most ODBC-based tools, works with DSNs (Data Source Name), which you register using a Windows utility. Just click the Windows Start icon and start typing "ODBC", then click "ODBC Data Sources (64 bit)". Choose the "System DSN" tab to register a connection to our Cloud SQL deployment. If you have local installations of InterSystems IRIS (of which I have about a dozen at any given time 😉), you'll see the installer created default DSN entries for those:
Click "Add..." to create a new DSN, picking a name and filling in the host, port, and namespace. I usually save my username and password to the DSN for any non-production instances (and we'll need it to test the connection shortly), but you can leave these blank and supply those credentials later. The SSL/TLS Server Name field is somewhat redundant (we'll work on that!).
 Next, hit "Test Connection" to see if everything is working as expected. You should get a "Connectivity test completed successfully!" message. If not, please verify the steps above, or refer to the Troubleshooting guide. One particular error message that may get you puzzled (it got me at least!) is "No SSL config found in the registry or in ssldefs.ini." This error means the ODBC driver did not find a match for your hostname/port combination in the SSLDefs.ini file. As your hostname changes each time you create a new deployment, you'll need to update or add the server configurations for each one.
Step 4: Connecting from Power BI
Now it's time to use our ODBC DSN to pull some data into Power BI. After opening the app, select "Get Data" or "Get data from other sources", and pick the ODBC option:
.png)
Then pick the DSN you just created from the list:
.png)
In the next screen, you can supply your username and password. No additional credential properties are required.
 That's it! Now you can select the tables you'd like to include in your Power BI reports:
.png)
As you probably noted, all but the last step in this article is universal to ODBC configuration, so this should get you going for most ODBC-based tools. Hope this article got you going, and feel free to add your own tips and tricks, or share experiences about connecting to Cloud SQL. Also note that there's hardly anything in here, other than step 0, that is specific to Cloud SQL, so you can use the same steps to connect to any IRIS instances that requires encrypted connections.
Comments
minor simplification:
inserting my 77 char server address into the15 char Server-IP of Windows DSN caused me repeating problems.
k8s-45090081-a9b5a485-233c4dadf5-46cc35674de4c26d.elb.us-east-1.amazonaws.com
A real pain to verify
So I translated it to a real IP address using nslookup
SAMPLES>$nslookup k8s-45090081-a9b5a485-233c4dadf5-46cc35674de4c26d.elb.us-east-1.amazonaws.com
;  . . . .
Name:    k8s-45090081-a9b5a485-233c4dadf5-46cc35674de4c26d.elb.us-east-1.amazonaws.com
Address:  3.215.248.100
3.215.248.100
was working excellent and easy to check and to work with
I did everything according to the instructions, but for some reason the configuration file is not found, below is an example of the error. What other options might there be?

Where did you created the SSLDefs.ini file?
@Alexey Nechaev
In my trial file SSLDefs.ini was placed into
C:\Program Files (x86)\Common Files\InterSystems\IRIS\
whích required admin access rights
I also gave Full Access to Everyone for the file (to avoid conflicts with 👿 MS security)
in addition also my ip address was NUMERIC to match DSN
so your's should look like this
[My CloudSQL Server]
Address=44.221.219.249
Port=443
SSLConfig=SampleSSLConfig
After an updated + repair of my local Ensemble 2018 installation
I had to re-install my IRIS 2023.1.4 client!
I put the file at C:\Program Files\Common Files\InterSystems\IRIS
I don't have an x86 address
As described in the article, this error message also fooled me into thinking it was not finding the SSLDefs.ini file, but in practice it meant that it didn't find a server entry (linking the hostname/port combination to an SSL definition) in the SSLDefs.ini file. Maybe that's also what you're running into @Alexey Nechaev ?
We'll be improving this error message in the near future.
I checked this several times, there shouldn't be any errors :(
can you share the contents of your SSLDefs.ini file?
I just had a similar picture when my trial account was terminated.
see:
https://community.intersystems.com/post/intersystems-iris-cloud-sql-and-intersystems-iris-cloud-integratedml-are-now-generally
To encourage experimentation and developer creativity, new subscribers automatically receive a $300 credit for running deployments of any size. Beyond this free credit, customers will be billed through their AWS account.
I successfully connected via dbeaver to the server, but I still get an error via odbc powerbi
Did "Test Connection" also fail ?.png)
If I understand it correctly :
- DBeaver uses your ODBC and works OK (or is this a different driver ?)
- Power BI tries ODBC but fails
What is the ODBC driver version you use?
We took the latest driver from the page https://intersystems-community.github.io/iris-driver-distribution/ (ODBC-2023.1.0.229.0-win_x64.exe)
My driver loaded using IRIS CLIENT installation
C:\Program Files\Common Files\InterSystems\IRIS\IRISODBC3564.dll
my driver version =2023.1.4.580.0
As displayed by OEBDC