Node.js: create a basic web app with React - part 3
Developing a Full-Stack JavaScript web app with Caché requires you to bring together the right building blocks. In this third part of this article series I will show how to link our React app to our three back-ends we created in part 2.
If you got the React app running from part 1, we will now add some JavaScript code to connect it to Caché. I assume your React app is still running at localhost:3000 and your QEWD server from part 2 is also running in its own command prompt window at localhost:8080.
Stop your React app first using Ctrl-C, we will install two node modules in your C:\react\test directory:
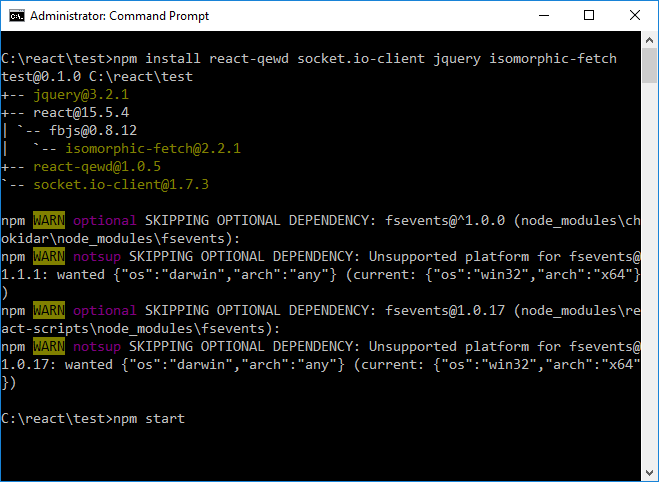
Again, ignore the warnings - we just installed the react-qewd package which makes the ewd-client module available for use in a React app. The ewd-client is used by your browser to connect to the QEWD back-end server. The socket.io-client module contains will open our WebSocket. The jquery module is used by the ewd-client by default to support Ajax mode (optional). The isomorphic-fetch module is needed for making REST calls to the QEWD/REST (option 2) and CSP/REST (option 3) back-end.
Now close the previous React app instance in Chrome and restart your React app using npm start.
We will now implement the same back-end call using the three back-ends we created in part 2. This will allow you to see clearly the differences in coding and what works best for you.
First option: connecting to Caché using QEWD/WebSockets
Go to the React test project in your Atom editor and edit the index.js file in the src subdirectory:
import React from 'react';
import ReactDOM from 'react-dom';
import App from './App';
import './index.css';
import { QEWD, QEWDProvider } from 'react-qewd';
let qewd = QEWD({
  application: 'test', // application name
  log: true,
  url: 'http://localhost:8080'
});
ReactDOM.render(
  <QEWDProvider qewd={qewd}>
    <App />
  </QEWDProvider>,
  document.getElementById('root')
);
We added the react-qewd module, defined the qewd object instance and added the QEWDProvider outer app component to pass the qewd object down as a property to the underlying (App) React components.
Next, edit App.js in src:
import React, { Component } from 'react';
import logo from './logo.svg';
import './App.css';
class App extends Component {
  constructor(props) {
    super(props);
    this.state = { message: 'no message received yet!' };
  }

  handleClick = () => {
    let me = this;
    let { qewd } = this.props;
    let messageObj = {
      type: 'isctest',
      //ajax: true,
      params: {
        text: 'my ISC test message'
      }
    };
    qewd.send(messageObj, function(messageObj) {
      //console.log(messageObj);
      me.setState(prevState => ({
        message: messageObj.message.text
      }));
    });
  }

  render() {
    let { qewdProviderState } = this.props;
    return (
      <span>
        {
          qewdProviderState.registered ?
            <div className="App">
              <div className="App-header">
                <img src={logo} className="App-logo" alt="logo" />
                <h2>Welcome to React</h2>
              </div>
              <p className="App-intro">
                To get started, edit <code>src/App.js</code> and save to reload.
              </p>
              <button onClick={this.handleClick}>Send message to ISC</button>
              <p className="App-intro">
                {this.state.message}
              </p>
            </div>
          :
            <p className="App-intro">
              Registering QEWD ...
            </p>
        }
      </span>
    );
  }
}
export default App;
We added several code pieces here:
- a constructor for the App component where we initialise it's state (no Caché message received yet)
- a handleClick handler where the actual message is sent to Caché through the WebSocket - as you see, the system plumbing is completely hidden by the qewd.send() method
- we defined the qewdProviderState object in the render() method which the QEWDProvider passes in automatically
- conditional rendering depending on the qewdProviderState.registered boolean: while the WebSocket is setting up its connection to the QEWD server in the back-end, we just show a "Registering QEWD ..." HTML paragraph; as soon as the WebSocket connection is ready, the app will automatically re-render itself and show our complete UI - this feature is what makes React so powerful: it uses a virtual DOM to re-render your UI as efficiently as possible, only changing the UI parts that changed
- a button to send the message to QEWD and invoke the handleClick handler
- a paragraph showing the message coming back from Caché
Save this file too and watch your Chrome reload the React app. Open now first Chrome's Devtools with Ctrl-Shift-I and go to the React debug tab. Open the QEWDProvider component and click on the App component. You should see the props and state of this component on the right.
Now click on the "Send message" button and watch the message sending in Devtools - it will update the message property in the state and your first WebSocket message will appear in your HTML too.
Congratulations! You just finished your first React WebSocket app with Caché at the back-end!
You can now also check the contents of the ^nodeTest global by opening a Caché terminal. You should see the message appear with a different timestamp each time you press the button.
Btw, you can also monitor and debug your back-end code running in QEWD using similar tools. I will show how this works in a future article about debugging.
You can test one more thing: uncomment now "ajax: true" inside the messageObj in handleClick(). Save App.js, open the Network debug tab in Chrome's Devtools and watch now the same message going out via Ajax:
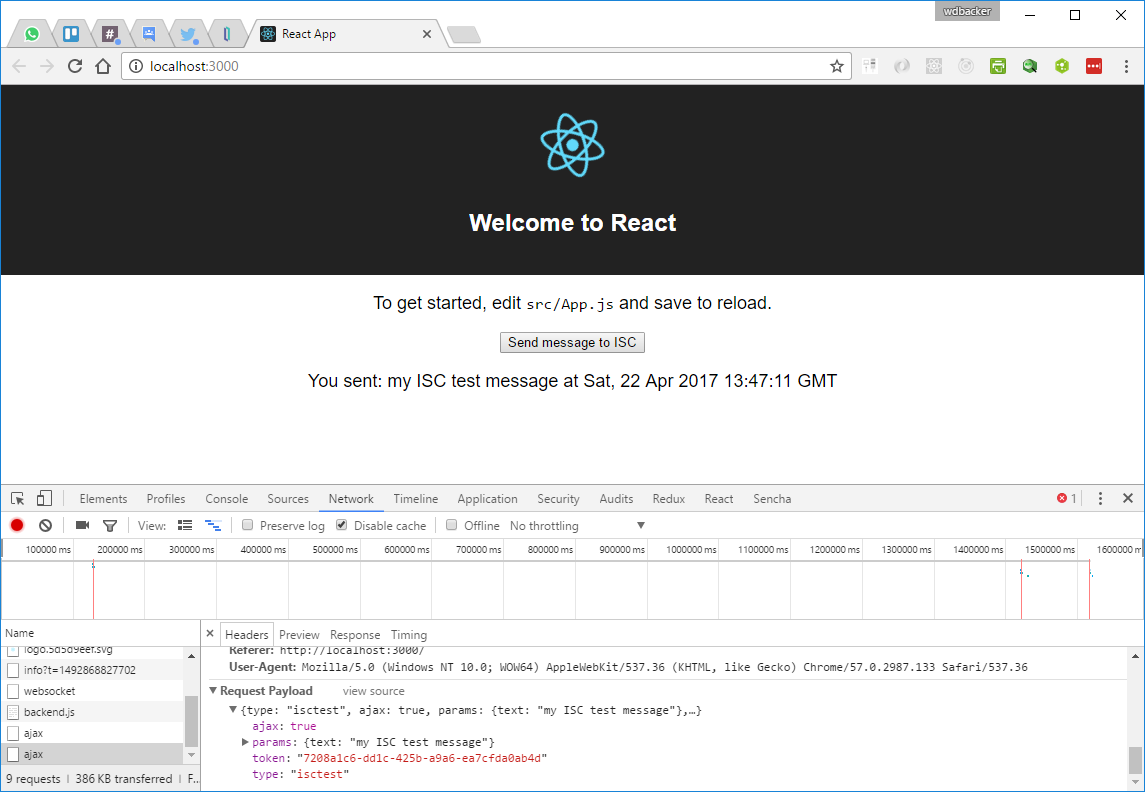
Note: we didn't need to rewrite our code, we just enabled Ajax mode for this message - watch also the response in the response debug tab.
* Btw, you don't need to do this in every message, you can also enable ajax for the whole application by enabling it in the qewd config in index.js. All messages will be sent using Ajax in this mode.
You'll notice the token inside the message: this is generated for you by QEWD for each message you send to the back-end and ensures secure communications because each client session has its own unique token. This is also womething what makes QEWD really attractive: it does all this plumbing for you behind the scenes, allowing the developer to concentrate on your application code.
Before you start your own experiments with this React technology, I stronly recommend to take a look at and follow the React tutorials first. This is a necessary step to understand the difference between plain HTML and JSX (the "HTML" tags in the code). HTML and JSX don't work the same! These docs also contain important information about how to write your JavaScript correctly, it will save you a lot of (debugging) time!
Second option: connecting to Caché using QEWD/REST
We will now change this same application code to use REST calls. To keep modifications to a minimum, I will keep the QEWD WebSocket code in index.js as it doesn't interfere with our modifications for REST calls.
Just edit App.js and modify your code for REST (in bold):
import React, { Component } from 'react';
import logo from './logo.svg';
import './App.css';
import fetch from 'isomorphic-fetch';

class App extends Component {
  constructor(props) {
    super(props);
    this.state = { message: 'no message received yet!' };
  }
  handleClick = () => {
    let me = this;
    /*
    let { qewd } = this.props;
    let messageObj = {
      type: 'isctest',
      ajax: true,
      params: {
        text: 'my ISC test message'
      }
    };
    qewd.send(messageObj, function(messageObj) {
      //console.log(messageObj);
      me.setState(prevState => ({
        message: messageObj.message.text
      }));
    });
    */
    var headers = new Headers({
      "Content-Type": 'application/json'
    });
    fetch('http://localhost:8080/testrest/isctest?text=REST+call+to+cache', {
      method: 'GET',
      headers: headers,
      mode: 'cors',
      timeout: 10000
    })
    .then(response => response.json())
    .then(response => {
      me.setState(prevState => ({
        message: response.text
      }));
    })
  }
  render() {
    let { qewdProviderState } = this.props;
    return (
      <span>
        {
          qewdProviderState.registered ?
            <div className="App">
              <div className="App-header">
                <img src={logo} className="App-logo" alt="logo" />
                <h2>Welcome to React</h2>
              </div>
              <p className="App-intro">
                To get started, edit <code>src/App.js</code> and save to reload.
              </p>
              <button onClick={this.handleClick}>Send message to ISC</button>
              <p className="App-intro">
                {this.state.message}
              </p>
            </div>
          :
            <p className="App-intro">
                Registering QEWD ...
            </p>
        }
      </span>
    );
  }
}
export default App;
You see we only needed to comment out the qewd.send() code and replace it with a standard JavaScript fetch(). This is the new syntax for issueing Ajax requests in the browser and in Node.js (hence the name of the module: isomorphic fetch - works both on the server and on the client).
Save App.js again and try it in Chrome by pressing the button again. You'll see in Devtools the REST call now:
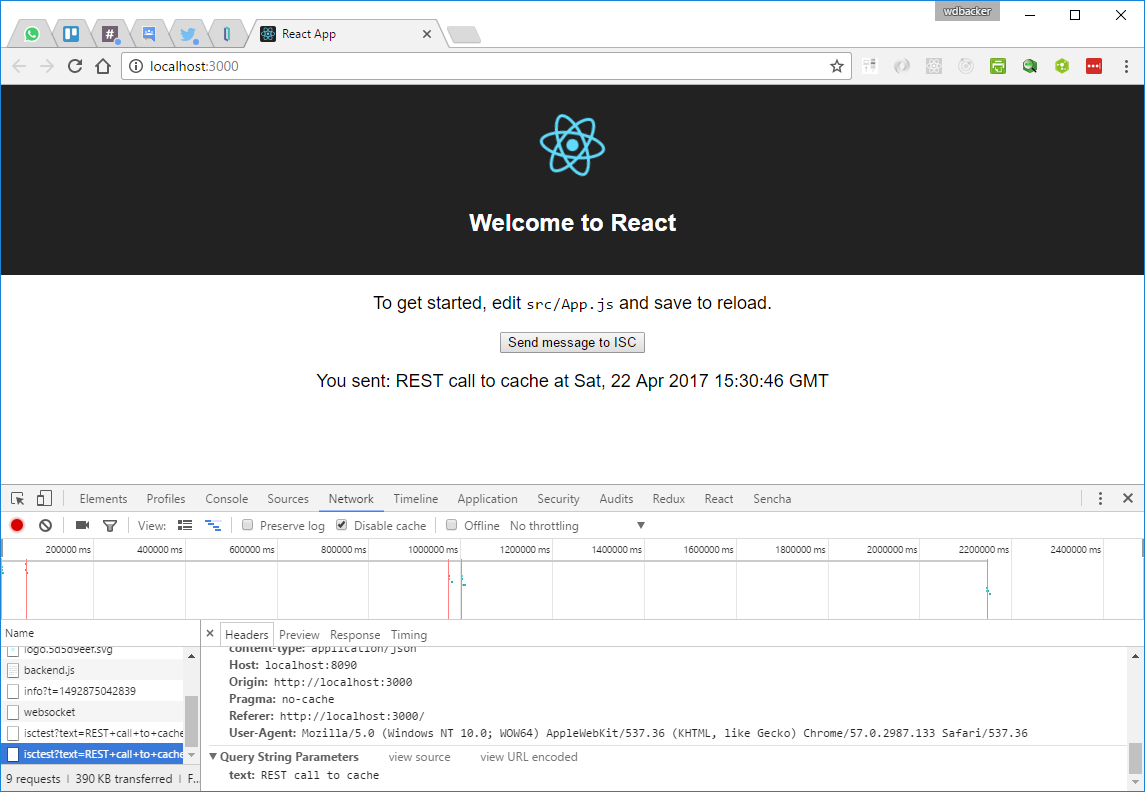
As you see, we didn't need to change a lot to our application to use a completely different back-end technology!
Third option: connecting to Caché using CSP/REST
This one is now really easy to modify: we just need to change our REST url:
import React, { Component } from 'react';
import logo from './logo.svg';
import './App.css';
import fetch from 'isomorphic-fetch';
class App extends Component {
  constructor(props) {
    super(props);
    this.state = { message: 'no message received yet!' };
  }
  handleClick = () => {
    let me = this;
    /*
    let { qewd } = this.props;
    let messageObj = {
      type: 'isctest',
      ajax: true,
      params: {
        text: 'my ISC test message'
      }
    };
    qewd.send(messageObj, function(messageObj) {
      //console.log(messageObj);
      me.setState(prevState => ({
        message: messageObj.message.text
      }));
    });
    */
    var headers = new Headers({
      "Content-Type": 'application/json'
    });
    fetch('http://localhost:57772/csp/user/testrest/isctest/REST+call+to+cache', {
      method: 'GET',
      headers: headers,
      mode: 'cors',
      timeout: 10000
    })
    .then(response => response.json())
    .then(response => {
      console.log(response);
      me.setState(prevState => ({
        message: response.text
      }));
    })
  }
  render() {
    let { qewdProviderState } = this.props;
    return (
      <span>
        {
          qewdProviderState.registered ?
            <div className="App">
              <div className="App-header">
                <img src={logo} className="App-logo" alt="logo" />
                <h2>Welcome to React</h2>
              </div>
              <p className="App-intro">
                To get started, edit <code>src/App.js</code> and save to reload.
              </p>
              <button onClick={this.handleClick}>Send message to ISC</button>
              <p className="App-intro">
                {this.state.message}
              </p>
            </div>
          :
            <p className="App-intro">
                Registering QEWD ...
            </p>
        }
      </span>
    );
  }
}
export default App;
Again, you can easily test it out in Chrome using CSP/REST now:
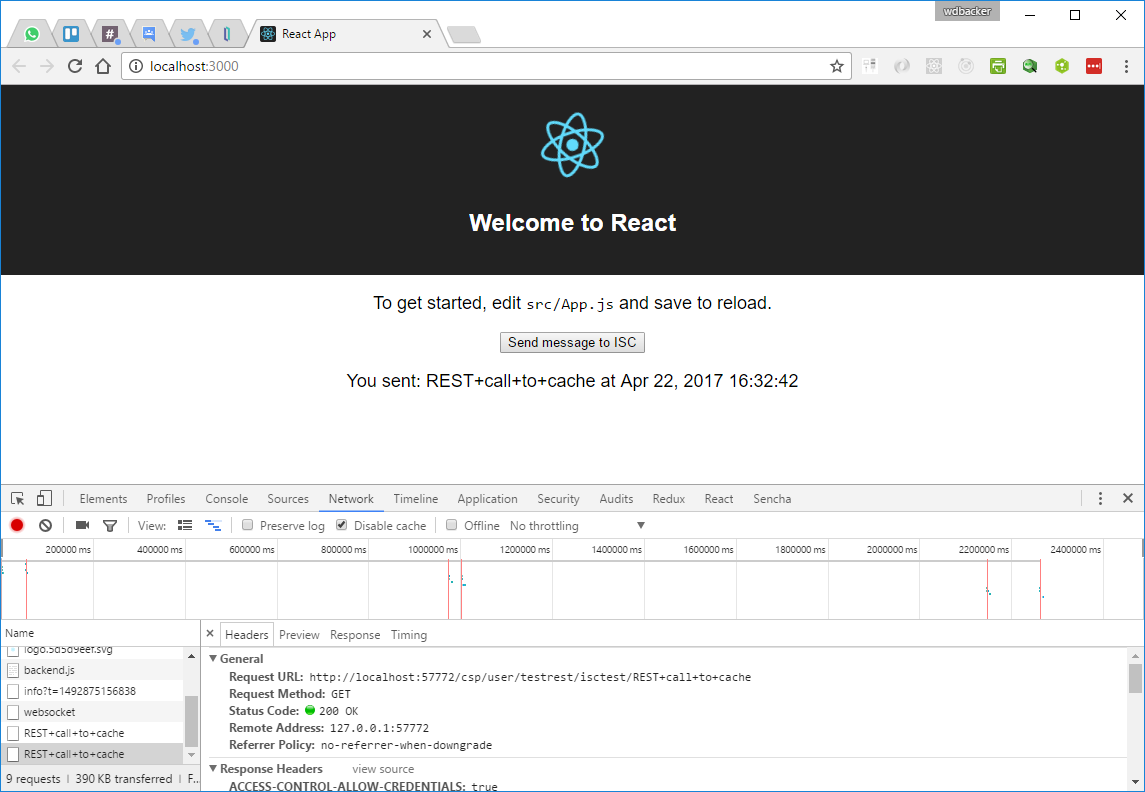
Congratulations! You've created a React app with three possible back-ends.
This example is kept as minimal as possible to show the basic principles of modern JavaScript application development. This is of course only the beginning and I hope it will get you started with Full-Stack JavaScript development using Caché. Maybe we should call this new collection of technologies the CNQR (Caché/Node.js/QEWD/React) stack?
Also note that you could easily replace React with AngularJS, Vue.js, ... or any other JavaScript framework. This way of working allows you to change your front-end rather quickly without many changes needed to your back-end.
You'll also have noticed that the declarative UI definition React uses in this example still contains the business logic (event handlers) in the same source file. With React, you can do better and create a clean separation between UI definition and logic. For more powerful data handling client-side, you can use the Redux module. It gives you a central store for your application state (in our example here the UI state is kept inside the App component). I deliberately didn't introduce it here for this example, as it makes your code a lot bigger. But for larger applications, it's certainly an excellent way of structuring your application code! I will try to cover this module in a later part of this series.
Comments
For an excellent, more in-depth application example, there is now a very useful RealWorld platform available, made by the people of Thinkster allowing you to easily compare many different modern web app technologies (front-end and back-end solutions).
This example app is a quite advanced real-world example you can use as a reference app to write your own apps and get the idea what development with modern app technology is all about.
The best news: Rob Tweed created a Caché Node.js back-end using QEWD/Express REST calls for this example app and also made a React/Redux demo version available to test using Caché as the underlying database.
Please check out this example as the results with Caché in terms of performance and development speed are really impressive!
Nice, thanks! :) Are you going to discuss the problems with the react license at some point?
Great article.
How can I use the third option from QEWD to make use of existing Cache object script methods by calling object script method name from a handler function from QEWD?