Let's write an Angular 1.x app with a Caché REST backend - Part 4
We finished our last lesson with our Widgets Direct page iterating over a list of widgets, displaying an ID and a Name value. While we have been able to achieve this with only a small amount of coding, the page itself is not the most visually appealing place to be. The AngularJS framework is providing a powerful Model-View-Controller framework for our structure and logic, but it does not implement anything that will provide a nice UI experience. For that we need to implement a UI toolkit. We have numerous options here; the leading toolkits are BootStrap from Twitter and Angular Material from Google. There are advantages and drawbacks to each choice. It is well worth exploring demos of each toolkit to see which would fit your needs
For these articles, we will use Angular Material. This framework is implemented in AngularJS, and is very widely used in modern UI development. It is missing some useful components, but there is a large community of 3rd party developers who have developed components to match the look and feel of Material
Angular Material has excellent documentation at https://material.angularjs.org/ This documentation covers the Material Design philosophy, has excellent API specifications, provides live demos of the UI components (and allows easy inspection of the code driving the component) and a comprehensive Get Started guide.
To start using the Material framework, we must import the javascript library and the css class from Material. We will also add some more useful AngularJS libraries at this time (to implement messaging, accessiblity and animation capabilities)


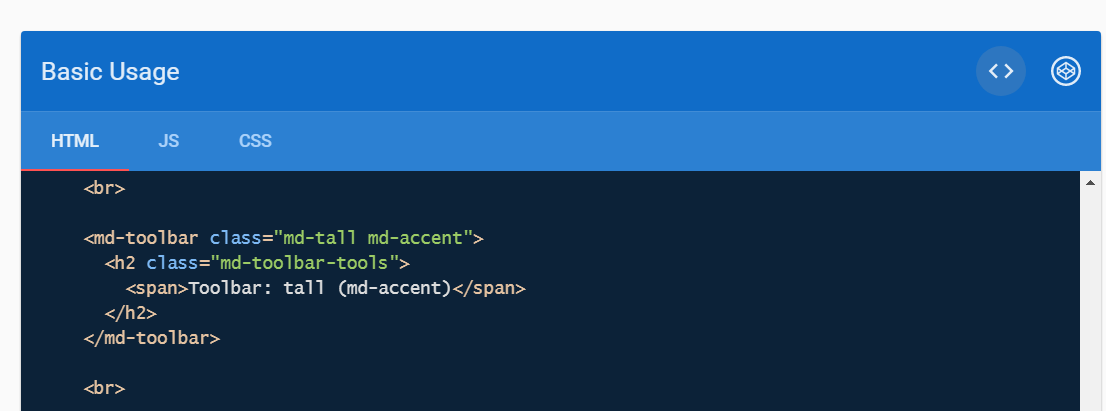
Now that we have the libraries we need, we can visit the Angular Material site and pick the UI component we want to use. We should have a Toolbar to contain our welcome banner. We'll navigate to the Toolbar demos and pick a basic one to start with. The tall toolbar doesn't have any buttons or controls we need to remove, so we can click the < > icon and get the code behind. We'll copy this to our page and replace the text content with our {{message}} to have the Toolbar contain our Welcome

Let's compile and reload our page. Our font has updated by there is no Toolbar. We have the Javascript and the CSS imported, so what's wrong?

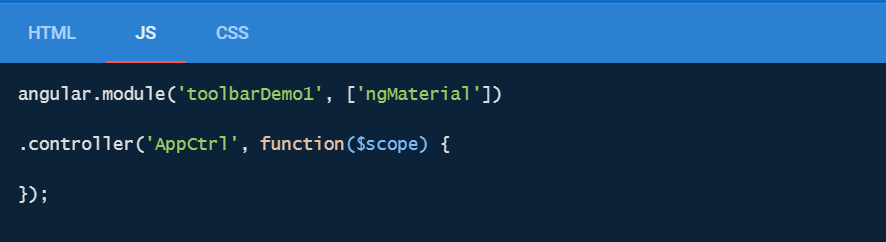
Let's go back to the Angular Material demo and see if there's any Javascript required. The angular.module definition contains 'ngMaterial'. This is marking the Material library as a dependancy for this application, and instructs the Angular runtime to use it. Let's add it to our module definition and see if that helps?

When we reload our page: Success! We now have a toolbar.

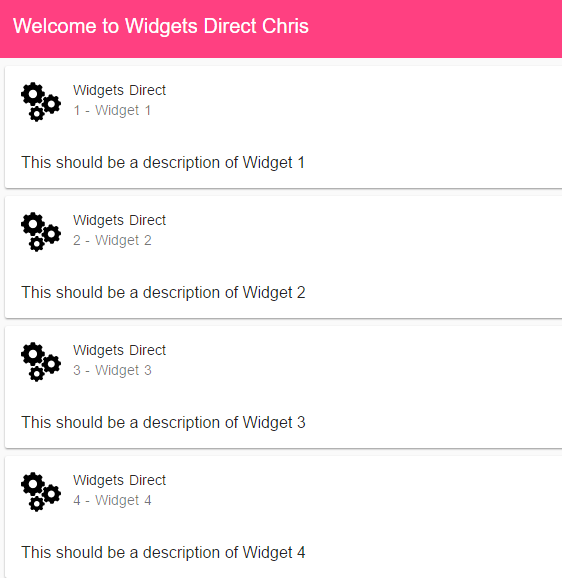
The list of Widget is still looking a bit sad though. Let's go back to our Material Demos and pick a template to use. The Card component is a nice clear way to display repeating data, so let's select a basic card, and adapt it for our data. Remember to assign the ng-repeat to the parent tag to have this applied for all values in our array. We will be referencing a logo.svg image in the img directory, so make sure you have an image file in this location

A recompile later, and we have a repeating list of Widget cards, with an icon and a header value. Our page is starting to take shape
Today we:
- Imported a UI toolkit
- Browsed the toolkit for UI components and adapted them for our data
- Injected a dependancy into our Angular Module
Next time we will:
- Connect our JSON to a Persistent class
- Explore some options around ng-repeat
- Encounter a problem we need to debug
This article is part of a multi-part series on using Angular on top of Caché REST services. The listing of the full series can be found at the Start Here page
Comments
This series is getting more and more cool. Go ahead, please !
Chris
where can I find logo.svg image? I couldn't locate it.
I assume it is necessary to to create a I got directory under the widgets directory and place this image file there.
Thanks
Joe
Hi Joe
I didn't include one as the one in the demos is under a license. Any small svg file will work in it's place for demo purposes
Thansk
Chris