Caché Localization Manager or i18N in InterSystems Caché
Caché Localization Manager

CLM is a tool for localization/internationalization/adding multi-language support to a project based on InterSystems Caché.
Imagine that you have a ready project where all the content is in Russian, and you need to add an English localization to it. You wrap all your strings into resources, translate them into English and call the necessary resource for Russian or English when necessary. Nothing tricky, if you think about it. But what if there are lots of strings and there are mistakes in Russian (or English)? What if you need to localize in more than one language – say, ten? This is exactly the kind of project where you should use CLM. It will help you localize the entire content of your project into the necessary language and retain the possibility to correct entries.
CLM allows you to do the following:
- Add a new localization.
- Delete a localization.
- Export a localization.
- Import a localization.
- View two tables at a time.
- Conveniently switch between spaces.
- Check spelling.
Let’s “look under the hood” now
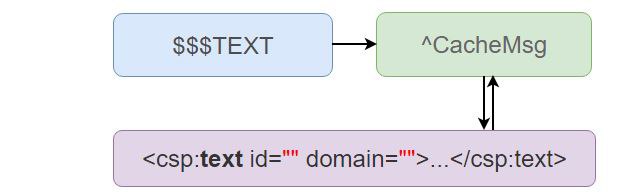
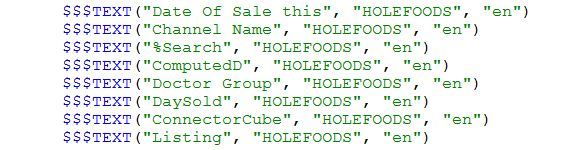
Caché has a standard approach to implementing I11N using the $$$TEXT macros:
$$$TEXT("Text", "Domain", "Language")where:
Text — the text to be used for localization in the future.
Domain — modules in your applications.
Language — the language of "Text".
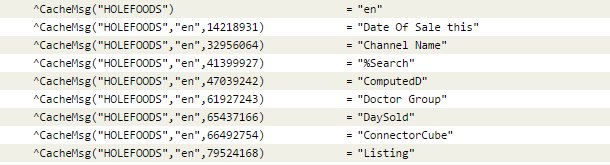
If you use $$$TEXT in COS code, data is added to the ^CacheMsg global during class compilation. And this is the global that CLM works with.
In ^CacheMsg, everything is identical to $$$TEXT, you just add "ID" as the text hash.
^CacheMsg("Domain", "Language", "ID") = "Text"
If you are using CSP, then the use of $$$TEXT in CSP will look as follows:
<csp:text id="14218931" domain="HOLEFOODS">Date Of Sale</csp:text>
Installation
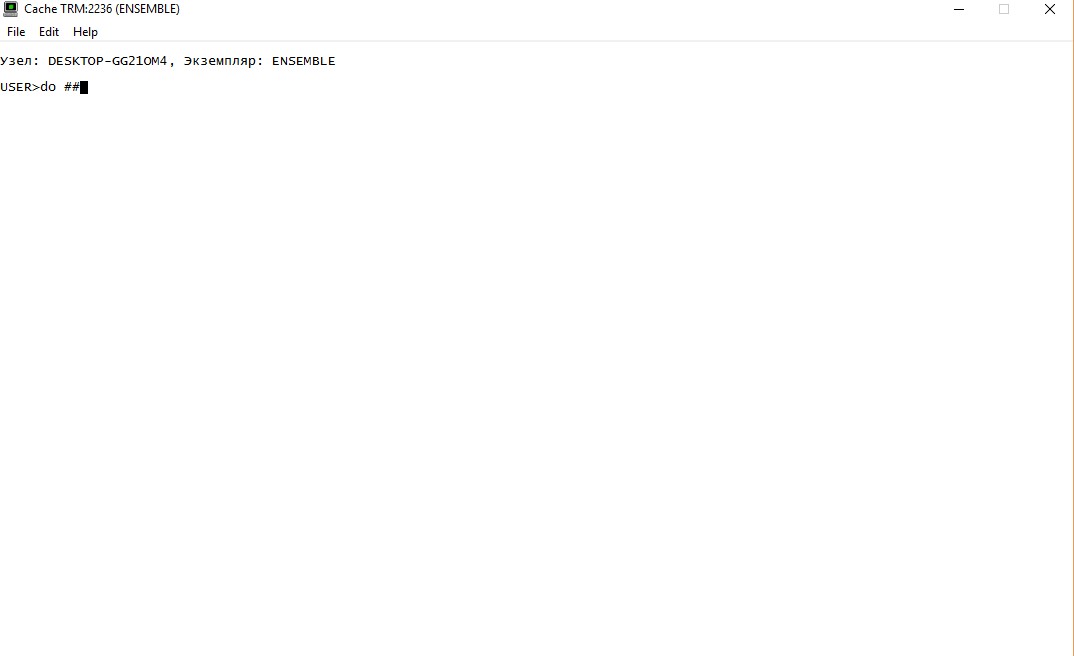
First of all, you need to download the Installed class from GitHub and import it to any convenient space in Caché. I will use the USER space. Once done, open the terminal and switch to the USER space. To start the installation, enter the following command in the terminal:
USER> do ##class(CLM.Installer).setup()
Installation process:
You can make sure the application is installed correctly by following this link: http://localhost:57772/csp/clm/index.csp (localhost:57772 — the path to your server).
Settings
CLM uses Yandex to perform the translation. You will now need to obtain a Yandex API key to let it work. It's free, but needs registration.
Let’s now deal with spellchecking. CLM uses Caché Native Access for SpellCheck implementation. CNA was written for calling external functions from dynamic libraries, such as .dll or .so. SpellCheck works with the Hunspell library and needs two files for spellchecking. The first file is a dictionary containing words, the second one contains affixes and defines the meaning of special marks (flags) in the dictionary.
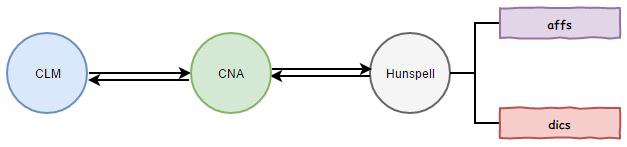
How words are checked:
All words are packed from CLM and sent to Hunspell via CNA, where CNA converts them into a language that Hunspell understands. Hunspell checks every word, finds the root form and all possible variations, and returns the result. But where do we get all these dictionaries and libraries?
— CNA: use an available release or build it on your own.
— Hunspell: same thing, use an available version or download sources for making your own build.
— We will also need a standard C language library. In Windows, it is located here: C:\Windows\System32\msvcrt.dll.
— Dictionaries can be downloaded here.
At the moment, 51 languages are supported:
- Albanian Czech German Latin Romanian Vietnamese
- Arabian Chinese Greek Latvian Russian
- Armenian Danish Hebrew Lithuanian Spanish
- Azeri Dutch Hungarian Macedonian Serbian
- Belarusian English Icelandic Malay Slovak
- Bosnian Estonian Indonesian Maltese Slovenian
- Basque Esperanto Italian Norwegian Swedish
- Bulgarian Finnish Japanese Polish Thai
- Catalan French Kazan Portuguese Turkish
- Croatian Georgian Korean Brazil Ukrainian
The entire configuration process boils down to entering the paths to everything you got before. Open CLM in a browser. There is a “Set Paths” button in the upper right corner. Click it and you’ll see the next window. Use it to enter the required paths.
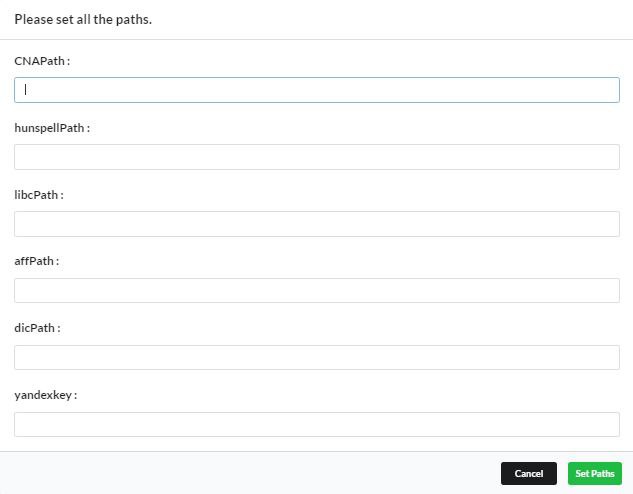
Here’s what I got:

Demonstration of a registration form localization
Link to demonstration. Password and login: demo.
Your critique, comments and suggestion are very welcome.
The source code and instructions are available on github under an MIT license.
Comments
An interesting article, but I'm puzzled by your use of the term "I11n". I'm familiar with "I18n" as an abbreviation for Internationalization (because there are 18 letters between the "I" and the "n". Likewise, I understand "L10n" as standing for Localization. Some Googling suggests that "I11n" is short for Introspection. Or have I missed something?
Hi, John!
i11n here stands for "internationalization"
i18n - internationalization, but i11n is something else
True. Title is fixed