How to create Data Lookup Tables using the SQL Data Import Wizard
I have been walking through this with a few team members and as such I thought there might be others out there who could use it, especially if you work with HL7 & Ensemble/HealthConnect/HealthShare and never venture out past the Interoperability section.
First, I would like to establish that this is an extension of the already established documentation on importing and exporting SQL data found here: https://docs.intersystems.com/iris20241/csp/docbook/DocBook.UI.Page.cls?KEY=GSQL_impexp#GSQL_impexp_import
This tutorial will explicitly detail how to create, populate or update a Data LookUp Table (LUT) from a text file using the SQL Data Import Wizard. This is especially useful for large Data Lookup Tables that have several rows of data--a good example would be a country mapping table for Promoting Interoperability (Meaningful Use).
************STEP 1: Prepare your Data************
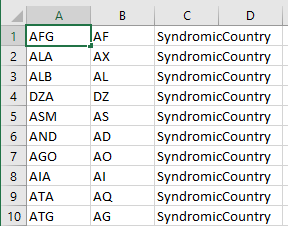
First, we will begin by formatting our data. Recall that a Data LookUp Table consists of several rows of Keys that map to their intended Values.
Personally, I find that creating and formatting these tables in Excel is the most efficient way to complete this process.
Here using the example of the Syndromic Country Mapping table, I populate column A with the 3 character country code that I will want to send out to the states I report to. I populate Column B with the 2 character country code that my EMR sends out natively. Finally in Column C, I populate the intended name of my data lookup table. NOTE: If the table does not exist, this utility will create the table under the name populated in Column C. If the table indicated in Column C does exist it will update the existing table. More on this below.
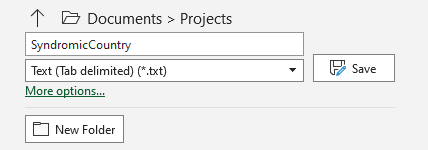
Once our file is populated with all of our data, we now save it as a tab delimited text file.
You can save this file on your local machine or in an Import/Export location for your sever. For this example, I will store it on my local machine.
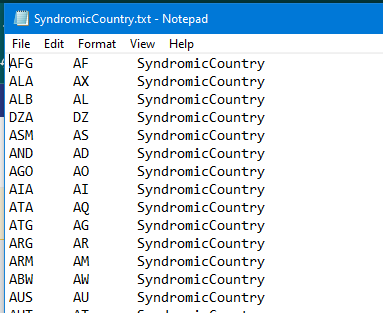
Now we have a nicely tab-delimited text file ready to be imported into InterSystems!
************STEP 2: OPEN THE SQL DATA IMPORT WIZARD************
Now that our data has been formatted, we are ready to utilize the SQL Data Import Wizard.
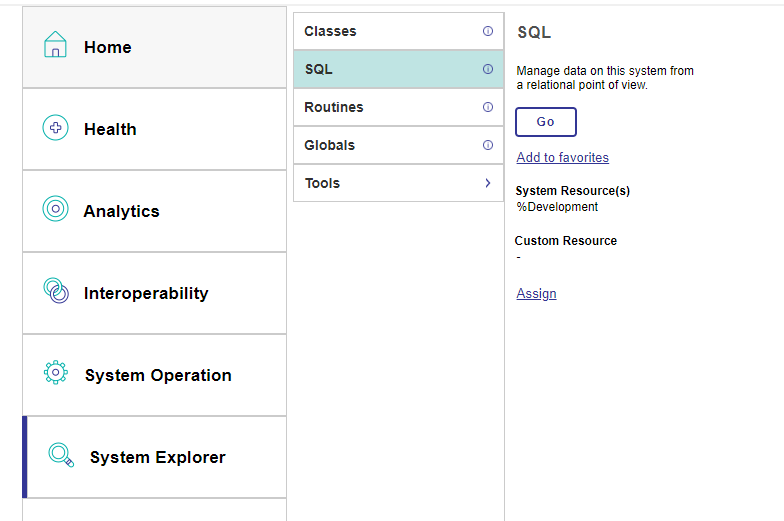
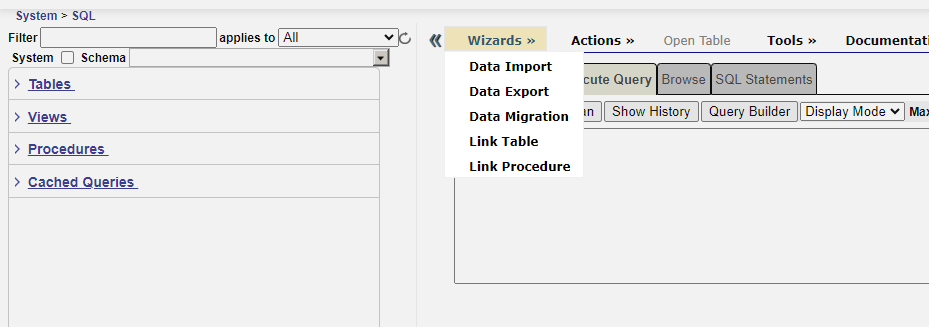
To do this, Open the Management Portal of the target server and navigate to System Explorer >> SQL.
Now that you are here, you can navigate to Wizards >> Data Import. The Data Import Wizard will open by clicking "Data Import".
************STEP 3: SQL DATA IMPORT WIZARD PG. 1--Indicate Source & Target************
Here you can either navigate to the import/export location on the server of your InterSystems Instance OR you can navigate to the file location on your local machine. As mentioned above, I will use the file I stored on my local machine.
Next select the namespace you would like to import to.
In my example we will import into SANDBOX
THIS NEXT STEP IS VERY IMPORTANT: Now you will select Ens_Util as the schema name to import to.
This will open a selection box and you will need to HIGHLIGHT "LookupTable" by clicking on it. (This selects it. I've heard many say that it doesn't feel like it is selected. I promise that it is.)
Your screen should look something like this:
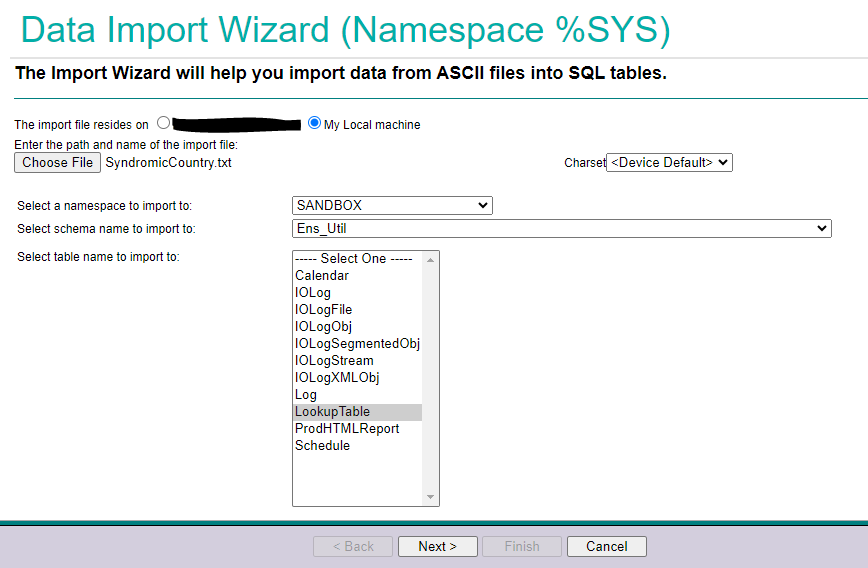
At the bottom, Hit "Next >".
************STEP 4: SQL DATA IMPORT WIZARD PG. 2--Indicate Source File Format************
We will now tell the Wizard how our Data is Formatted.
When we formatted our file, I explained that I populated my Columns A, B and C such that the columns are in order Left to Right: DataValue, KeyName, TableName. This is the same order top to bottom in the Data Import Wizard so the data will be interpreted in this manner.
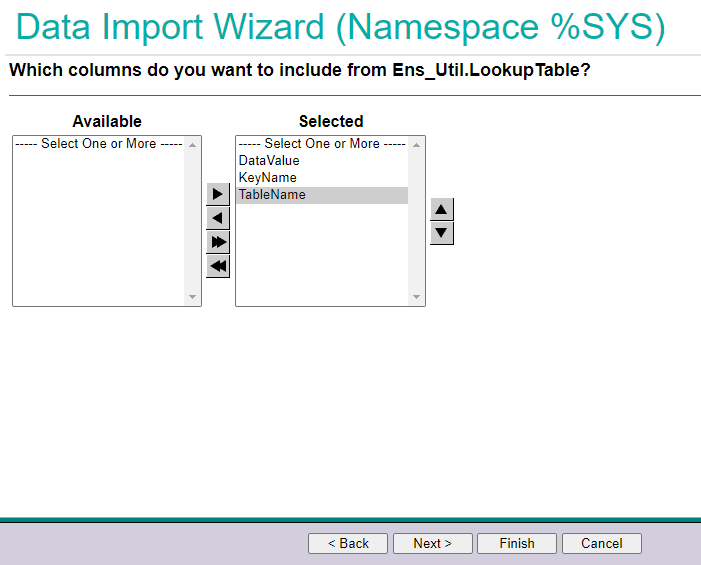
At the bottom, Hit "Next >".
************STEP 5: SQL DATA IMPORT WIZARD PG. 3--Indicate Source File Data Details************
Now because we formatted our file in Excel earlier and saved it as tab delimited, we will keep the default of "Tab" to answer the question "What delimiter separates your columns?"
We also DID NOT include column headers in our file so we will UNCHECK "First Row Contains Column Headers?"
(Note: Leaving this field checked, will tell the Data Import Wizard to Ignore the first row of data and NOT IMPORT IT.)
This also tells us which Columns will correlate to what data columns in the Data LookUp Table.
Our window should look like this below.
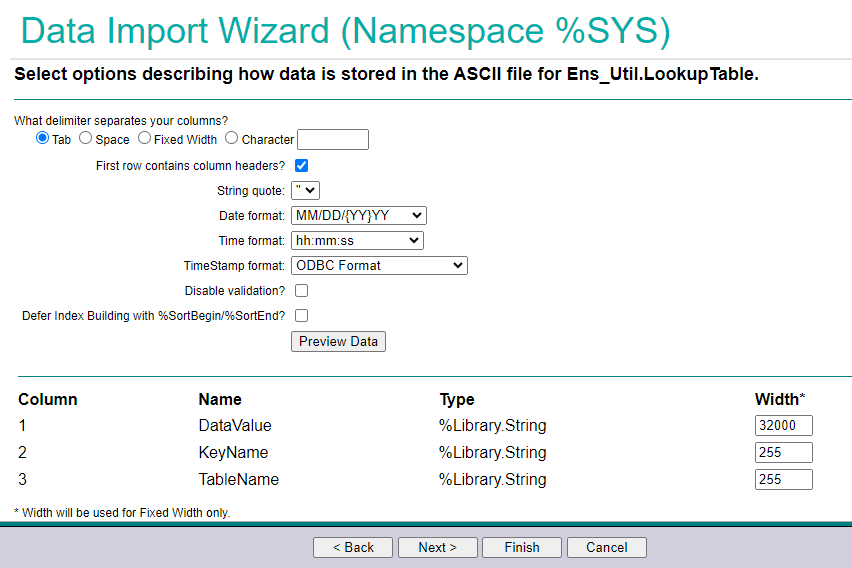
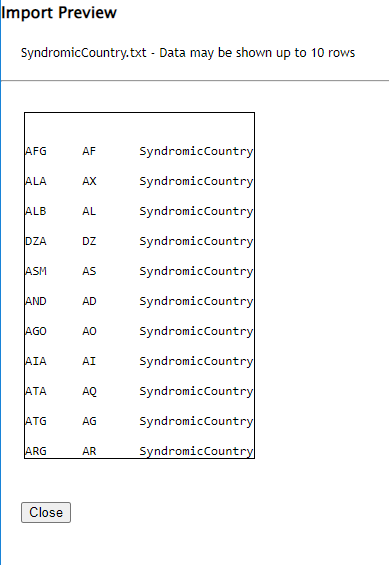
We can also select "Preview Data" to confirm that our columns 1, 2 and 3 correlate as we have indicated. Our system sends out a 2 Character code that will be the Key Value seen in Column 2, we are going to want to map it to the 3 Character code that will be the Data Value in Column 1 and the name of our table in Column 3.
Now we can select "Next >".
************STEP 6: SQL DATA IMPORT WIZARD PG. 4--Review & Run the Import************
This window gives us a recap of our selections.
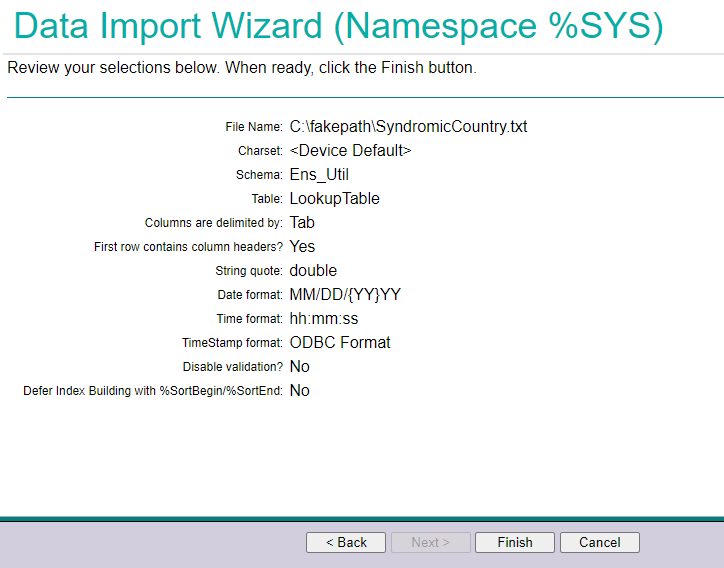
If we are happy with our settings, we can select "Finish."
NOTE: Before you select Finish be sure to enable popups as a new window will pop up to create the table.
A Window like this one will pop up to indicate that the Wizard is running.

In this window, I like to "Click here to view the background tasks page."
************STEP 7: Review Errors and your Table************
We can view the Background Tasks page to see if there were any errors.
I did have 1 error:

And when I clicked on the hyperlinked 1 I was able to find more details:

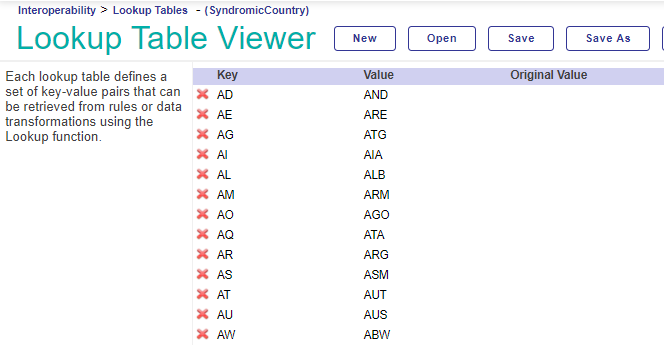
This indicates that one of my rows was missing the required field of KeyName. I did investigate and found that there was an extra newline in my file which caused this error. However, it still created the table which we can see below!
For Fun, I ran the wizard again with the same file in the same namespace. Here we can see that there were 251 errors and again we can investigate further.


Again we run into the blank newline error but we can also see that there are 250 uniqueness errors.
This is important to note that this tool can only be used to ADD NEW KEYS and their value pairs but it CANNOT UPDATE THE VALUES OF EXISTING KEYS without disabling validation on page 3 of the wizard. I suggest you use caution when disabling validation to not introduce unintended errors or mappings.
And that is it! You just created a large Data LookUp Table using the SQL Data Import Wizard!
Comments
Thank you @Victoria Castillo!
This article was very helpful to instruct me how to import a large LUT that I was dreading to do manually.
It showed what to do every step of the way.
I'm only just now seeing this reply--a whole year later--but I am so glad that you found it useful!! And I happy you found that it was all encompassing! I try to capture all the steps so there are no questions, but you never know how things will age!