Deploy IRIS Community Edition on the cloud: Part 2 Azure
This article explains how to deploy InterSystems IRIS Community Edition on Azure using the Azure Marketplace and a Virtual Machine. It covers prerequisites, instance selection, authentication, SSH access, first verification steps, and how to delete resources to avoid charges. The deployment can typically be done using Azure free credits and is suitable for developers who want to quickly start working with IRIS in the cloud.
Who this guide is for. This guide is intended for developers, solution architects, and DevOps engineers who want to deploy InterSystems IRIS Community Edition on Microsoft Azure. No prior Azure automation experience is required, but basic familiarity with the Azure Portal and SSH is helpful.
After following this guide, you will be able to:
- Launch InterSystems IRIS Community Edition from the Azure Marketplace
- Configure a small, secure Azure VM
- Connect to IRIS using SSH and the Management Portal
- Reset the default IRIS password and verify that IRIS is running
Prerequisites
- An active Azure subscription (new accounts may have free credits)
- Permissions to create resource groups, VMs, and networking resources
- An SSH client and a private key (.pem) you can store securely
- Basic knowledge of Linux command line
Deployment overview
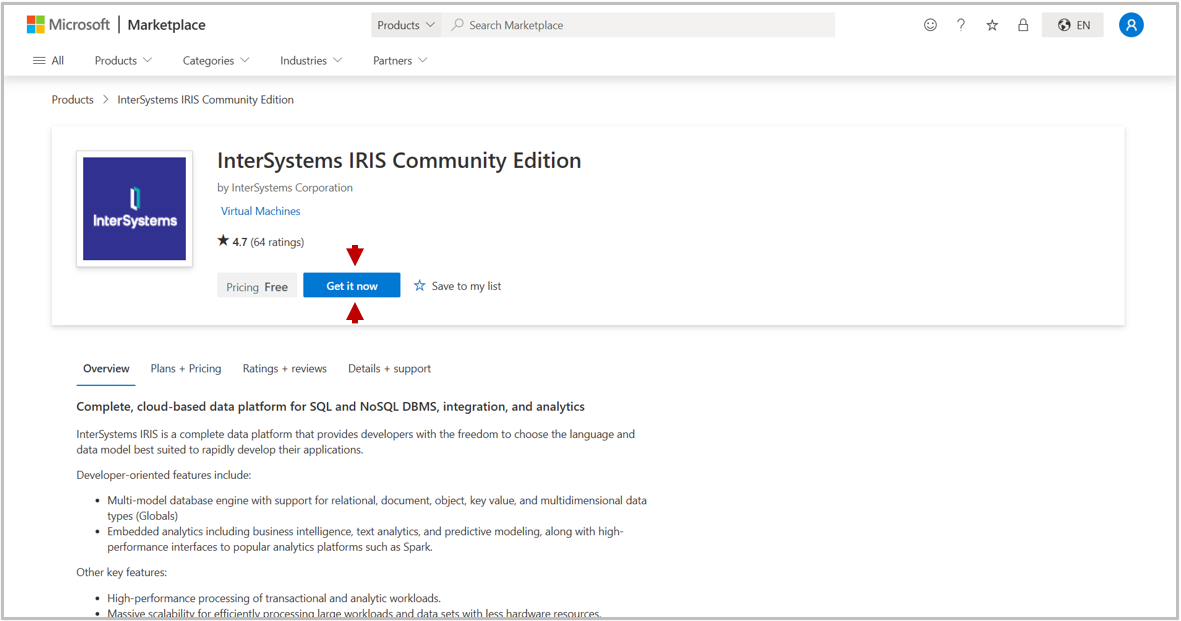
- Open the IRIS Community Edition listing in Azure Marketplace and click Get it now
- In Azure Portal, choose Start with a pre-set configuration (or Create)
- Configure Basics: subscription, resource group, VM name, region, image, and size (a small VM is usually sufficient)
- Choose SSH key authentication and generate/download the key if needed
- Review + Create, accept terms, and deploy; then Go to resource → Connect → SSH
- First SSH login: run
iris passwordto change_SYSTEM/SYS; start a session withiris session iris - Management Portal:
http://YOUR_VM_IP:52773/csp/sys/UtilHome.csp
Hello!
In my last article, I went through a walkthrough on how you can try deploying InterSystems IRIS Community Edition, or IRIS for Health Community Edition for free on AWS. In this follow up, I will show the same for the next biggest cloud provider, Microsoft Azure.
Like with AWS, Azure also provides a free offering on sign up, although its a bit less generous - you get $200 free credit to spend in the first month. This does mean you can once again try deploying IRIS Community edition for free on Azure, although I do recommend caution to avoid costly bills.
Like with the previous article, this walks through the process for deploying the Community Edition on the cloud, however the process can be followed for a fully licenced version, as there is a Bring Your Own Licence offering for IRIS and IRIS for Health. You can either use an existing license key for this, or contact sales for a new license.
Walkthrough
Before starting you will need to sign in or create an account on Azure, and sign up for an Azure subscription (to enable billing). Then, head to the Azure Marketplace listing for IRIS Community (or IRIS for Health Community) and click Get it now.
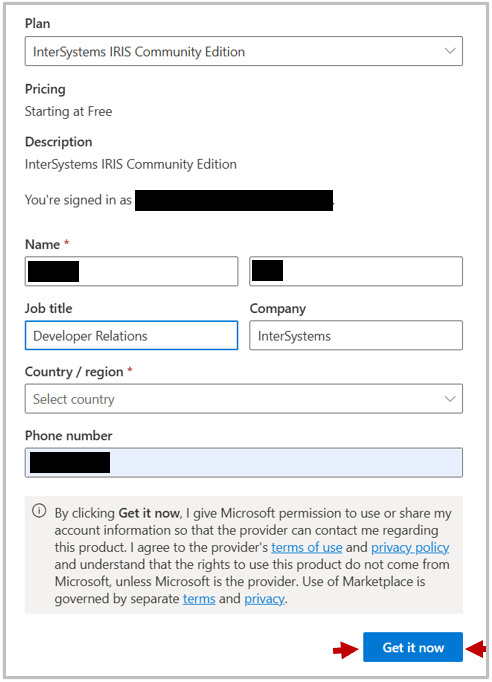
You will be prompted to sign in, and may also be asked for additional details like Country, Mobile number and workplace. Complete this and then click Get it now at the bottom of this form.
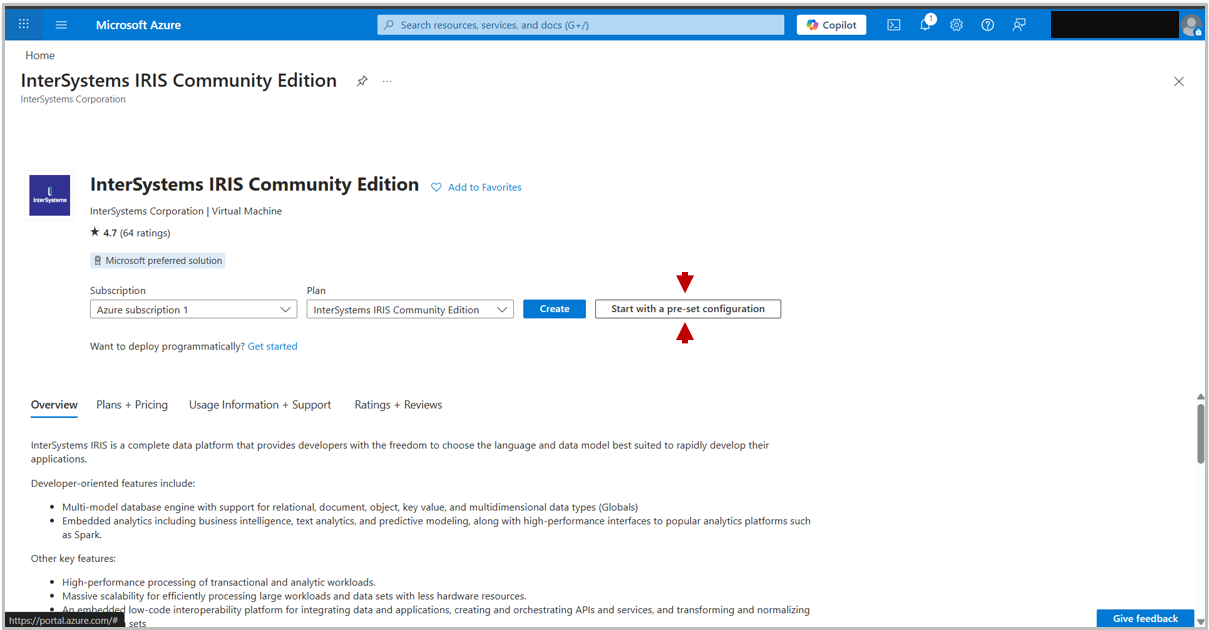
You will then be redirected to the Azure Portal. Click Start with a pre-set configuration to get started creating a deployment. If you'd rather select all the settings yourself, you can click Create to deploy without any default configuration.
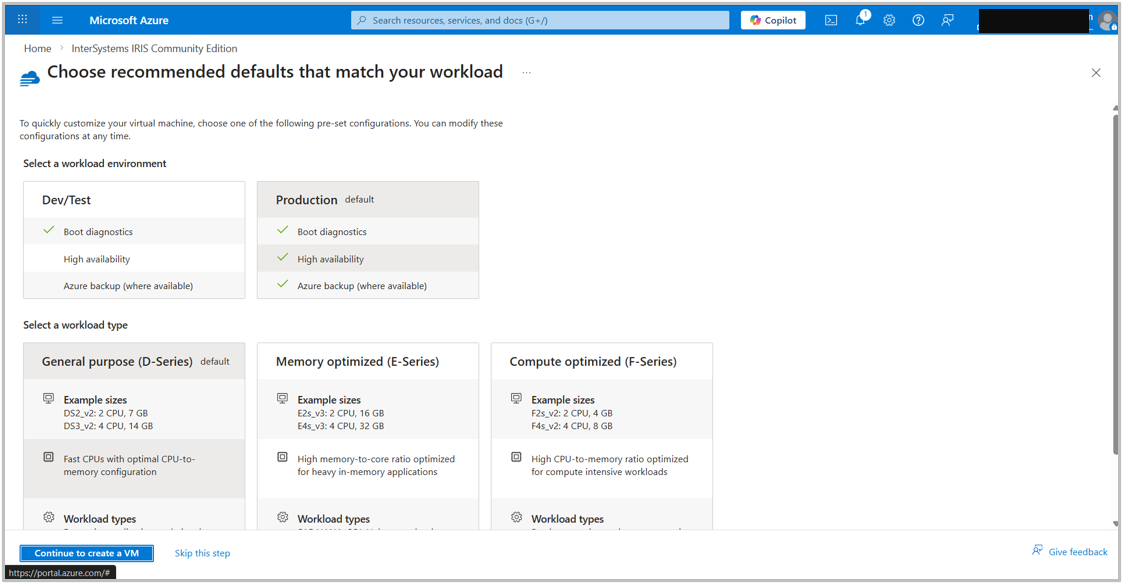
After choosing to start with a pre-set configuration, you will be redirected to a page suggesting defaults for your use case. Choose your required use case, then click Continue to Create a VM, this choice will automatically pre-fill some of the configuration settings.
Choosing VM Settings
You will now enter the Create a virtual machine page. This is where you configure all of the settings for your virtual machine deployment.
There are tabs to choose settings under "Basics", "Disks" (storage), "Networking", "Management", "Monitoring", "Advanced Settings" and "Tags". This guide will discuss the settings under "Basics". For the other settings, you can either leave them as the default if you've started with a pre-set configuration, or select them in your own time. Many of these can be changed after deployment (for example limiting the connecting IP addresses).
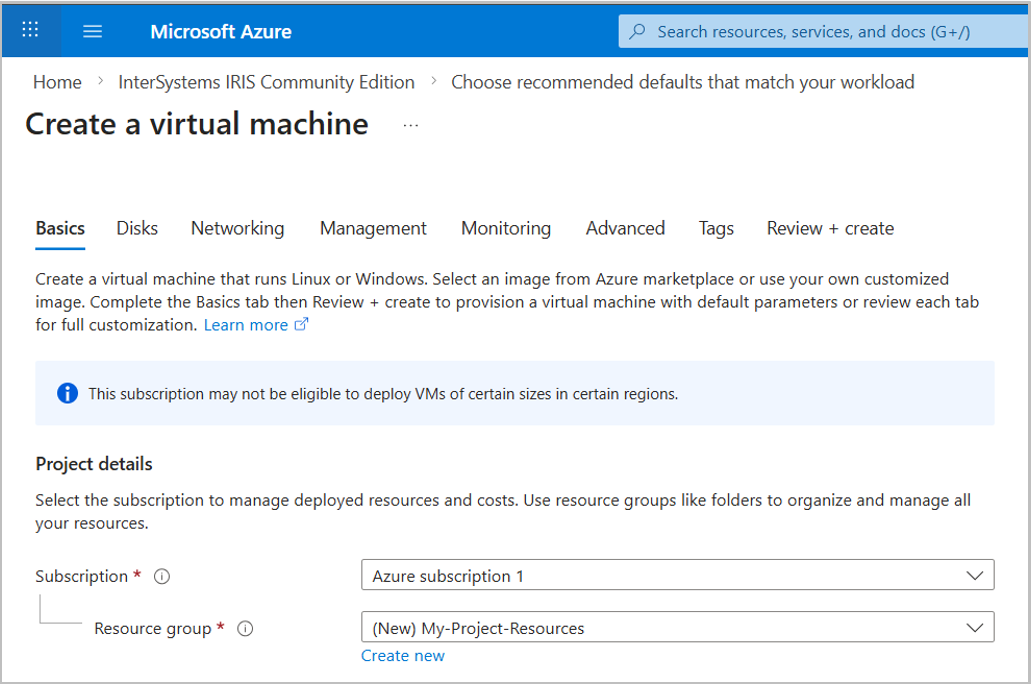
Project Details
Here you choose which Azure Subscription and Resource group is being used for the deployment, a resource group allows you to group related deployments (e.g. deployments for different services of a single project) for organization and billing purposes. You will need to create a resource group if you have not done so before. Click Create new and give a suitable name.
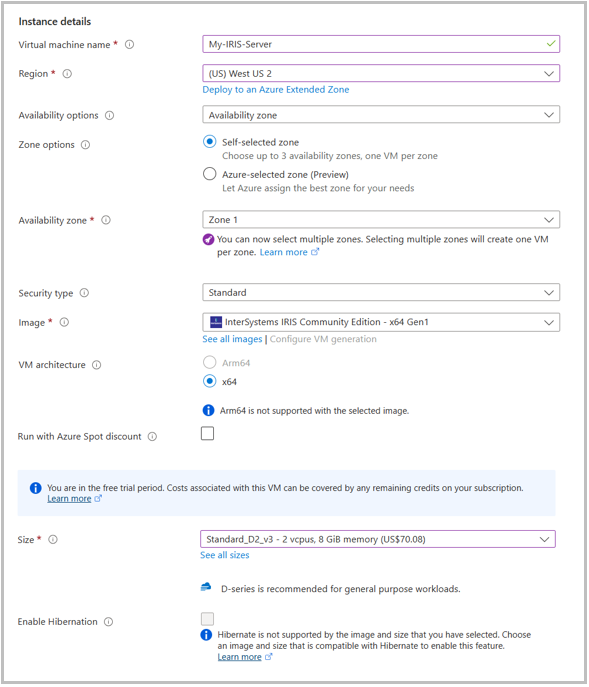
Instance Details
The instance details controls the size, location and security settings of the instance. As you have clicked through the Azure portal, the image should have been pre-filled. Otherwise, you can selected through the marketplace dropdown.
There are several essentials to fill out in this section.
- Virtual Machine Name - Preferably use something easy to recognize for ease of management.
- Region - The closer the region is to your users, the less latency when accessing the machine. However, region choice will also affect availability of machines.
- Size - The performance specifications of the machine, including memory and number/type of processors available (CPUs, GPUs). The choice of size will depend on budget, required performance and availability in your selected region. As the InterSystems IRIS Community Edition itself limits the storage in the database and compute power used ( see the limits here), you will probably want to one of the smaller machines.
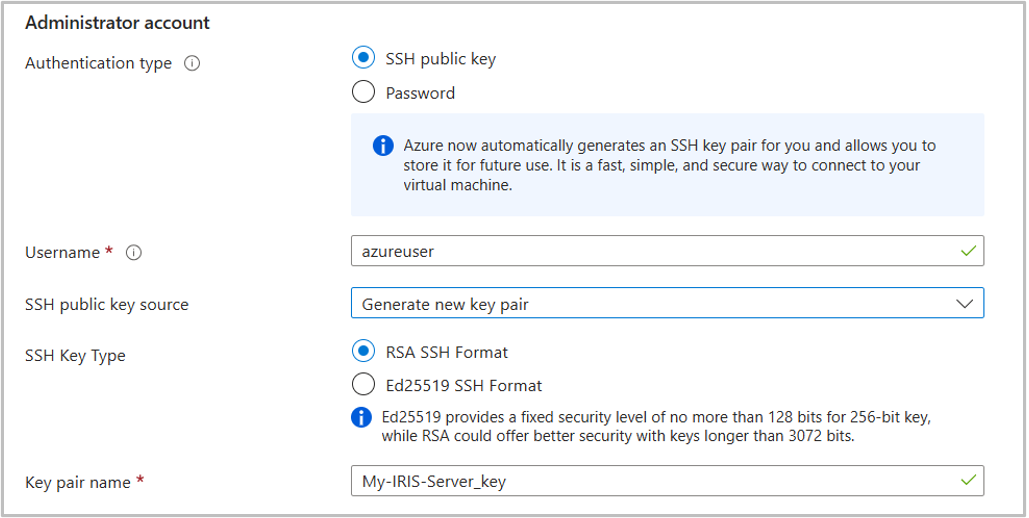
Authentication
Here you can choose how you authenticate when connecting to the machine. It's suggested that you use an SSH public/private key pair for this, but you can also use password authentication.You can also select a default username to access the machine.
You can leave all these settings as the default. If you choose to create a new SSH key, it will automatically be generated and downloaded when you deploy the machine.
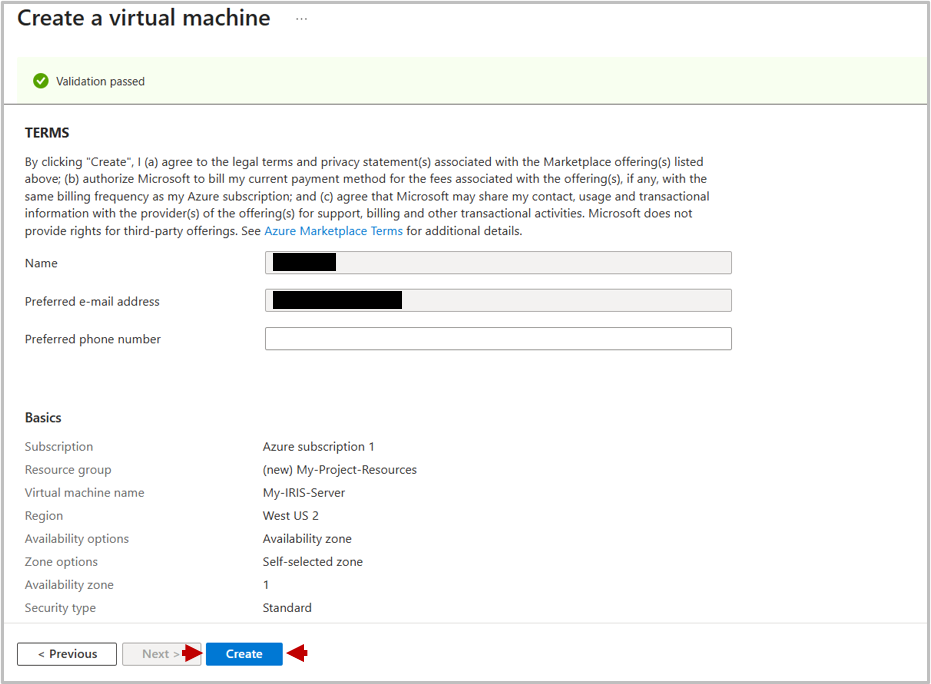
Review + Create
Once you have set the,"Basics" check through the other tabs of settings and see if there is anything you would like to change from defaults. If not, select the Review + Create tab.
This tab will take a while to load, as it validates your selected settings. After validation has passed, you have to agree to the Terms for the final time, and will also see a summary of your selected settings.
When you are ready click Create to create your virtual machine.
If you have selected to authenticate with an new SSH key as suggested, you will be greeted with a pop-up to generate and download this. Click Download private key and create resource.

Connect
It will take a couple of minutes for your deployment to launch, but you should end up with a screen saying "Your deployment is complete".
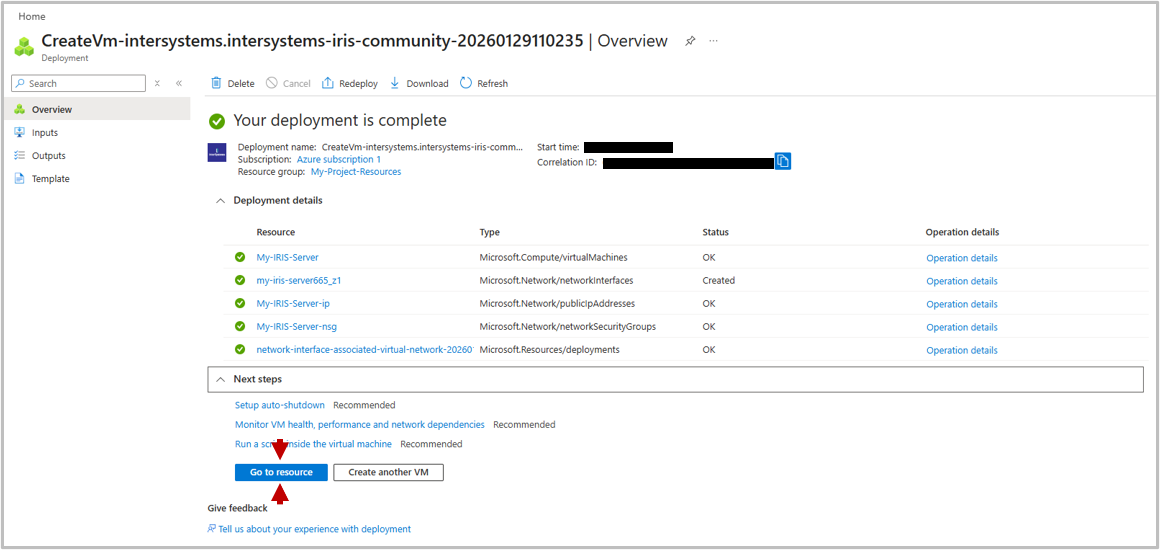
There are several settings which Azure recommends setting, which you may wish to do soon. However, to initially demonstrate connecting to the machine, click Go to resource. This will bring up the management dashboard for your deployed virtual machine.
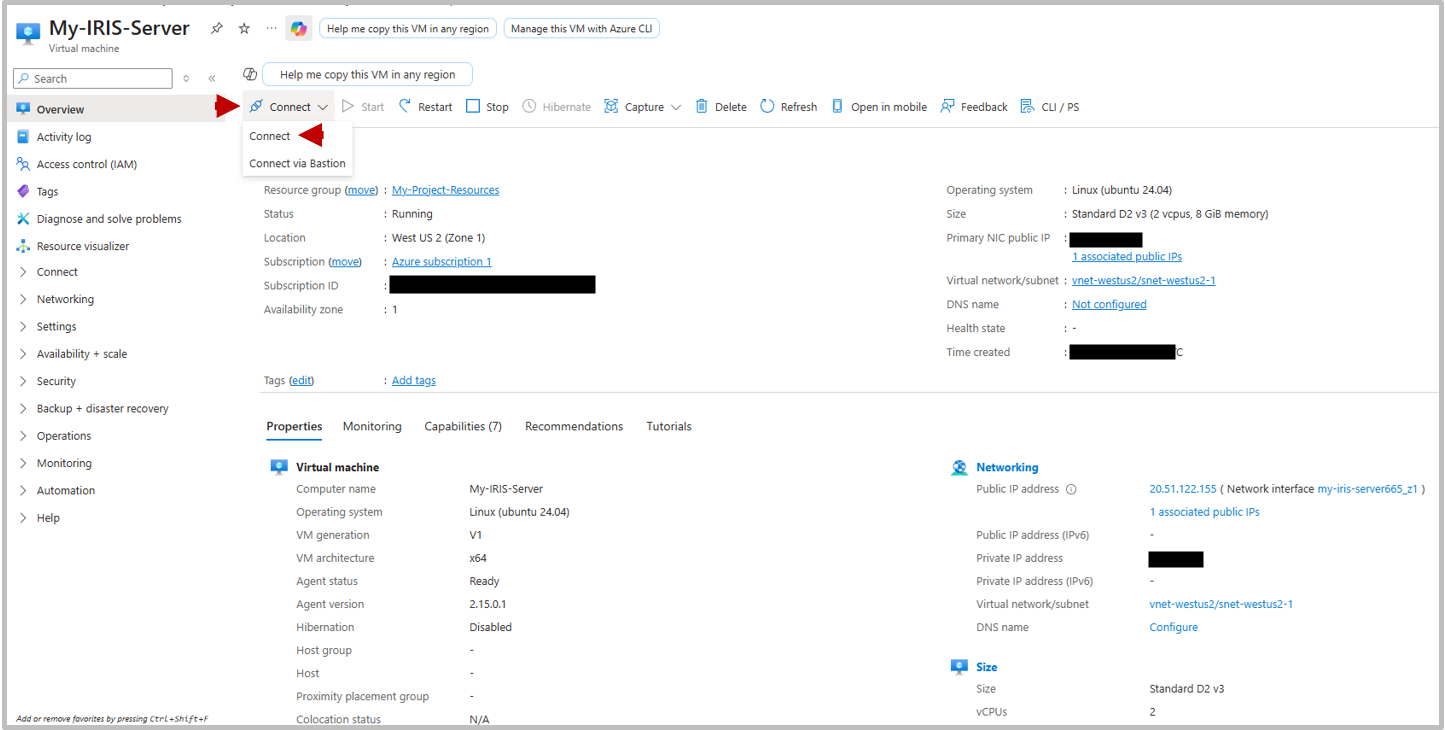
On the left-hand side there is a panel to select different settings groups to view and edit machine settings. For now though, Select Connect from the panel across the top of the dashboard.
Via SSH
On Azure, Secure Shell (SSH) is the recommended method when connecting to the InterSystems IRIS Community Edition instance. You can connect via SSH from your local machine terminal or powershell.
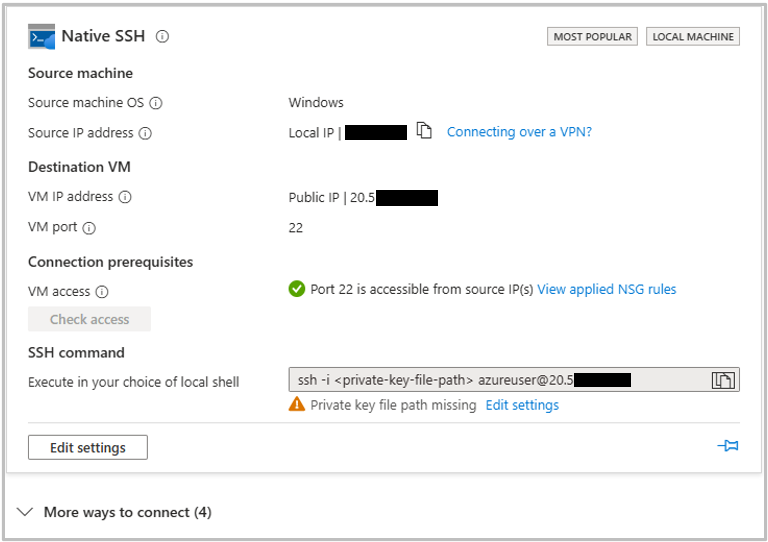
From the connection panel you will clearly see the IP address of your instance, and an SSH command to use to connect to the instance. The SSH connection command required three things, the local path to your private key which was downloaded when you launched the instance, the username on the machine (default was azureuser unless you changed it in the Authentication step above) and the IP address of your instance.
ssh -i /path/to/key.pem username@xx.xx.xxx.xxx

ssh -i /home/keys/My-Iris-Instance_key.pem azureuser@12.34.567.899
On your first time connecting, you will be prompted if you are sure you want to continue connecting. Type "yes" and you will connect to the instance.
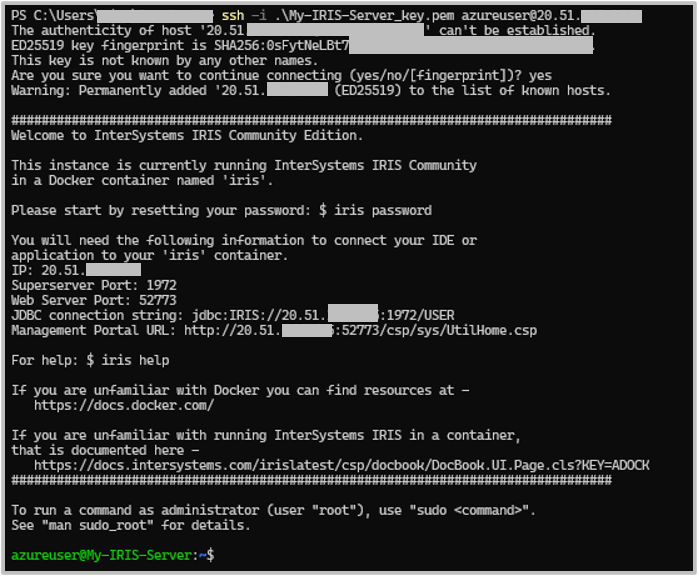
The first time you log in, you will need to reset the password from the default. To do this, run:
iris passwordA prompt will tell you that the default credentials are:
- Username: _SYSTEM
- Password: SYS
And that this password is expired and needs to be changed. If like me, you prefer the other default username, SuperUser, that should also work with the same password
After this, you can start an IRIS terminal session with:
iris session irisIf you would like to copy files to the IRIS instance, you can use an SSH connection using scp, sftp or an sftp client like Filezilla. You can also copy files via Azure's Bastion service.
Via Management Portal
Once deployed, the Management Portal will be available at the IP address of your instance with :52773/csp/sys/UtilHome.csp appended on the end. The default credentials are:
- Username: _SYSTEM
- Password: SYS
These will need to be changed on first login, unless you have already changed them from the SSH connection.
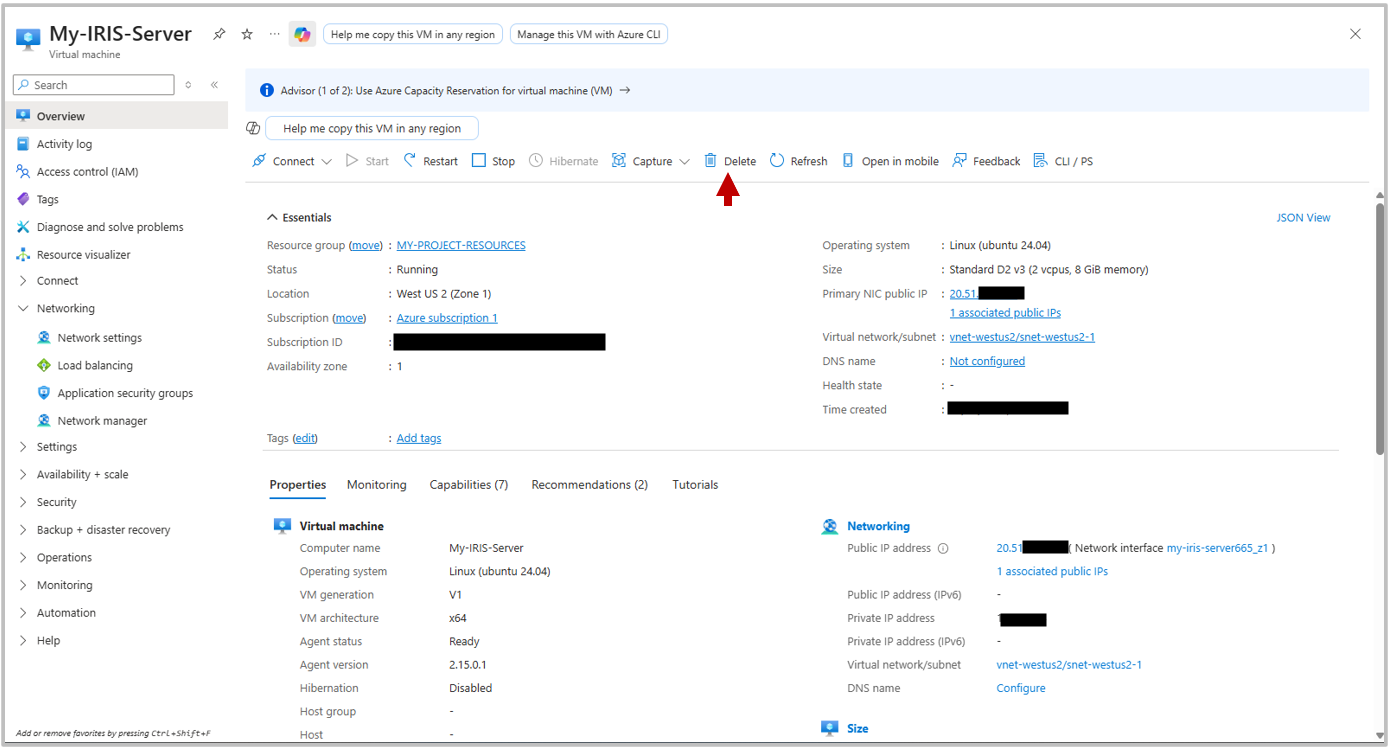
Terminate Deployment
Remember to stop the deployment once you are done using it! To do so, navigate back to the Virtual Machine dashboard for your instance, and click Delete. You will be prompted for which components you want to delete. If you are completely finished using this deployment, select all of the components and click Delete to end all deployments.
FAQ
Can I deploy IRIS for free on Azure?
Yes. InterSystems IRIS Community Edition is free to deploy ; infrastructure (VM, storage, networking) may incur charges. New Azure subscriptions often include free credits that can cover a small VM during evaluation. For production deployments, a license key is required, but you can follow the same guide with a Bring-Your-Own-License edition.
What’s the easiest way to connect to a deployment?
SSH with your private key:
ssh -i /path/to/key.pem azureuser@YOUR_VM_IPWhat are the default credentials used?
IRIS defaults (must be changed on first login):
- Username: _SYSTEM
- Password: SYS
How do I terminate my instance to avoid charges?
In the VM’s Azure Portal page, click Delete and remove the VM and all associated resources (disks, NIC, public IP, etc.) to stop all charges.