Using REST API, Flask and IAM with InterSystems IRIS - Part 2 – Flask App
Using Flask, REST API, and IAM with InterSystems IRIS
Part 2 – Flask App
Flask is a web development microframework written in Python. It is known for being simple, flexible, and enabling rapid application development.
Installing Flask is very simple. Once you have python installed correctly on your operating system, we need to install the flask library with the pip command. For REST API consumption, it is advisable to use the requests library. The following link provides a guide to installing flask: https://flask.palletsprojects.com/en/stable/installation/
Once the flask is installed, let's start with the structure of our application. Let's create the directories and sub-directories to accommodate our files:
/--+
|
+-- static
|
+-- template
So let's follow this definition. For example, in c:\temp we will create the flask directory and below we will create the static and template sub-directories.
Follow the installation documentation and install and configure the venv. Then install the flask library with the pip command. The flask documentation shows the command. Remember that you need to already have python installed.
After installing the flask library, install the requests library with pip, the same way you installed flask.
In the flask directory we will put our python application. The following is the application code:
from flask import Flask, render_template, request, redirect, url_for
import requests
from requests.auth import HTTPBasicAuth
app=Flask(__name__)
API_URL = "http://192.168.0.13/iris/rest/servico/cliente"
USERNAME="_SYSTEM"
PASSWD = "SYS"
# Route to List Records
@app.route('/')
def index():
response = requests.get(API_URL, auth=HTTPBasicAuth(USERNAME, PASSWD))
data = response.json()
lista = data["clientes"]
return render_template("index.html", registros=lista)
# Route to Display the Inclusion Form
@app.route('/include', methods=['GET'])
def include():
return render_template("form.html", record={"id": "", "name": "", "age": ""}, action="Include")
# Route to Create a New Record
@app.route('/create', methods=['POST'])
def create():
data = {
"name": request.form["name"],
"age": request.form["age"]
}
requests.post(API_URL, json=data, auth=HTTPBasicAuth(USERNAME, PASSWD))
return redirect(url_for("index"))
# Route to Display the Edit Form
@app.route('/edit/<int:id>', methods=['GET'])
def edit(id):
response = requests.get(f"{API_URL}/{id}", auth=HTTPBasicAuth(USERNAME, PASSWD))
record = response.json() if response.status_code == 200 else {"id": "", "name": "", "age": ""}
return render_template("form.html", record=record, action="Edit")
# Route to Update an Existing Record
@app.route('/update/<int:id>', methods=['POST'])
def update(id):
data = {
"name": request.form["name"],
"age": request.form["age"]
}
requests.put(f"{API_URL}/{id}", json=data, auth=HTTPBasicAuth(USERNAME, PASSWD))
return redirect(url_for("index"))
# Route to Deleting a Record
@app.route('/delete/<int:id>')
def delete(id):
requests.delete(f"{API_URL}/{id}", auth=HTTPBasicAuth(USERNAME, PASSWD))
return redirect(url_for("index"))
if __name__ == "__main__":
app.run(debug=True)
The code is very simple, we have the inclusion, change, deletion routes, a route to list the existing records and give access to the maintenance options, and the inclusion and change forms.
Now let's go to the static subdirectory. In it we will put our CSS file style.css:
body {
;
text-align: center;
margin: 20px;
}
table {
width: 60%;
margin: auto;
border-collapse: collapse;
}
th, td {
border: 1px solid black;
padding: 8px;
}
a {
text-decoration: none;
color: blue;
}
And in the templates subdirectory we will put our HTML files index.html and form.html:
index.html
<meta charset="UTF-8">
<title>CRUD Flask</title>
<link rel="stylesheet" href="{{ url_for('static', filename='style.css') }}">
<h2>List of Records</h2>
<a href="{{ url_for('include') }}">Add New</a>
<table border="1">
<tr>
<th>ID</th>
<th>Name</th>
<th>age</th>
<th>Stocks</th>
</tr>
{% for reg in records %}
<tr>
<td>{{ reg.id }}</td>
<td>{{ reg.name }}</td>
<td>{{ reg.age }}</td>
<td>
<a href="{{ url_for('edit', id=reg.id) }}">Edit</a> |
<a href="{{ url_for('delete', id=reg.id) }}" onclick="return confirm('Are you sure?')" >Delete<>
</TD>
</tr>
{% endfor %}
</table>
form.html
<meta charset="UTF-8">
<title>{{ action }} Record</title>
<h2>{{ action }} Log</h2>
<form method="POST" action="{{ url_for('create' if action == 'Include' else 'update', id=record.id) }}">
<label>Name:</label>
<input type="text" name="name" value="{{ record.name }}" required><br>
<label>age:</label>
<input type="text" name="age" value="{{ age.record }}" required><br>
<button type="submit">{{ action }}</button>
</form>
<a href="{{ url_for('index') }}">Back</a>
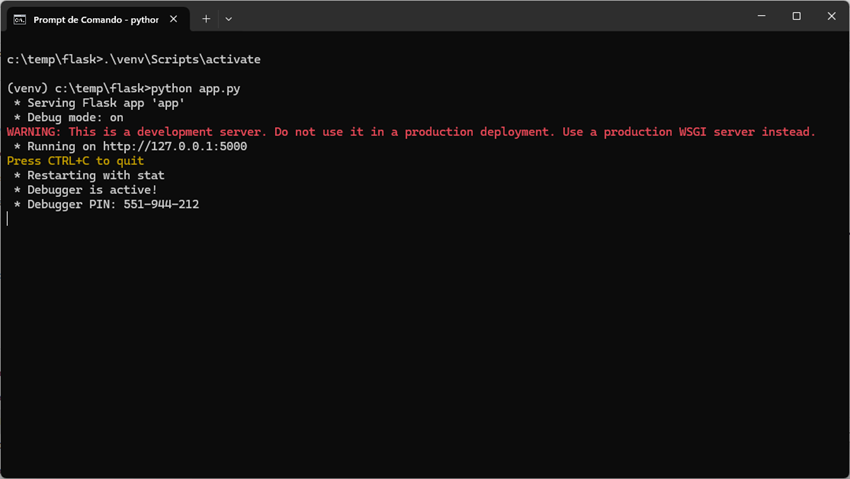
To run the application just go to the directory where we are with our python application (in our case, c:\temp\flask), activate the venv (virtual environment) and run the application:
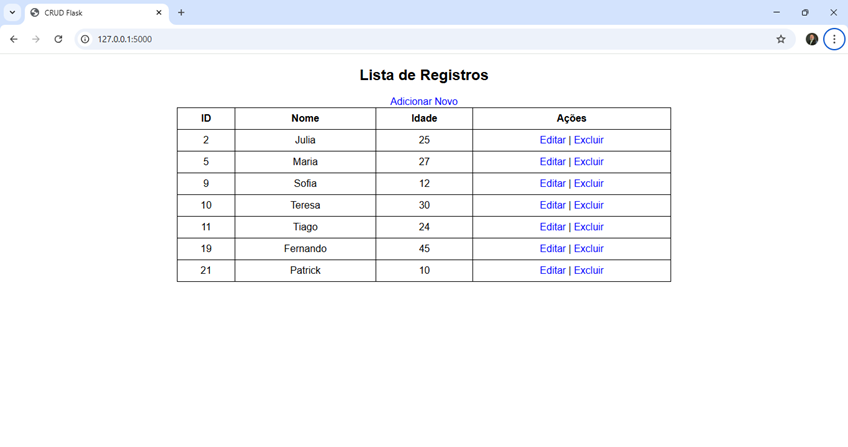
We can now access our application by accessing local port 5000 with a browser:
Clicking on the Add New link we have the screen for adding records to our class:

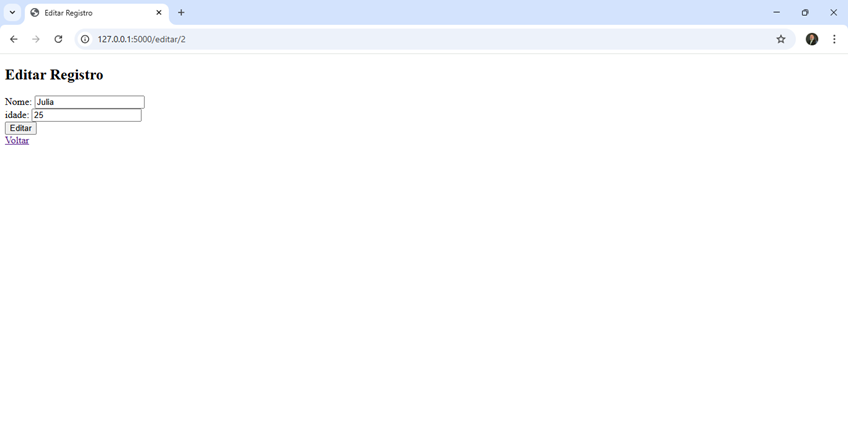
Returning to the index screen, selecting Change on some record, we have the change screen:
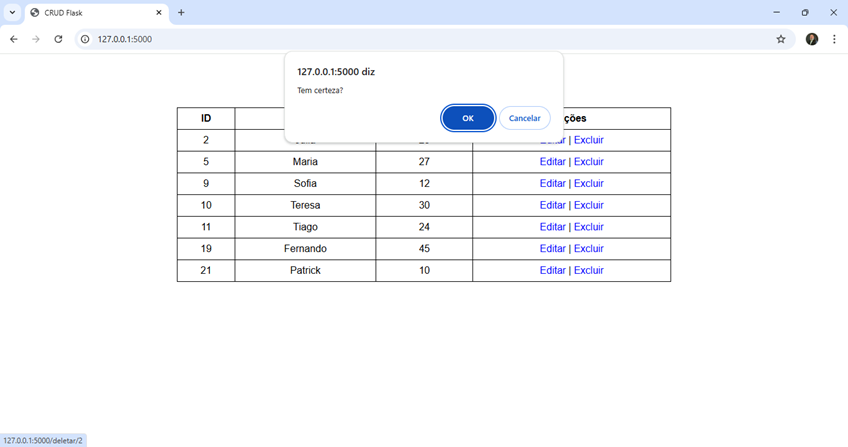
And, again going back to the index screen, clicking on Delete , let's go to the confirmation of the deletion:
With that we end this part of the article. We already have our persistent class created, the REST API published, and a flask application consuming this API with the requests library to perform basic maintenance (CRUD)..