Using SQL Gateway with Python, Vector Search, and Interoperability in InterSystems Iris - Part 1 - SQL Gateway
Using SQL Gateway with Python, Vector Search, and Interoperability in InterSystems Iris
Part 1 - SQL Gateway
Hello
In this article we will look at the use of SQL Gateway in Iris. SQL Gateway allows Iris to have access to tables from other (external) database via ODBC or JDBC. We can access Tables or Views from various databases, such as Oracle, PostgreSQL, SQL Server, MySQL and others.
From a usage point of view, it is as if the table were local in our Iris instance, but the storage is carried out in an external location.
For more details on this component, see the documentation that is available at https://docs.intersystems.com/irislatest/csp/docbook/DocBook.UI.Page.cls?KEY=BSQG_overview
So let's go to the necessary settings:
First, to configure SQL Gateway in Iris, we will need to configure access to an external database. For our example we will use a MySQL instance being accessed via ODBC.
We then install an instance of MySQL on a separate server, and create a table that will be accessed in our example:
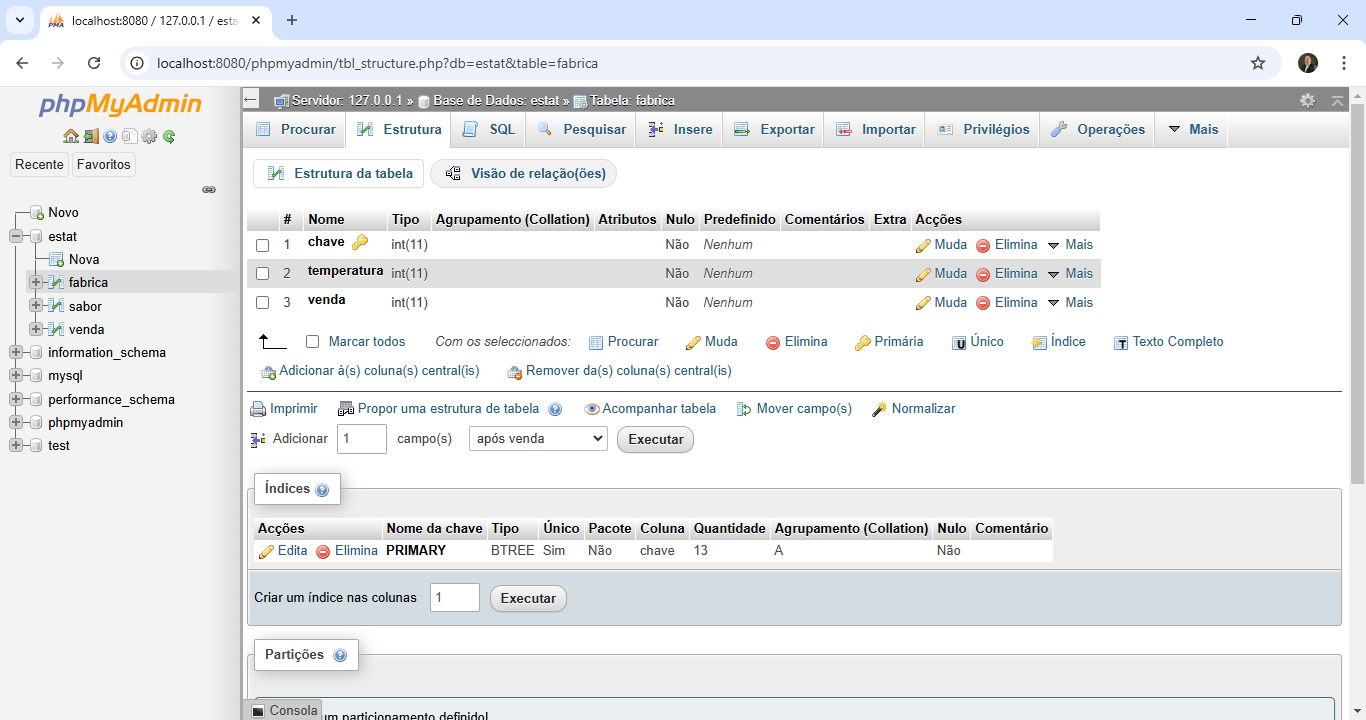
So, we populate the table with information. Below is an example of the table already with data:

Now let's create a DSN in Windows to connect to MySQL. First, we need to install the MySQL ODBC driver on Windows. The driver can be easily obtained from MySQL's own website.
After installing the ODBC driver for MySQL, open the ODBC Data Source Manager on Windows:
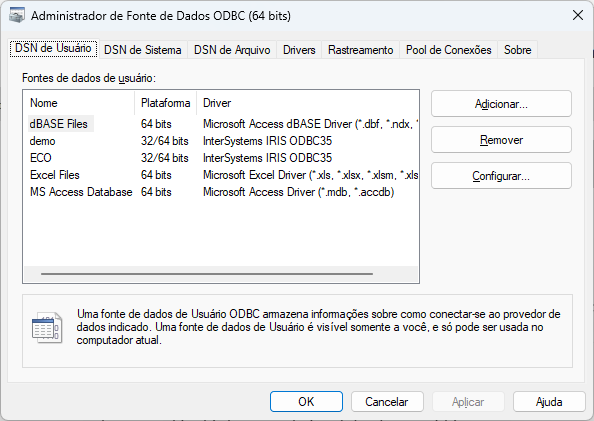
Click on the "System DSN" tab and then on the Add button:
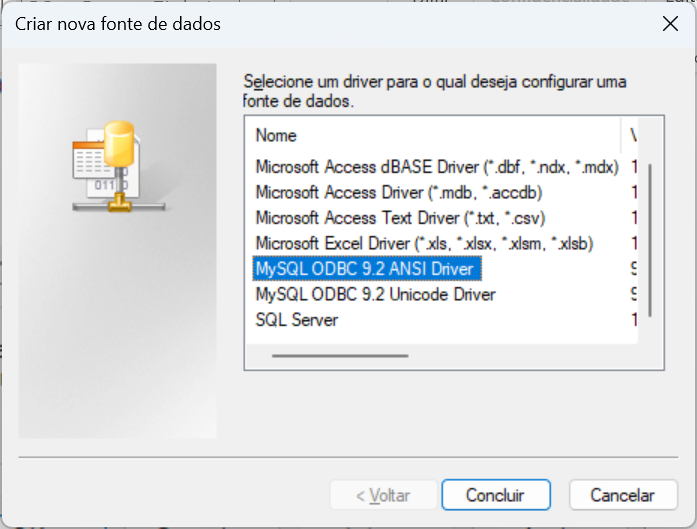
Select the MySQL ODBC ANSI driver and click Finish.

Fill in the configuration screen with the name of the data source to be created, description, IP address and communication port of the MySQL server (default is port 3306 – check if your MySQL instance is actually using this communication port), the username and password to access MySQL (create in MySQL a user with access permission for the tables you want to use). Select the database to access:
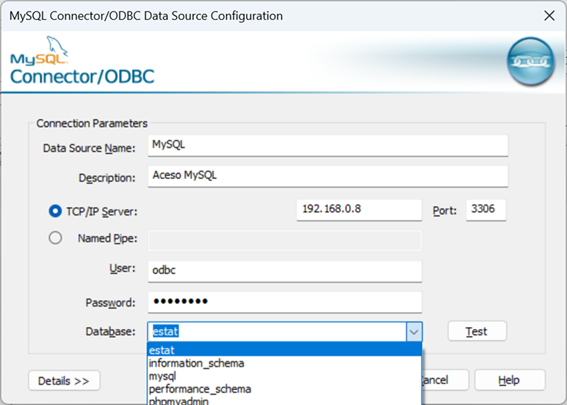
Click the test button to verify that your configuration is accessing the MySQL instance configured in the DSN:
Now let's do a query via ODBC to check if everything is OK in our structure. We're going to use Excel for that. Open Excel, and go to Data->Fetch-Data->From other sources->From ODBC:

Select the DSN you created to access MySQL, and then select the schema and table you want to check. In our case we will see the venda table of the estat scheme:

Then click the Load button and you will see your table data in Excel cells:
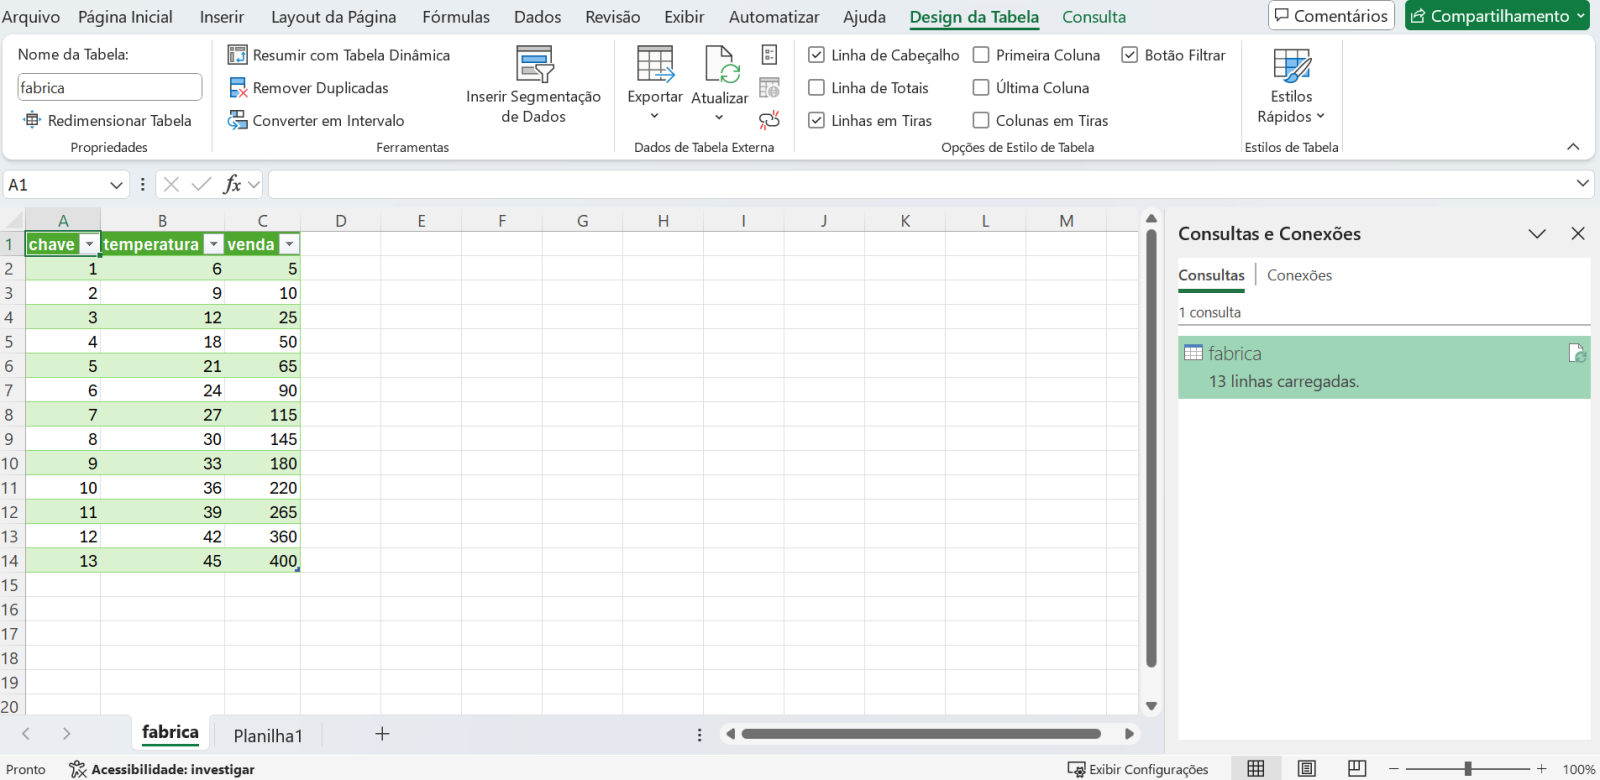
So, we have our ODBC connection created and working to access our remote table. Now let's go back to Iris and perform the configuration of the SQL Gateway connection. Open the Iris Administration Panel and go to System Administration->Configuration->Connectivity->SQL Gateway Connections and click on the Create New Connection button:
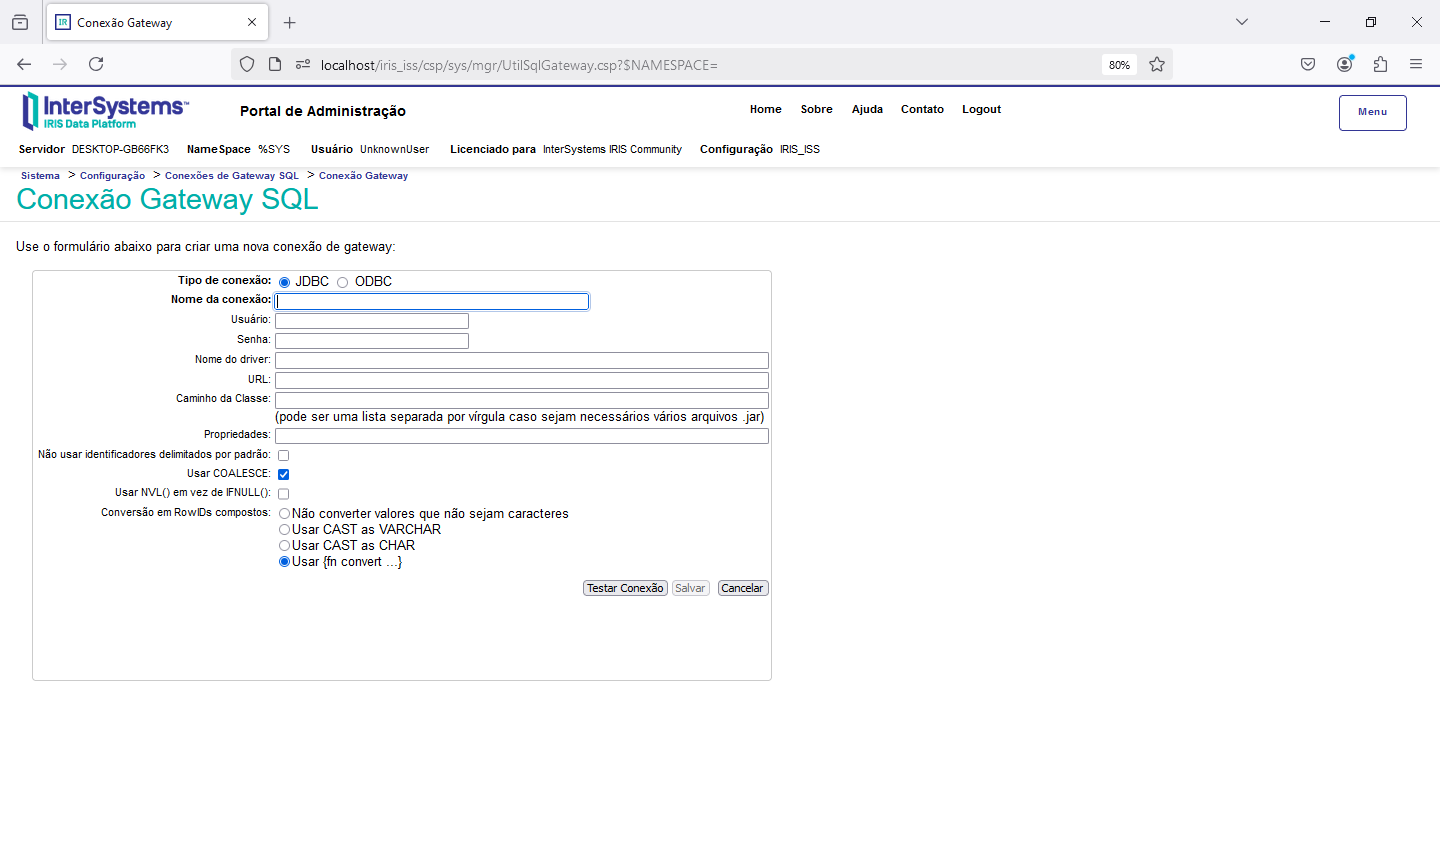
Enter the DSN access data as follows:
|
Connection Type |
ODBC |
|
Connection Name |
Enter a name at your discretion |
|
Select an existing DSN |
Select the DSN created for ODBC access to MySQL |
|
User |
Access user (same as DSN) |
|
Password |
Access password (same as the DSN) |
For the test we will leave unchecked all the configuration options, except for Do not convert values that are not characters:

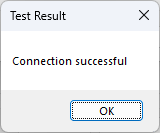
Finally, click on "Test Connection" to check if everything is OK. You'll see the text "Connection succeeded." if everything is set up correctly:

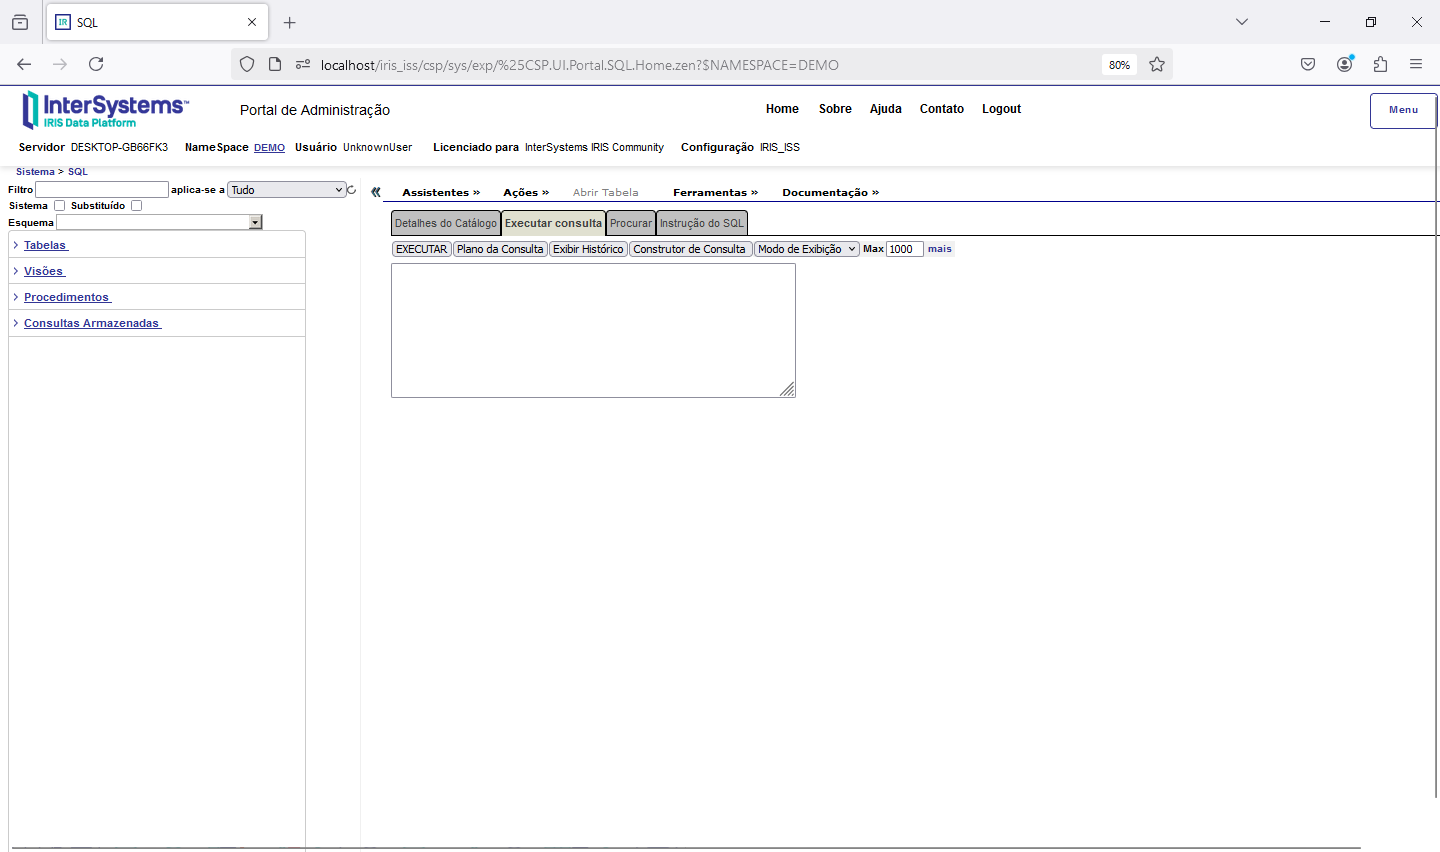
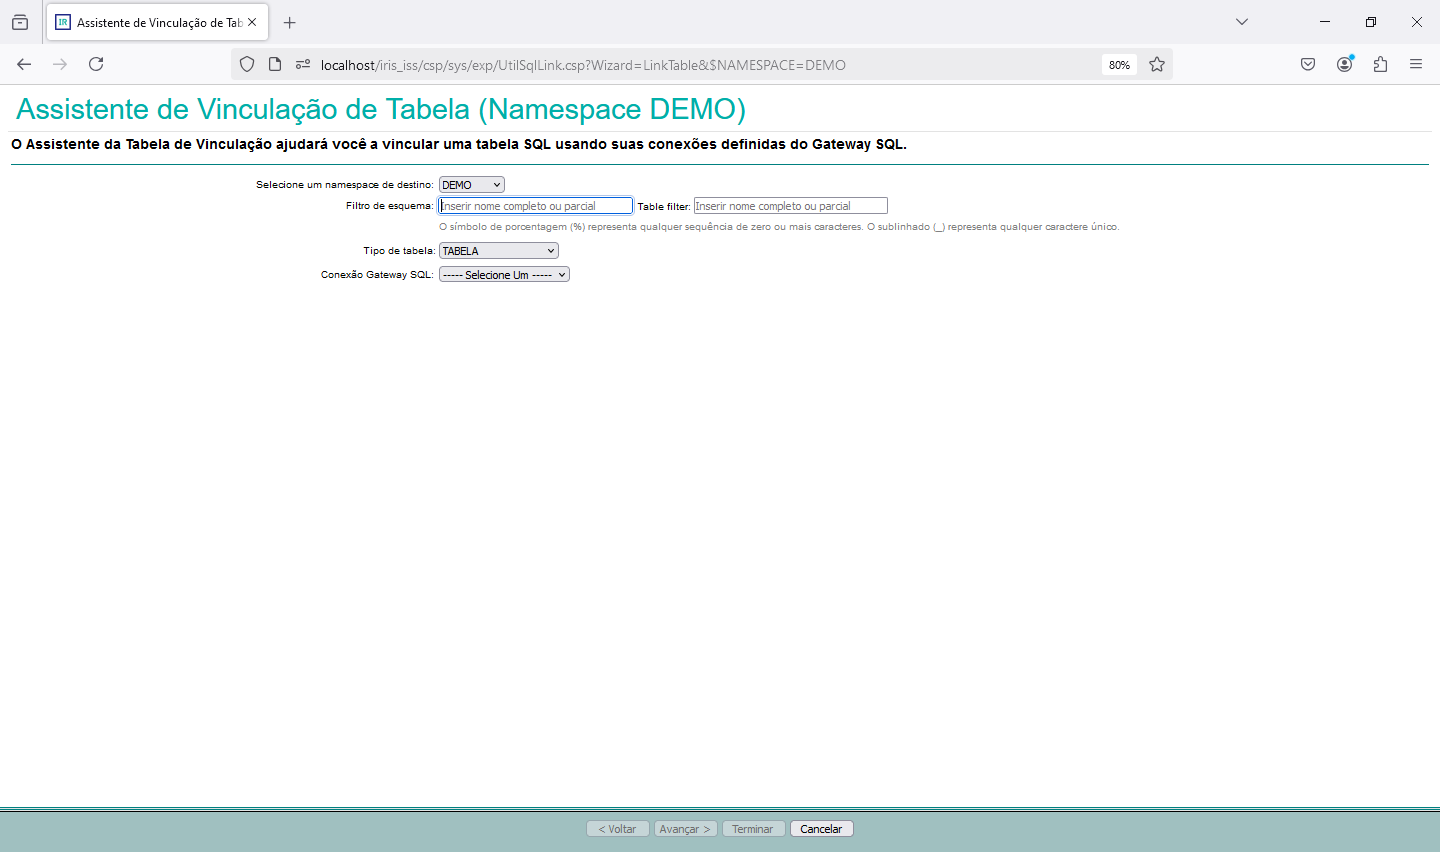
Once the DSN is created and the SQL Gateway access is configured, we can link the tables so that Iris can access the remote data. To do this, go back to the Admin Portal and go to the >SQL System Explorer and switch to the namespace where the class definitions that will be generated will be stored:
Click the "Wizards" link, then click "Link Table." You will see the Iris table linking wizard screen:
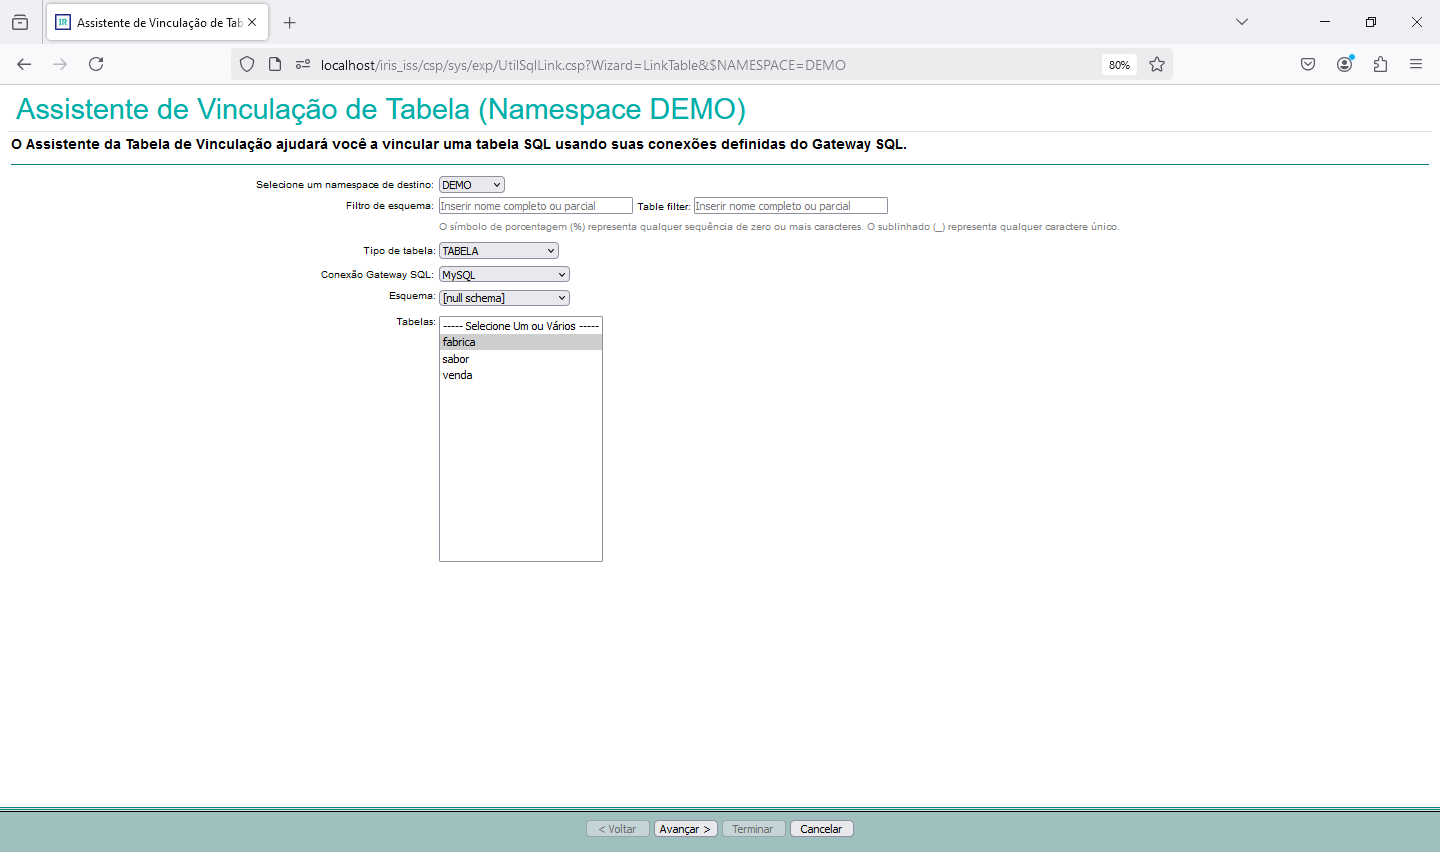
Look for the SQL Gateway connection that was created in the previous step:

Select the schema and table you want to link in Iris:
Click Next and select the columns of the table you want to access:

Click Next and make the read/write name and characteristic adjustments in the available fields:

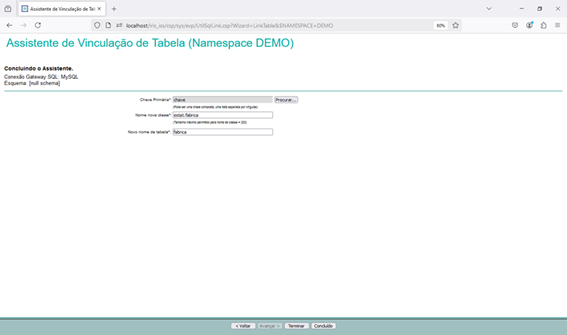
Click Next and look for the field that will be the primary key for the records:

Select the fields that form the primary key of the record:

Click Save. Enter the name of the class to be created and the name of the SQL table:
Then click Finish.
Our class in Iris was created. Open Studio and see the class:

Let's test data access by making a query via SQL. For this we will go back to the Admin Portal and we will go to >SQL System Explorer and we will change to the namespace where we created our class. Let's then run the SQL query on our linked table:

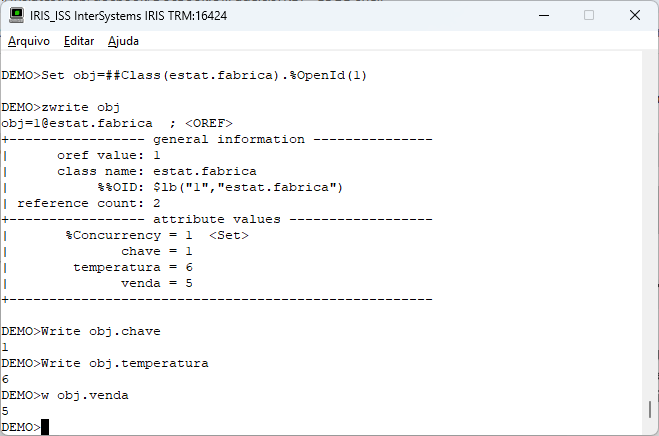
Ready! We already have access to the data from our table in MySQL. Remembering that we can perform INSERT/UPDATE/DELETE or use the Iris object manipulation syntaxes now that the table is linked, as we see below:

And using the Iris object syntax:
So we conclude this first part by being able to access MySQL data through Iris using the SQL Gateway.
See you in the next part of our article!