Let's write an Angular 1.x app with a Caché REST backend - Part 2
or "So you just got yelled at by your boss, for sending him an unformatted Hello World webpage"
Our previous lesson ended with us serving a Message value obtained from a Caché REST service to the client, using Angular as a runtime. While there is a lot of moving parts involved in this process, the page is not especially exciting at the moment. Before we can start adding new features, we should take a step back and review our tools.
This tutorial is using the JSON functionality built into 2016.2+ versions of Caché. This functionality is partially available in 2016.1 but utilizes a different syntax which will not be forward compatible.
In post 1, we verified the output of our GET request using a standard browser, and viewing the plain text output on the page. This isn't adequate to test anything more than the most basic scenarios, so we should install something which can craft custom HTTP requests, and then digest the responses. There are numerous options, ranging from the command line curl tool to fully featured test harnesses. The RESTLET client (formerly called DHC) is available as a Chrome plugin, and provides excellent support for HTTP requests with JSON payloads. This is the client which I will use in all future posts, but any HTTP debugger will work.
These posts will not be an Angular 1.x tutorial. There are numerous excellent free tutorials available online. This one was particularly clear and provides a good introduction to the Angular framework.
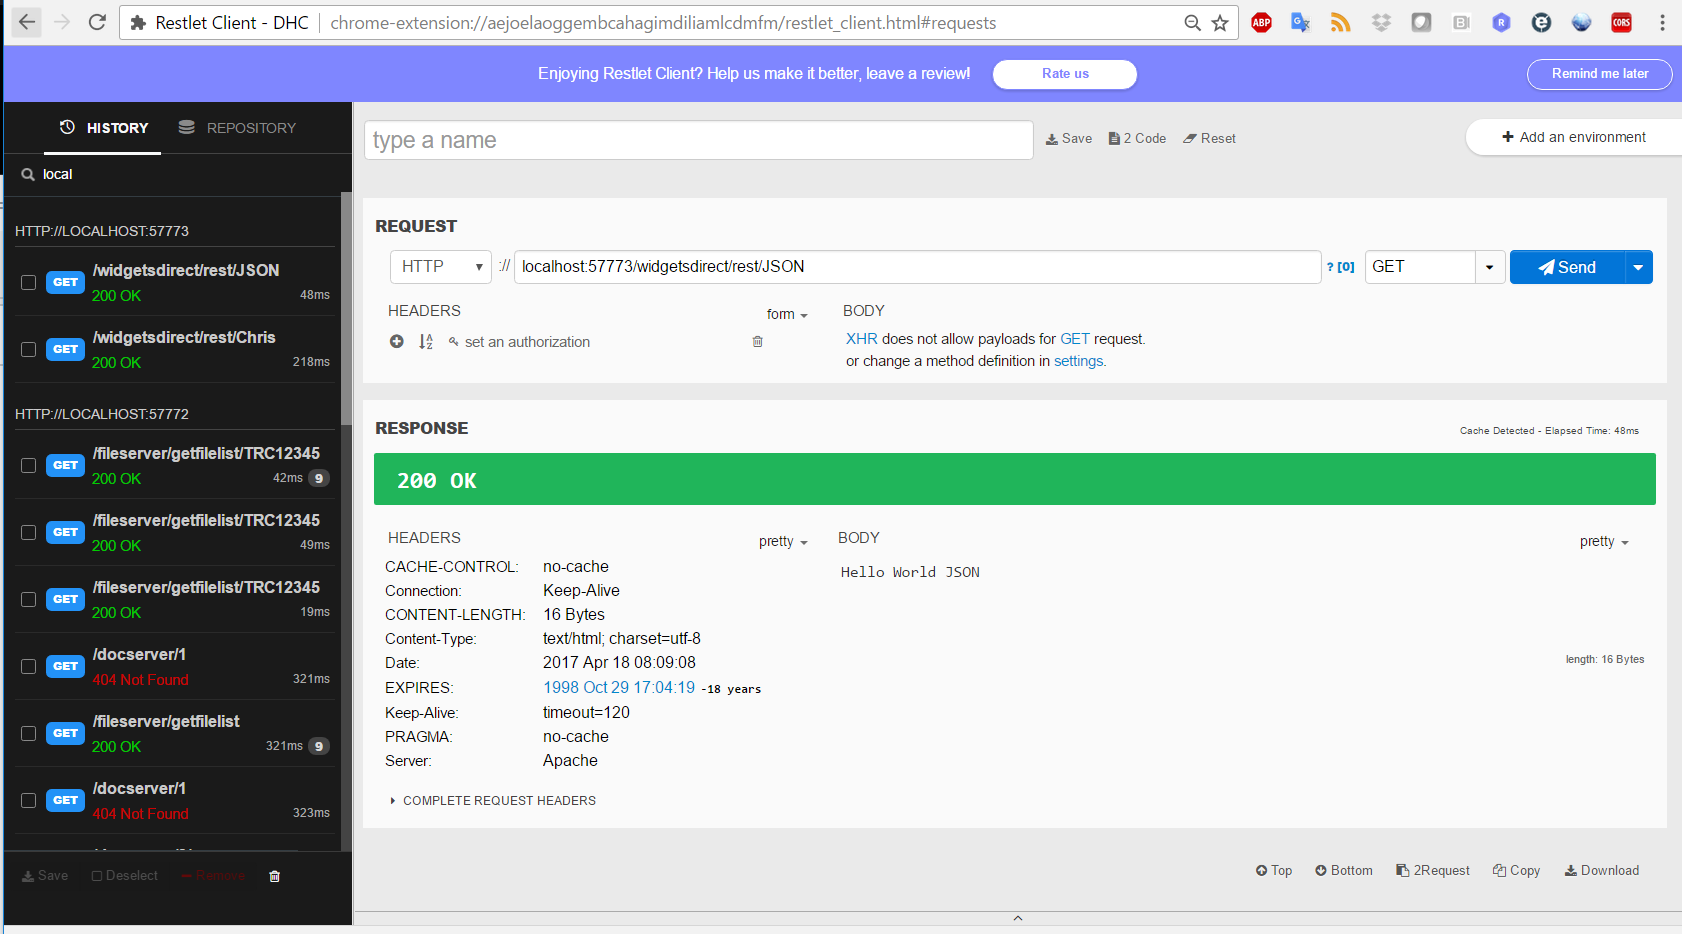
So, back to our code. Let's begin by testing out our new HTTP debugger. Load your REST URL, and send the request. You should see something like this
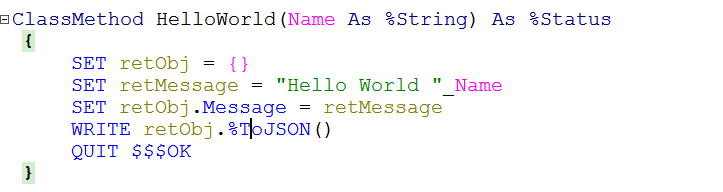
At this point, you're probably asking "Chris, I thought we were going to be using JSON to return our data from REST? This return is just plain text?" That's correct, and we need to do some more work on our REST service to make our output a little more usable. Let's go back to Studio and open our REST.Dispatch class. We need to create a JSON object (we are using the {} shortcut to do this), and then we will set a property of this object to hold our Message. We will then output this JSON by rewriting its output of the %ToJSON method. Then, as before, we will output an OK status
Let's rerequest from our service
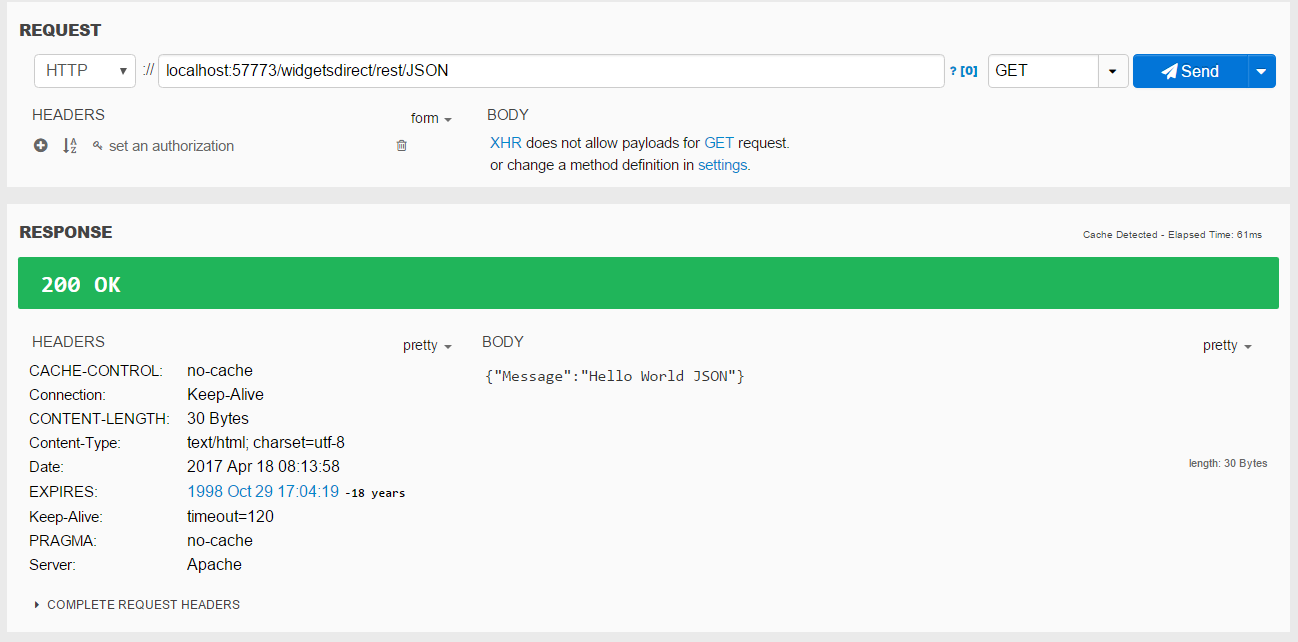
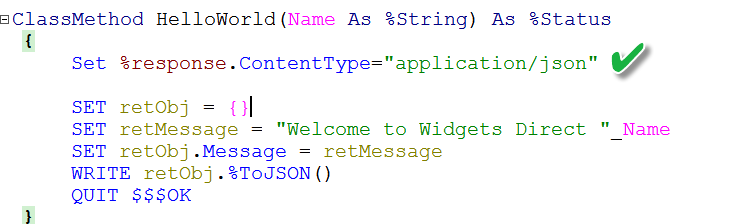
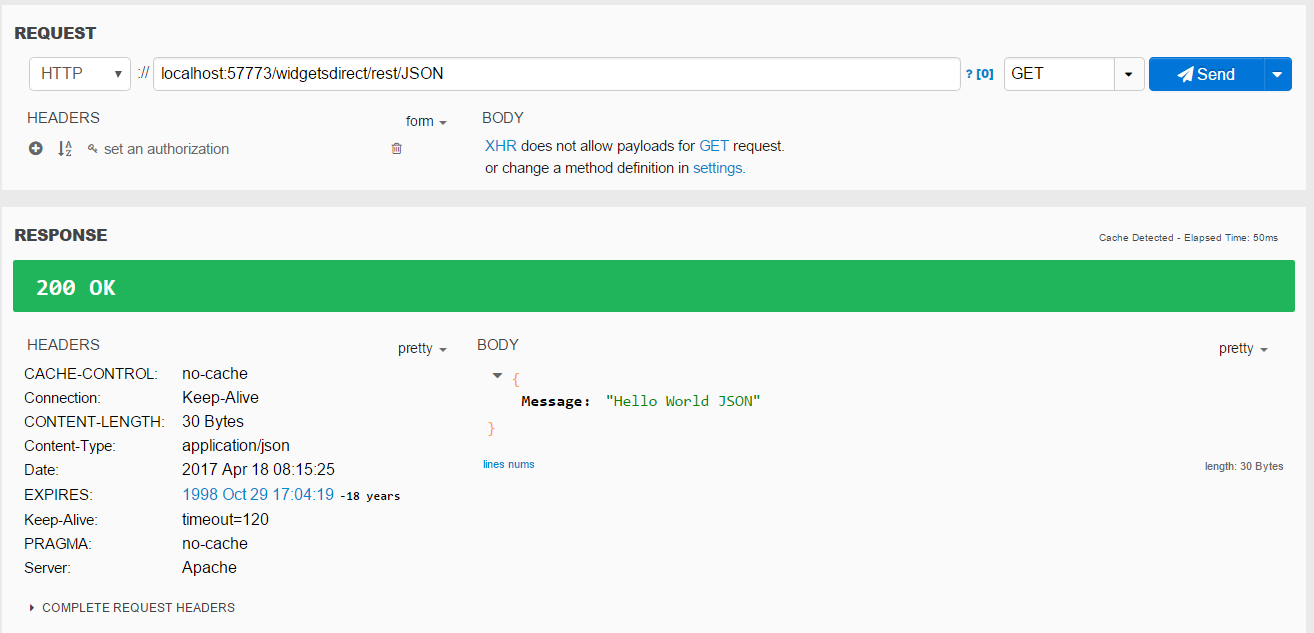
We now have a JSON string, but the pretty printing isn't applied. It's almost as if the client doesn't know this is supposed to be JSON. If we look at the Content-Type, the message is being returned as text/html. While some clients will be able to decipher the JSON content automatically, we should be clear that we are passing JSON as a response. Let's go back to our class, and add the Content-Type to our %response. We will also change our message to a more appropriate Welcome for Widgets Direct
If we now reload our request, we will see properly pretty-printed JSON.
We are now serving JSON to our client. Let's reload our Welcome page to see if this has made any difference

There is a difference, but not exactly what we are wanting. We are now displaying the whole JSON object, as our controller is binding the entire data section to the $scope.message. We need to amend our controller to unpack the Message field correctly.

With our message now unpacked and set properly, we can refresh our page to get our new Welcome

Recap
In this lesson we:
- Learned not to send "Hello World" pages to our boss
- Reviewed our tooling
- Viewed our REST output in an HTML debugger
- Converted our REST service to output JSON correctly
- Updated our page controller to unpack our JSON response
In our next lesson we will:
- Add a JSON array to our service
- Add a repeating display of array elements to our page
This article is part of a multi-part series on using Angular on top of Caché REST services. The listing of the full series can be found at the Start Here page
Comments
Thanks for the information but I am facing some issues with the backend area.