SMART on FHIR JS Library and examples in iris-on-fhir
Introduction
In the first article, a simple tutorial helped you to set up your FHIRaaS deployment.
Now, let's move forward and introduce a JS library to access the FHIR resource.
In the end, two examples of usage of this library will be presented, exploring the Appointment FHIR resource type.
SMART on FHIR JavaScript Library
FHIR is a REST API, so you can use any HTTP client in order to use it. But, it’s always a good idea to have help.
Furthermore, there is a cool initiative called SMART which aims to provide standards for easy access to health data stored over health systems. This API relies on FHIR as its communication layer. This is called SMART on FHIR applications.
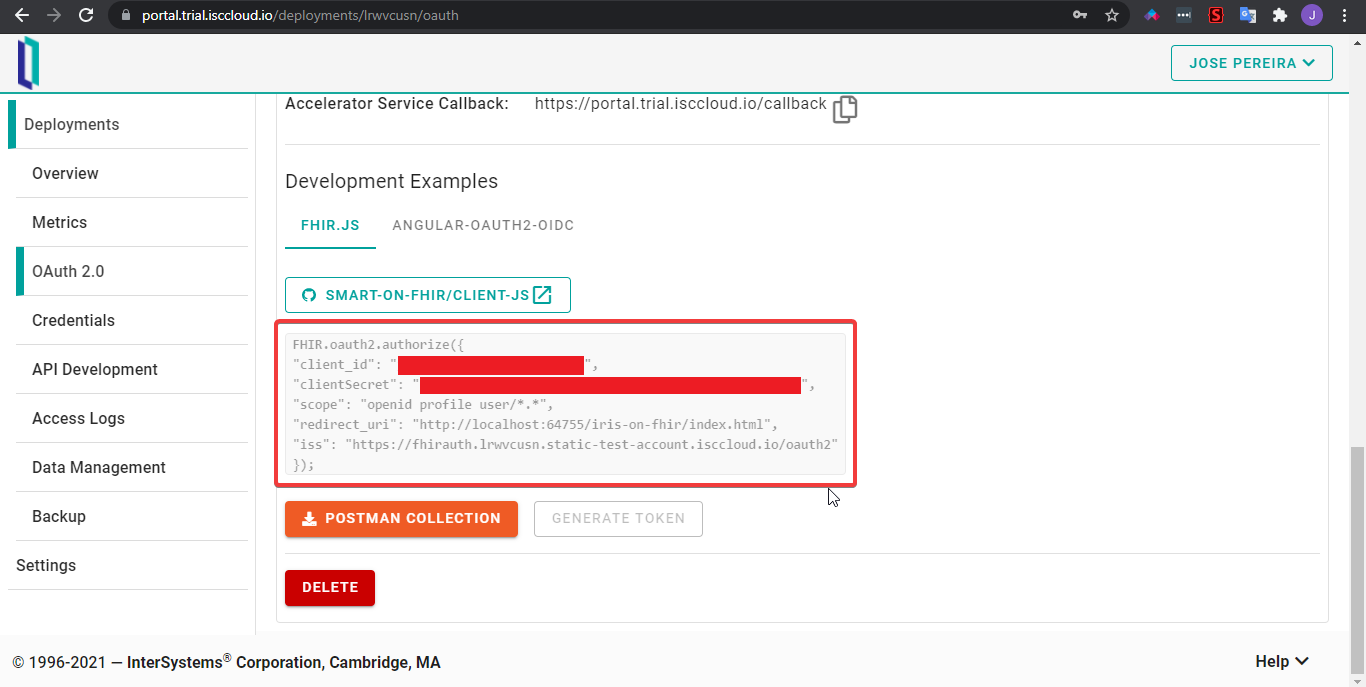
The SMART team has been developing an JS client library, which helps us to create applications compatible with SMART standards. For instance, in order to initiate the authorization code OAuth2 flow, you just need this code.
FHIR.oauth2.authorize({
"client_id": "<your-app-client-id>",
"clientSecret": "<your-app-client-secret>",
"scope": "openid profile user/*.*",
"redirect_uri": "http://localhost:64755/iris-on-fhir/index.html",
"iss": "https://fhirauth.lrwvcusn.static-test-account.isccloud.io/oauth2"
});
Note: this code is provided to you copy and paste in OAuth 2.0 tab:
In order to follow the SMART standard, you need to put this code in a page called launch.html. So, a SMART launcher will be able to find your application launcher.
Note that the method authorize() do a lot of work to us:
- Initializes the OAuth flow, taking the user to the IdP login page
- If login was successful, stores the authorization token
- Calls the refresh token URI, when token expires
- Once a token is retrieved, this methods uses it until its expiration, but you can be unaware of all these steps
Another cool feature of this library is that you just need to provide the FHIR resource, and it automatically selects API paths. For instance, in order to get patients, you just need to use the method request and specify the Patient resource type:
FHIR.oauth2.ready()
  .then(client => client.request("Patient/1223"))
  .then(resource => console.log(resource))
  .catch(console.error);
This command retrieves a resource of Patient type. So if you modifies this resource, you can edit it or even create another one based on this patient, by methods update and edit, respectively:
// saves changes in patient resource
FHIR.oauth2.ready()
  .then(client => client.update(resource))
  .then(() => console.log('patient updated'))
  .catch(console.error);

// creates a new patient resource
FHIR.oauth2.ready()
  .then(client => client.create(resource))
  .then(() => console.log('patient created'))
  .catch(console.error);
Note that you didn’t specify any FHIR API path.This because the library resolves the correct API path by the resource’s type.
Finally, to delete a resource:
FHIR.oauth2.ready()
  .then(client => client.delete(`Patient/1223`))
  .then(() => console.log('patient deleted'))
  .catch(console.error);
FHIR Appointment resource
In order to show the use of another resource, let’s create a simple appointments application by handling the Appointment FHIR resource.
Please, note that this is a very simple use case of this resource, using just a few of its properties. Furthermore, this resource is related to other ones, which are not covered here. If you’d like to know more about these resources and the workflow among them, you must refer to the HL7 FHIR specification.
First, a template object is grabbed from API Development for Appointment resource. This object is used to provide a prototype for creation and editing of appointments.
function getAppointmentTemplate() {
    return {
        "resourceType": "Appointment",
        "id": "examplereq",
...
    };
}
Then, a function to change the prototype is created. This function receives the Appointment resource prototype and an instance of a calendar event. This event object contains properties filled by the user through a calendar component, which will be input to the resource prototype.
function setEventDataToResoruce(resource, eventData) {
    if (eventData.id) {
        resource.id = eventData.id;
    }

    const patient = getSelectedPatientObject();
    resource.participant[0].actor.reference = `Patient/${patient.id}`;
    resource.participant[0].actor.display = patient.name[0].given[0];
    resource.description = eventData.title;
    resource.comment = eventData.extendedProps.description;
    if (!resource.comment) {
        delete resource.comment;
    }

    if (eventData.allDay) {
        eventData.start = eventData.start.split(" ")[0];
        eventData.end = eventData.end.split(" ")[0];
    }

    const hasTime = {
        start: eventData.start.indexOf(" ") > -1,
        end: eventData.end.indexOf(" ") > -1
    }
    if (hasTime.start || hasTime.end) {
        resource.requestedPeriod[0].start = new Date(eventData.start).toISOString();
        resource.requestedPeriod[0].end = new Date(eventData.end).toISOString();
    } else {
        resource.requestedPeriod[0].start = eventData.start;
        resource.requestedPeriod[0].end = eventData.end;
    }

    return resource;
}
By these two functions, we can create and fill properly an Appointment resource. Now, we must use SMART library to do the CRUD operations over this resource, finalizing our simple appointment application:
function getAppointments(client) {
    return client.request(`Appointment`);
}

function createAppointment(eventData) {
    const resource = setEventDataToResoruce(
        getAppointmentTemplate(), eventData
    );
    return getFHIRClient()
        .then(client => {
            return client.create(resource);
        });
}

function updateAppointment(eventData) {
    const resource = setEventDataToResoruce(
        getAppointmentTemplate(), eventData
    );
    return getFHIRClient()
        .then(client => {
            return client.update(resource);
        });
}

function deleteAppointment(id) {
    return getFHIRClient()
        .then(client => {
            return client.delete(`Appointment/${id}`);
        });
}
Here is a screencast of the application running:
Remember, the code exposed here is just the highlights to understand the application. But, if you'd like more details, please, check out the source code.
Telegram bot
As a last demonstration of what cool things you can do with FHIRaaS, I’d like to show a very simple Telegram bot.
I based this feature fully in works of Nikolay Soloviev and Sergey Mikhailenko. In the Nikolay's article you can checkout how to create the bot in Telegram. Also check out Sergey Mikhailenko application in order to get more information on Telegram bots.
As the hard work was already done by Nikolay and Serguey, I just added an extra layer of code. This layer grabs the patient’s identifier and the appointment date and time, from Telegram users in a simple chat interaction with no NLP features. After grabbing such information, a FHIRaaS endpoint is called to post a new appointment.
Here a screencast of the bot in action:
If you'd like more detail on implementation, please check out the application code.
Conclusion
In this article we did an overview of the SMART on FHIR JavaScript Library library and show how to use it on two examples based in the Appointment FHIR resource type.
Next article, we'll going more deep in the other features of iris-on-fhir application.