REST API for Security Package
REST API for Security Package
Hi community,
In this article, we will learn how to set up a REST API for the IRIS Security Package. We will be able to create users, roles, add applications, etc... by simple HTTP requests as well as generate a client application in ObjectScript.
Requirements
We need :
- An IRIS instance (installation kit or docker).
- ObjectScript package manager (ZPM).
- (Optional) A second IRIS instance to generate an ObjectScript client.
We will use a set of existing applications and libraries on OpenExchange. The package manager (ZPM) will make their installations much easier. If you don't have ZPM on your instance, you can easily install it by copying this line into an IRIS terminal:
set $namespace="%SYS" do ##class(Security.SSLConfigs).Create("ssl") set r=##class(%Net.HttpRequest).%New(),r.Server="pm.community.intersystems.com",r.SSLConfiguration="ssl" do r.Get("/packages/zpm/latest/installer"),$system.OBJ.LoadStream(r.HttpResponse.Data,"c")
Create the web application
A REST service dedicated to the package is available starting from version 1.4.0 of the Config-API application. We will simply install this application via the ZPM command:
zpm "install config-api"
By default, installing Config-API does not expose the REST services so we need to create the web application "/config-api". A ready-to-use script is available to avoid manual intervention in the management portal:
Do ##class(Api.Config.Developers.Install).installMainRESTApp()
The REST services of the security package are now available via the path "/config-api/security/".
API security
Now when the "/config-api" web application is created, you can view the details in the management portal.
![webapp][webapp]
By default, the application will only be accessible by login and password (basic authentication) provided that the user has the %Admin_Secure resource.
Of course, this is not enough. Requests must use the HTTPS protocol, and communications between the WebGateway and the IRIS instance must be encrypted. Using an API manager (IAM) might be beneficial. In that way, you can have smoother access control and, for example, accept HTTP requests from certain IP addresses only. We won't go into details of how to configure this, as it is beyond the scope of this article. However, you can find more articles on this subject in the community and in the official documentation. Yet, if you wish to leave me a comment, and I will provide you with a Docker-based repository with WebGateway HTTPS and SSL\TLS.
Custom OnPreDispatch (optional)
The REST dispatch class "Api.Config.REST.Main" has an implementation of the "OnPreDispatch" method. This method is called before the request processing. Just put any common code you want to run for each request here. Remember that if pContinue is set to 0, the request will not be processed.
Class Api.Config.REST.Main Extends %CSP.REST
{

....

ClassMethod OnPreDispatch(pUrl As %String, pMethod As %String, ByRef pContinue As %Boolean) As %Status
{
    Set sc = $$$OK, class = ##class(Api.Config.REST.OnPreDispatchAbstract).GetSubClass()

    Set pContinue = $$$YES

    Return:class="" sc

    Return $CLASSMETHOD(class, "OnPreDispatch", pUrl, pMethod, .pContinue)
}
}
The default implementation checks for the presence of a subclass of "Api.Config.REST.OnPreDispatchAbstract". If it exists, it will be executed. Since we have a hook to execute custom code, it can be an alternative to perform additional access checks or logging if you don't have an API manager.
Here is an example of an implementation that only logs incoming requests:
Class dc.sample.RestSecurity Extends Api.Config.REST.OnPreDispatchAbstract
{

ClassMethod OnPreDispatch(pUrl As %String, pMethod As %String, ByRef pContinue As %Boolean) As %Status
{
    Set sc = $$$OK

    /// Implement your custom access verifications here.

    Set key = $Increment(^RestSecurity.log)
    Set ^RestSecurity.log(key) = $ZDateTime($Horolog,3,1) _ " " _ pMethod _ " " _pUrl _ "( IP : " _ $Get(%request.CgiEnvs("REMOTE_ADDR")) _ ")"

    merge ^RestSecurity.log(key, "CgiEnvs") = %request.CgiEnvs
    merge ^RestSecurity.log(key, "Data") = %request.Data

    // Example to stop the execution :
    // Set %response.Status = "401 Unauthorized"
    // Set pContinue = $$$NO

    Quit sc
}
}
Testing the REST API
The API is provided with a specification (swagger 2.0) available at http://localhost:52773/config-api/security/ (adapt the port number if necessary). Therefore, we can easily generate a client application with, for example, the swagger-ui application available on OpenExchange.
Install swagger-ui:
zpm "install swagger-ui"
Now open the browser at the URL http://localhost:52773/csp/swagger-ui/index.html
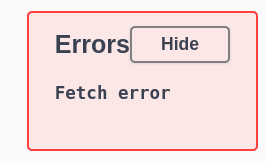
Once you open the page, you will most likely see an error
![swerr][swerr]
This error occurs because by default swagger-ui tries to retrieve a specification from a non-existent URL. To avoid this error, You can force swagger-ui to open by exploring the URL of our REST service:
Do ##class(Api.Config.Developers.Install).SetSwaggerUIDefaultPath("/config-api/security/")
Now refresh your browser. Log in with a user with the %Admin_secure resource.
![swspec][swspec]
At this stage, you can see on this interface that **C**reate **R**ead **U**pdate **D**elete operations are available for: users, roles, resources, SSL configuration, and web applications.
It's a bit different for services and system settings, where it can only be read (GET) and modified (PUT).
The interface is self-documented thanks to the rather detailed swagger specification:
![swuser][swuser]
It is not useful to describe here how to test each request because by clicking on POST /user, you can get a detailed description, a sample body for the request, and complete documentation of the model. In this article, we will only describe the particular case of SQL privileges.
Adding an SQL privilege
POST /sqlprivileges
Set SQL Privileges.
Here is an example of a body for adding the "select" privilege.
{
  "Grantable": "1",
  "Grantee": "MyRoleName",
  "Grantor": "_system",
  "Namespace": "USER",
  "Privilege": "s",
  "SQLObject": "1,schema_name.table_name"
}
Privilege can take the next values: s (select), i (insert), u (update), d (delete), r (reference), and e (execute).
SQLObject starts with "1," for tables, "3," for views, and "9," for stored procedures.
If you need to assign privileges to a large number of tables, It is not very convenient... In this case, it is better to use “(PUT) /sqlhelper”.
Deleting a privilege
DELETE /sqlprivileges/{id}
The deletion is done by the ID, which is composed of a namespace, SQLObject, privilege, grantee and grantor. The ID corresponding to the creation of our previous privilege is "USER||1,schema_name.table_name||s||MyRoleName||_system". Be careful with escaping special characters.
Adding privileges to all tables in a schema
PUT /sqlhelper
This service allows you to assign a set of privileges to all the tables of one or more schemas. Here is an example of a body:
{
  "Grantable": "1",
  "Grantee": "MyNewRole",
  "Grantor": "_system",
  "Namespace": "USER",
  "Table": {
    "Schemas": [
      "schema_name",
      "schema_name_2"
    ],
    "Privileges": [
      "S",
      "I",
      "U",
      "D"
    ]
  }
}
Generating an HTTP ObjectScript client
Swagger editor allows us to generate clients from a swagger specification in different languages, but unfortunately ObjectScript is not in the list. However, it’s possible to generate it using an application on the OpenExchange “OpenApi-client-gen”. Currently, it is only compatible with swagger 2.0 specifications.
Install openapi-client-gen:
zpm "install openapi-client-gen"
Generate the client application:
Set features("simpleHttpClientOnly") = 1
Set sc = ##class(dc.openapi.client.Spec).generateApp("IrisSecurity", "https://raw.githubusercontent.com/lscalese/iris-config-api/master/swagger-security.json", .features)
Write !,"Status : ",$SYSTEM.Status.GetOneErrorText(sc)
Below you can see an example of code allowing you to make an HTTP request to retrieve the list of web applications and display the result in the terminal:
Class iris.dc.sample.ObjectScriptRestClient
{

ClassMethod GetRequestObj() As %Net.HttpRequest
{
    Set httpRequest = ##class(%Net.HttpRequest).%New()
    Set httpRequest.Username = "_system"
    Set httpRequest.Password = "SYS"
    Set httpRequest.Server = "iris-security-rest-server"
    Set httpRequest.Port = 52773
    Set httpRequest.Https = 0
    Quit httpRequest
}

ClassMethod ExampleGetWebAppList() As %Status
{
    Set sc = $$$OK
    Set httpClient = ##class(IrisSecurity.HttpClient).%New()
    Set httpRequest = ..GetRequestObj()
    Do httpRequest.SetHeader("accept", "application/json")
    Set msg = ##class(IrisSecurity.msg.GetListOfWebAppsRequest).%New()
    Set sc = httpClient.GETGetListOfWebApps(msg,.response,.httpRequest,.httpresponse)
    Write !,"Status           : ",$SYSTEM.Status.GetOneErrorText(sc)
    Quit:$$$ISERR(sc) sc
    Write !,"Http Status Code : ",response.httpStatusCode
    Write !
    zw response

    If response.httpStatusCode = 200 {
        Set formatter=##class(%JSON.Formatter).%New()
        Do formatter.Format({}.%FromJSON(response.body))
    }

    Quit sc
}

}
GitHub
If you are a docker user, everything we have seen in this article is available on the following GitHub repository: https://github.com/lscalese/iris-sample-security-rest-api.
You just have to do this:
git clone https://github.com/lscalese/iris-sample-security-rest-api.git
cd iris-sample-security-rest-api
docker-compose up -d
You can now open your browser at the URL http://localhost:32773/swagger-ui/index.html to test the REST API directly.
It is also possible to test the generated ObjectScript client application by opening a terminal on the "iris-cli" service:
docker exec -it iris-security-rest-client iris session iris
Do ##class(iris.dc.sample.ObjectScriptRestClient).ExampleGetWebAppList()
You should see the list of web applications displayed in JSON format.
[webapp]: https://github.com/lscalese/iris-sample-security-rest-api/raw/master/img/mp_webapp.png [swerr]: https://raw.githubusercontent.com/lscalese/iris-sample-security-rest-api/master/img/err_swagger_ui.png [swspec]: https://github.com/lscalese/iris-sample-security-rest-api/raw/master/img/sw_spec.png [swuser]: https://github.com/lscalese/iris-sample-security-rest-api/raw/master/img/sw_post_user.png
Comments
@Lorenzo Scalese thank you for implementing the idea REST API for Security Package from the Ideas Portal. 👏