Firebase Module: Unleashing the Power of Firebase Realtime Database with InterSystems IRIS
Hello, community!
I have been tinkering around with Flutter lately and, as a result, came up with some apps that can use Firebase as a database. When I realized there was an available Python library, I felt the urge to create something for InterSystems IRIS that would communicate with the Firebase RealTime Database and perform CRUD operations. Later, I stumbled upon the following idea from Evgeny in the portal:
https://ideas.intersystems.com/ideas/DP-I-146
That is when I got down to work!
Are you curious to see my findings? Then buckle up because we’re about to take off!
Yet, let’s take it easy, step by step.
Step 1 - What in the nerdland is Firebase?
Well, Firebase Realtime Database (henceforth RTDB) is a cloud-hosted, NoSQL database service that enables developers to store and synchronize data in real time across users. It provides all connected devices with automatic updates when changes occur within the database. It is perfect for real time applications since alterations made by one user get instantly reflected on other users' devices.
Are you still with me on this wild ride? Alright, let the adventure begin then!
Step 2 - Let’s whip up our app in Firebase! 🚀🔥
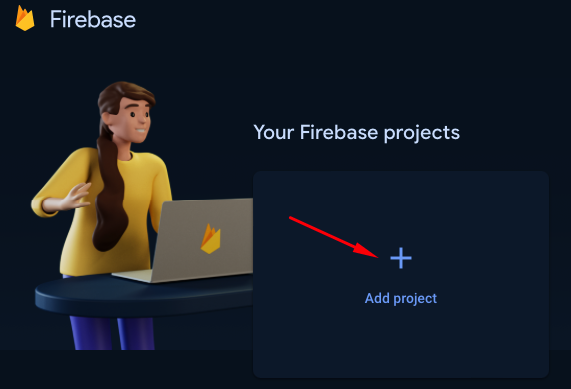
Go to https://console.firebase.google.com/ and log in or register. You will need to have a Google account to do it.
Once inside, press the “Add project” button:
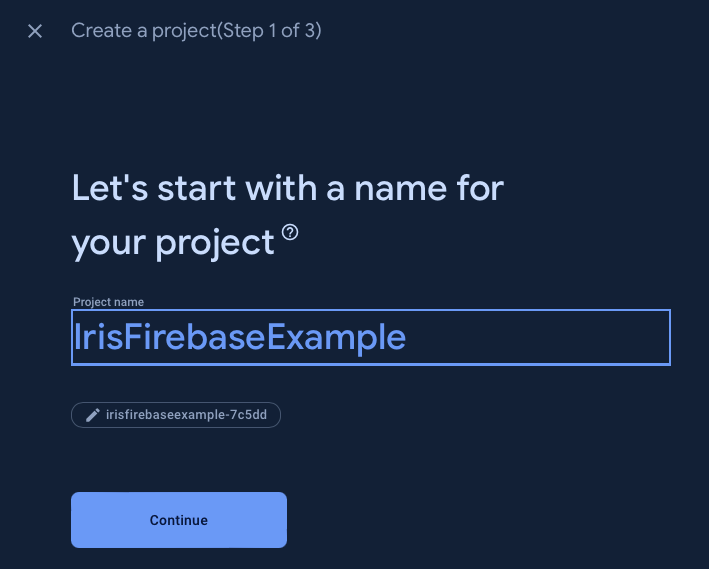
Let’s give our project a name:
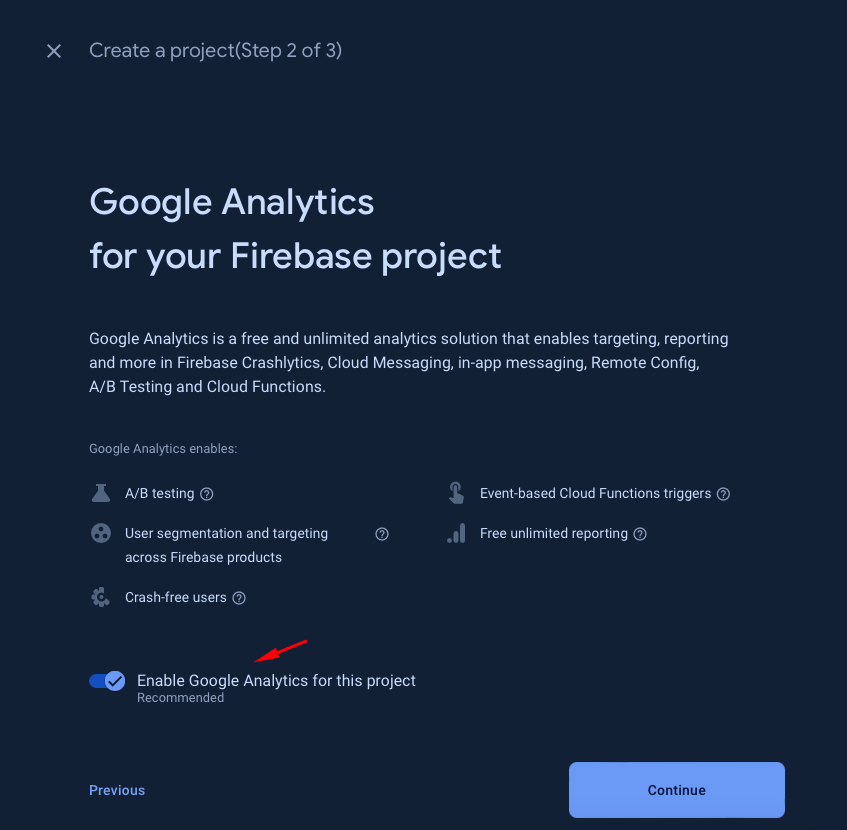
Now, you can decide whether or not you want to enable Google Analytics (I disabled it).
Wait for a few seconds until the project gets created:
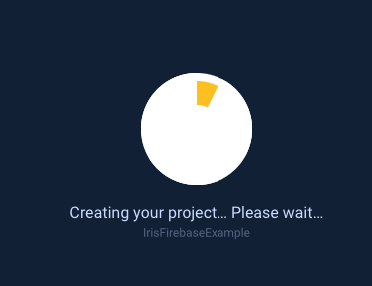
After a short wait, it will be completed.
Congrats!! Your Firebase Application is finally alive and kicking!!
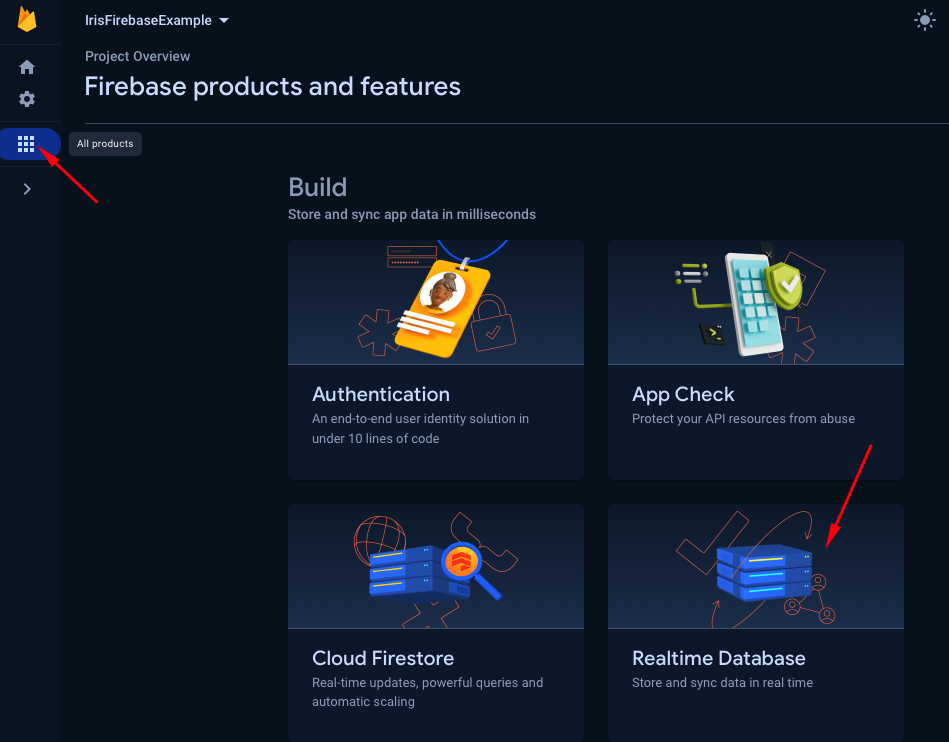
Step 3 - Creating our Realtime Database:
At this point, click “Products” and then “Realtime Database”.
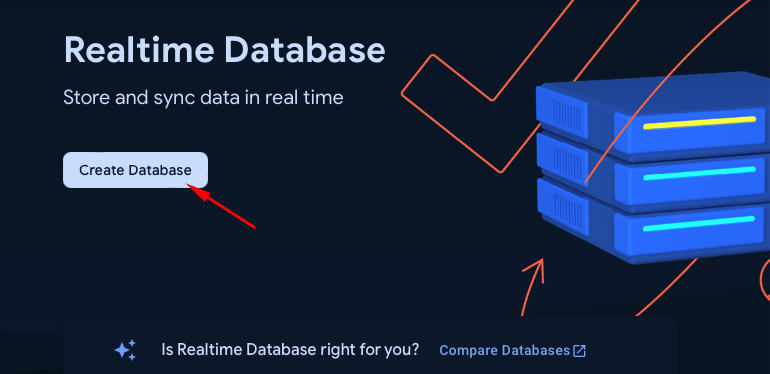
Ultimately, click “Create Database”.
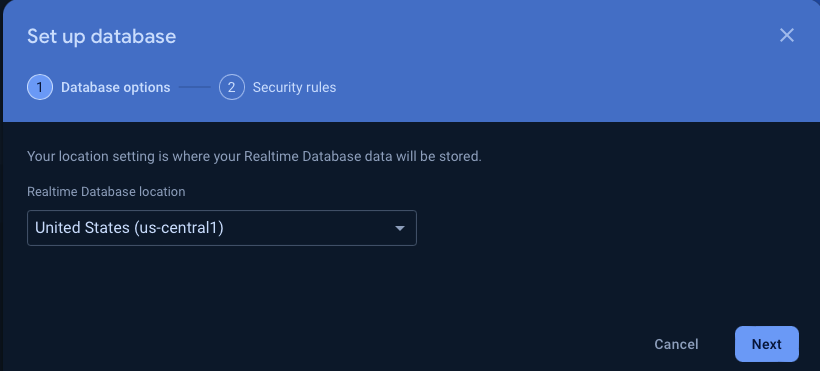
Select the location:
Pick the rules. (There are two options: Locked mode, where only authenticated users can make operations, or Test mode, where anyone who knows the URL of the database can perform CRUD operations.)
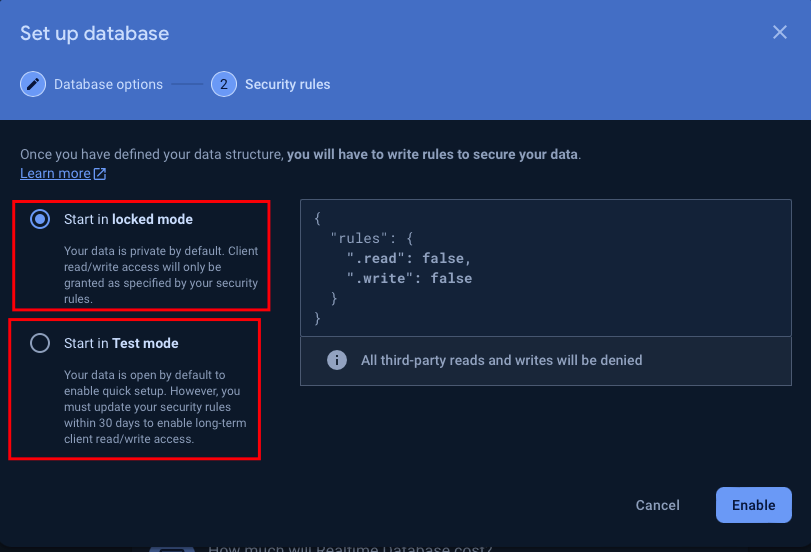
In this case, we will opt for the locked mode. So, make your choice and press Enable. Wait for a few seconds for the database to be ready.
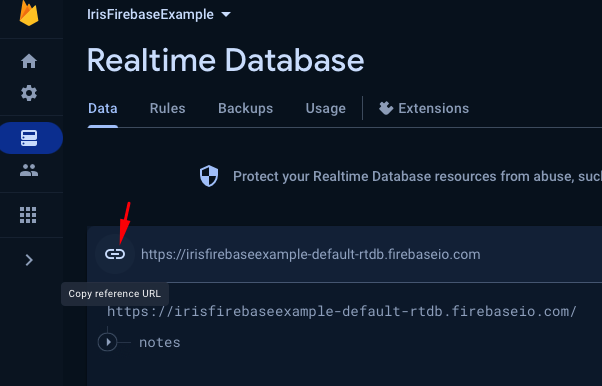
Once the database is good to go, copy the URL and save it for later.
It's time to set up the rules to admit only authorized connections:
These are my rules:
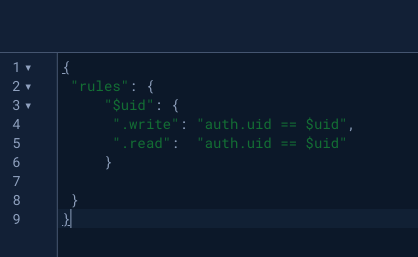
With those rules, you will keep unauthorized users at bay
The code version would like like the following:
{
"rules": {
"$uid": {
".write": "auth.uid == $uid",
".read": "auth.uid == $uid"
}
}
}
We’re almost done here! Only one last step is left in Firebase!
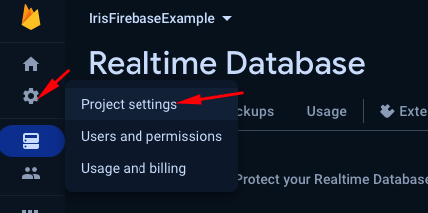
Step 4 - Generating our Certification file:
Go to the Project Settings section:
Then proceed to the tab Service accounts, select Python, and press “Generate new private key”.
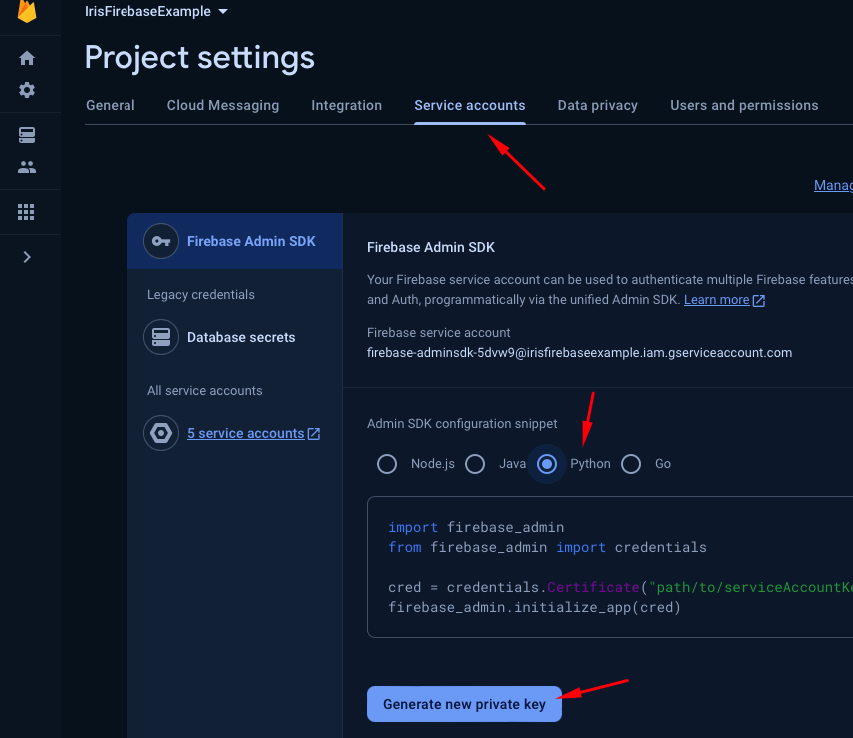
Save the file because we will need it later.
Step 5 - Clone the repository or install IrisFirebase with ZPM:
Repository: https://github.com/daniel-aguilar-garcia/irisfirebase
ZPM package: iris-firebase
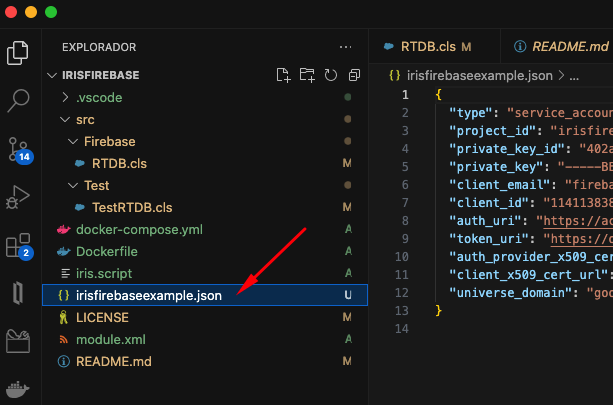
Step 6 - Let’s configure Firebase on InterSystems:
First, copy your credential file that you downloaded from Firebase in Step 4:
If you are using the Docker version, copy the file in the path of the project and update the file name in the Dockerfile file:
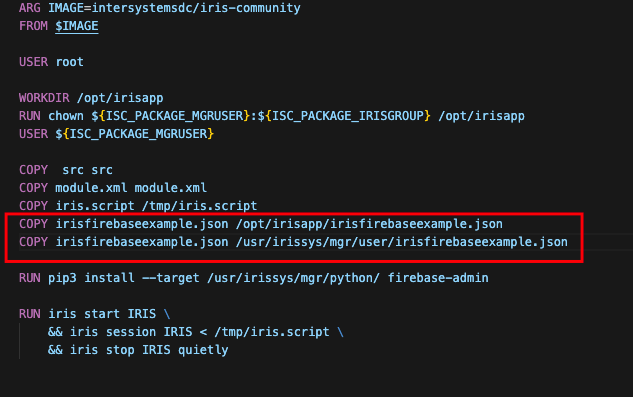
Once you have performed the steps mentioned above, start the Docker file!
On the other hand, if all you want to do is to add the module to your server, make sure you have copied the credential file to a path that the IRIS server can access.
Step 7 - Let the magic flow!
Now, we are ready to set up the connection with our Firebase App. Open a Terminal and run the following command:
do ##class(Firebase.RTDB).ConfigApp(appName,url,credentialFile)
Parameters explanation:
appName: any random name that popped into your head. (Remember not to forget it) xD
URL: your RTDB URL (the one you copied in step 3)
credentialFile: your credential file name, including the extension .json
Example:
do ##class(Firebase.RTDB).ConfigApp("myApp","https://irisfirebaseexample-default-rtdb.firebaseio.com/","irisfirebaseexample.json")
Congratulations! That is a wrap! I hope you enjoyed it. Catch you up in my next article!
What?.. Not enough?..
Just kidding! Let’s get down to the fun stuff!
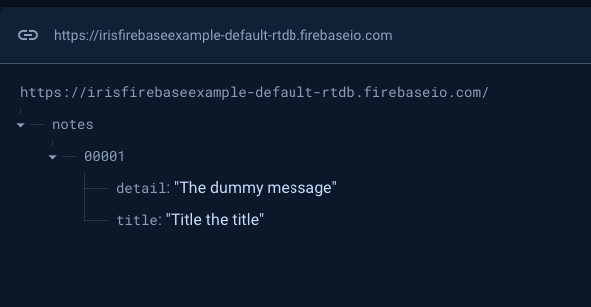
Step 8 - Creating our first MegaWonderMagic register:
In order to create a new register, you will only need 4 following things:
- Your appName
- The data you want to save (It is a JSON object)
- The table (node) name
- The ID
Example:
ClassMethod TestCreate()
{
Set objTest = {}
Set objTest.title = "Title the title"
Set objTest.detail = "The dummy message"
Set id = "00001"
Set id=##class(Firebase.RTDB).Create("appNotas",objTest,"notes",id)
U 0 w id,!
Q id
}
The result should looks like this:
Have you noticed that? There is something familiar… But… What exactly?...
What would happen if we presented the information as shown below?
^notes(“00001”,”detail”)=”The dummy message”
^notes(“00001”,”title”)=”Title the title”
Exactly! It is a global!
As you can see, it seems that the whole world has finally realized that the relational table system has become obsolete, and now everyone is leaning towards an approach similar to our beloved Globals ;-)
Step 9 - Reading registers:
We can read a single register or a complete node in the following way:
Reading a single register would look like this:
It’s easy. You only need to call the Read method, indicating the application, table (node), and ID.
ClassMethod TestRead()
{
Set id = "00001" //..TestCreate()
Set response=##class(Firebase.RTDB).Read("appNotas","notes",id)
U 0 w response.title,!
U 0 w response.detail,!
}
Check out the result below:

Now let’s add some extra registers:
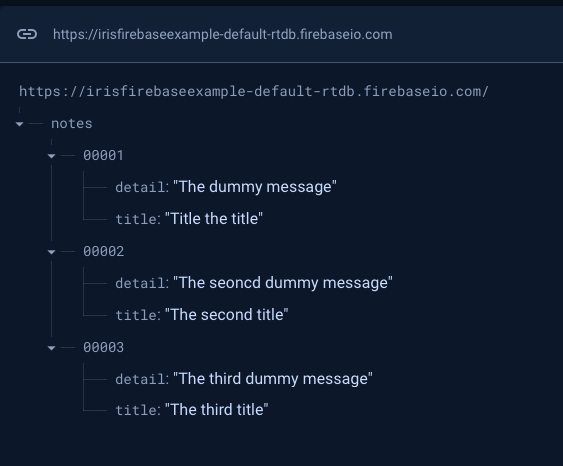
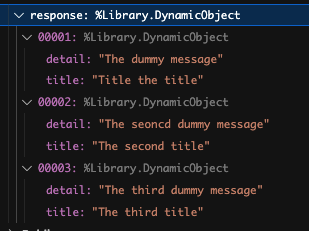
It is time to read the node notes to get all the details:
ClassMethod TestReadFullTable()
{
Set response = {}
Set response=##class(Firebase.RTDB).ReadTable("appNotas","notes")
U 0 w response.%ToJSON(),!
}
Here comes the result:

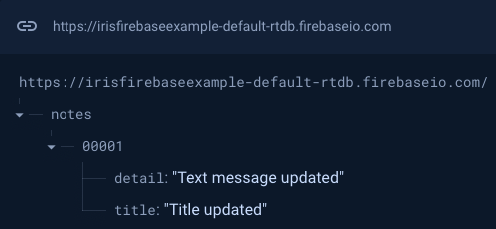
Step 10 - Updating data:
Updating a register is a piece of cake!, Simply pass the app name, table name (node), ID, and data object
Example:
ClassMethod TestUpdate()
{
Set id = "00001" //..TestCreate()
Set objTest = {}
Set objTest.title = "Title updated"
Set objTest.detail = "Text message updated"
Set id=##class(Firebase.RTDB).Update("appNotas","notes",id,.objTest)
U 0 w id,!
}
Take a look at the miraculous result:
Great!. Now let’s give those silly grades what they deserve!
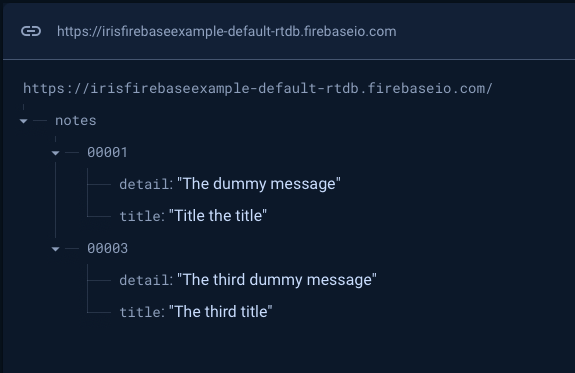
Step 11 - Deleting registers:
We are going to delete the register with the ID “00002”
ClassMethod TestDelete()
{
Set id = "00002" //..TestCreate()
Set res=##class(Firebase.RTDB).Delete("appNotas","notes",id)
U 0 w res,!
}
Ready! Now the silly note “00002” is sleeping at the bottom of the ocean.
If you wish to send the whole node to uncle Calamardo, you can omit the ID parameter:
ClassMethod TestDeleteNode()
{
Set res=##class(Firebase.RTDB).Delete("appNotas","notes")
U 0 w res,!
}
Goodbye, notes!

To sum up:
Create register:
##class(Firebase.RTDB).Create("appName",objData,"tableName",id)
Update register:
##class(Firebase.RTDB).Update("appName","tableName",id,.objTest)
Read a single register:
##class(Firebase.RTDB).Read("appName","tableName",id)
Read the whole node:
##class(Firebase.RTDB).ReadTable("appName","tableName")
Delete a single register:
##class(Firebase.RTDB).Delete("appName","tableName",id)
Delete the whole node:
##class(Firebase.RTDB).Delete("appName","tableName")
That is all, folks! (for now)
Other interesting Firebase modules could be leveraged by extending this module, including the following:
- Authentication
- Cloud Firestone
- Storage
- Cloud Messaging
- …
Are you interested in any of them? Please let me know your opinion in the comments (they are always welcome).
Did you enjoy the article? Then give me a thumbs-up!! And remember, I will clear all your doubts to the best I can if you write them in the comment section.
Thanks for reading!