clinFHIR for developers
This article is intended to describe how the clinFHIR application can be used to help developers both understand FHIR and to develop applications that utilize FHIR artifacts. It’s not intended to be an introduction to FHIR, but rather describe how clinFHIR can help on the learning / development journey. It’ll be reasonably high level - there is other information available, especially on my personal blog.
I do recommend that everyone who is working with FHIR join the FHIR chat - it is a great way to ask questions of the FHIR community - most of the experts hang out there. And, there is also a clinfhir stream for app specific questions.
First a bit of background.
When we were first developing FHIR over a decade ago, it became apparent that there was a need to be able to visualize what FHIR was all about. Just what are resources, how can they be used to represent a specific usecase, how does terminology work and so forth. This was especially needed for the clinical audience, hence the name clinFHIR - short for ‘clinical FHIR’.
Since then clinFHIR has evolved over multiple versions of FHIR with modules being added and dropped over time. This does mean that the User Interfaces are not always consistent between modules - but hopefully still straightforward to use.
I should also point out that clinfhir doesn’t currently use SSL. It is on the roadmap, but there are a few issues to work through. The consequence of this is that if you enter ‘clinfhir.com' into the browser, it may not find it. You sometimes have to specify http://clinfhir.com/ .
As stated above, there are a number of different clinfhir modules. We’ll talk about a few of them:
- The Patient viewer for looking at an individual patients records
- Server Query which makes RESTful API calls against a FHIR server displaying the result in different formats
- Bundle Visualizer which will display the contents of a bundle
- Graph Builder which allows you to build graphs of interconnected resources.
When you first load clinfhir you will see the following load screen from which you can select the module you wish to use.
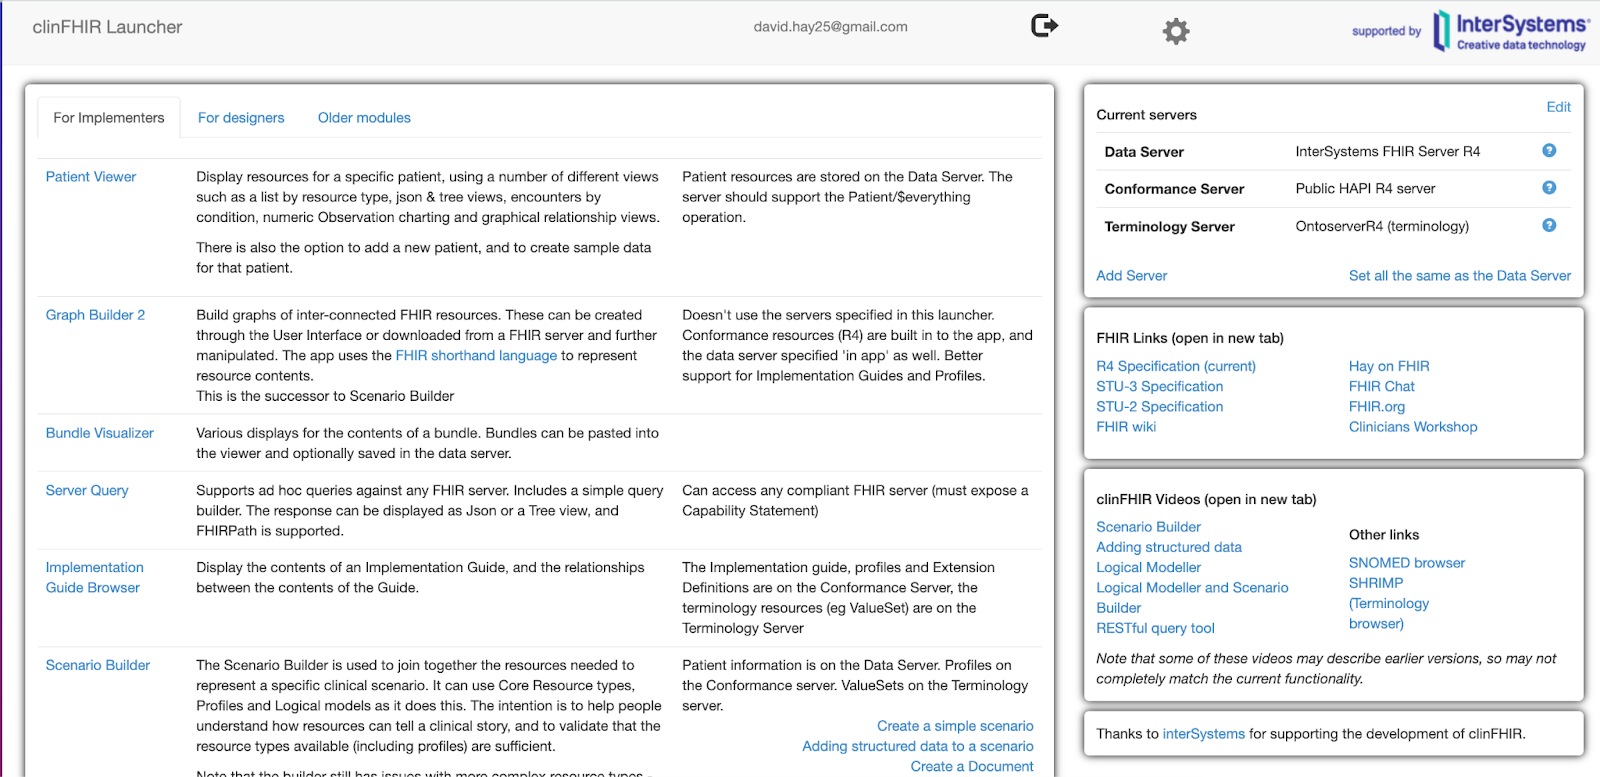
In the upper right are the servers that clinfhir will access by default. Generally, these can be left at the default values as most modules will now allow you to select a server if different.
The Patient Visualizer is the first link. Selecting that will open the module in a separate tab. Click the ‘Select Patient’ button in the navbar at the top, then enter the patients name (I used ‘hay’) and finally select the patient from the list that is displayed. Here’s the details for the selected patient.
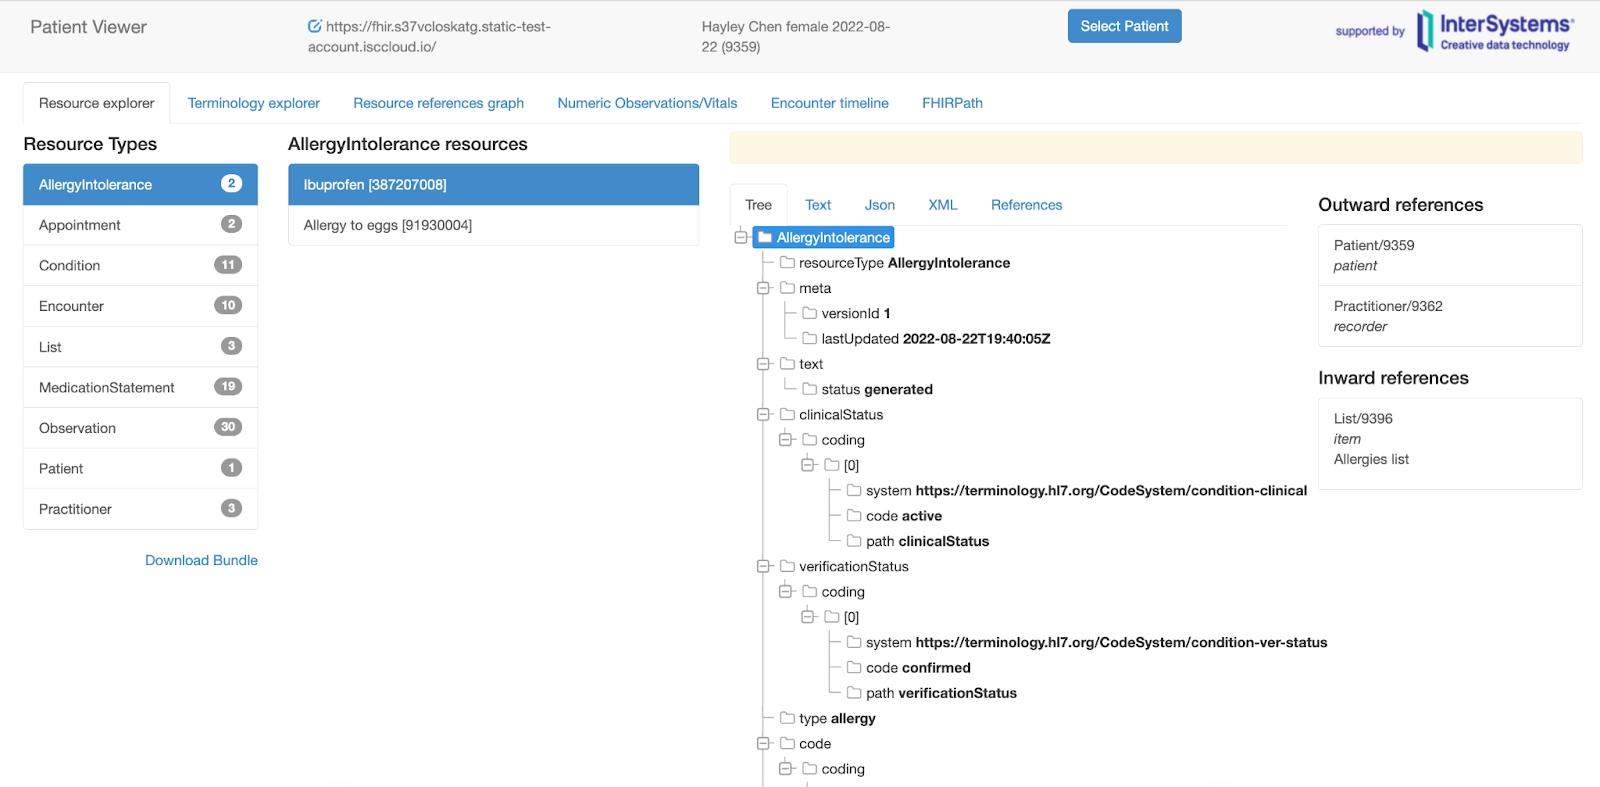
There are a number of different tabs - the first being the most useful. It lists the different resource types to the left. Selecting a type shows the instances in the middle, and selecting an instance will display different renderings of the instance to the right.
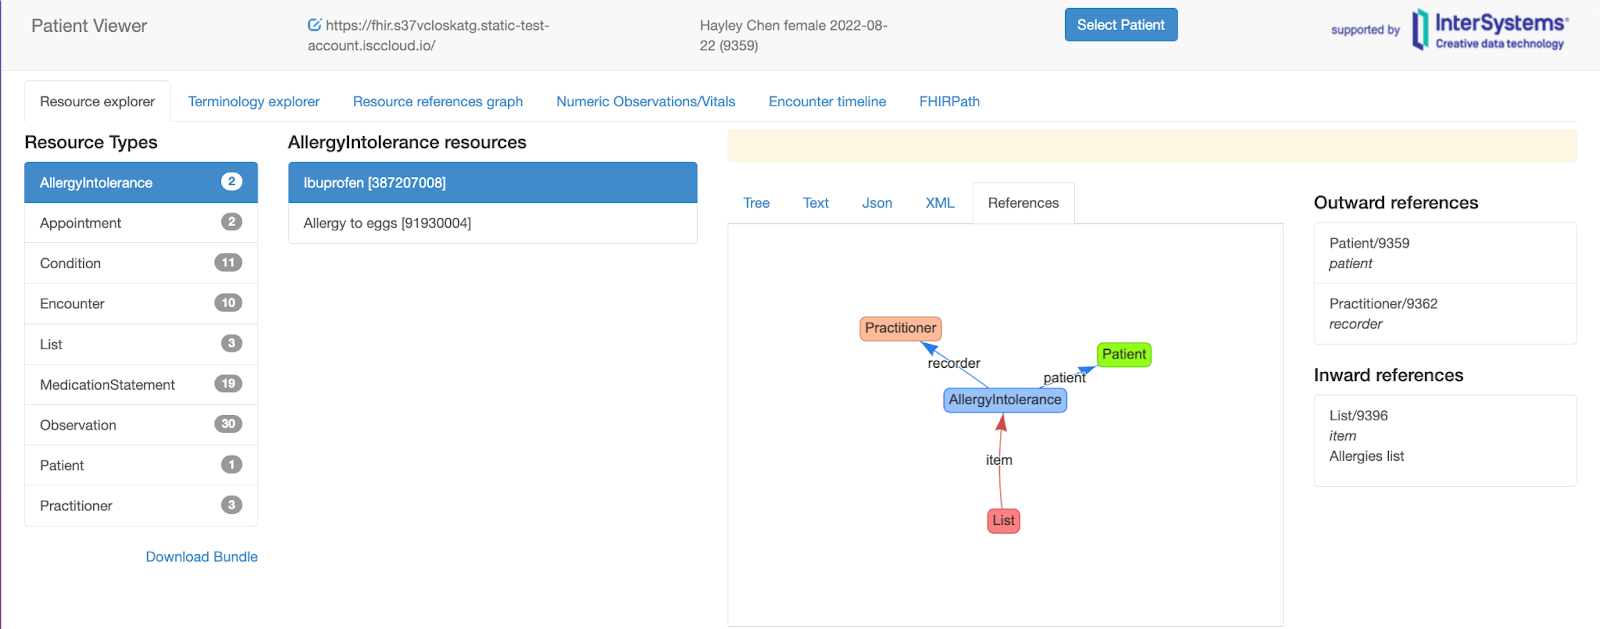
This screen show shows the references of the selected resource - this inter-resource referencing is a key aspect of FHIR.
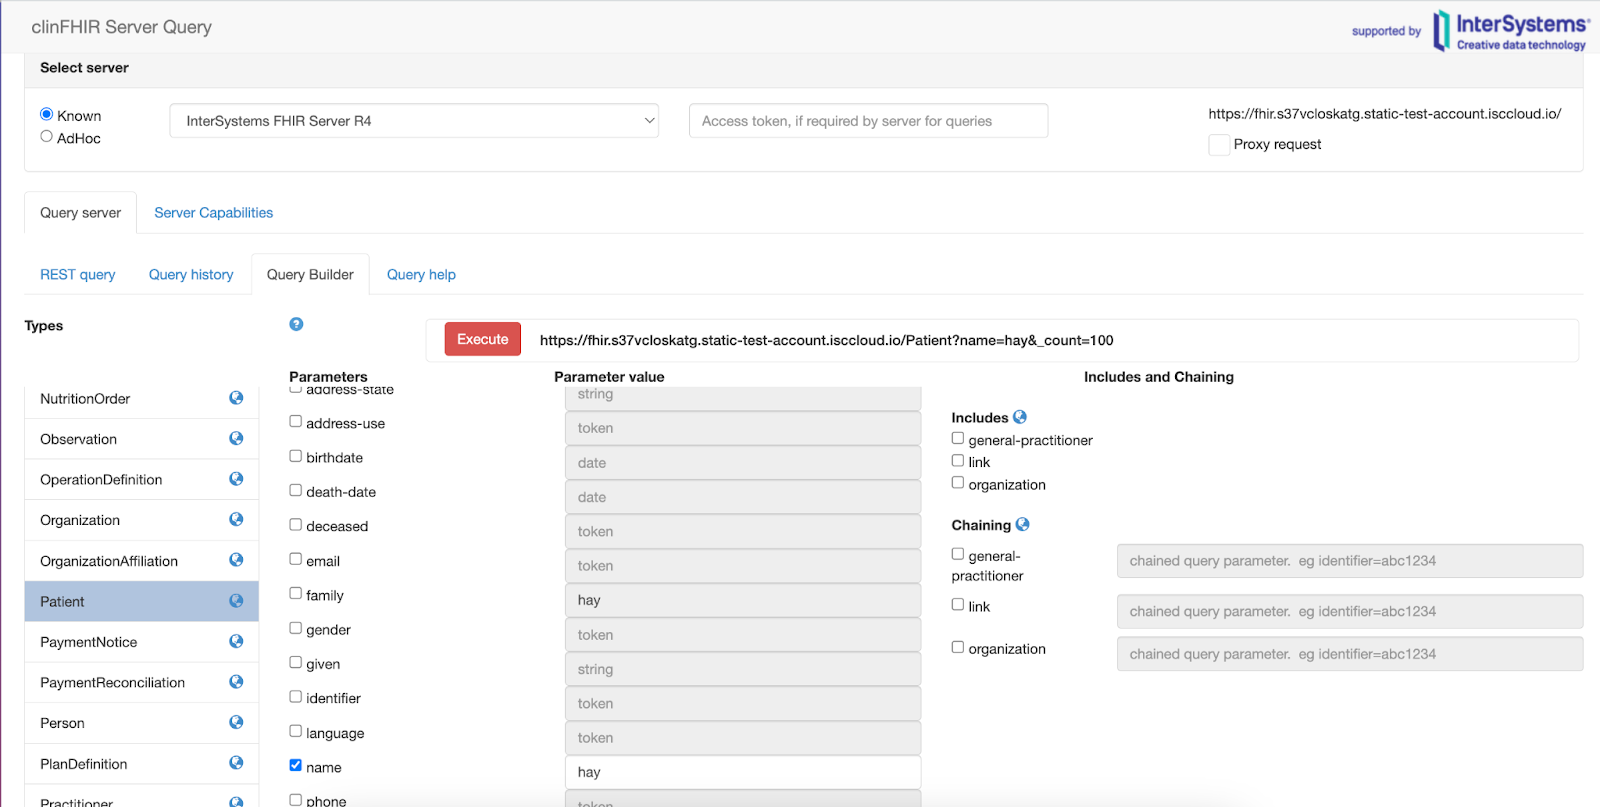
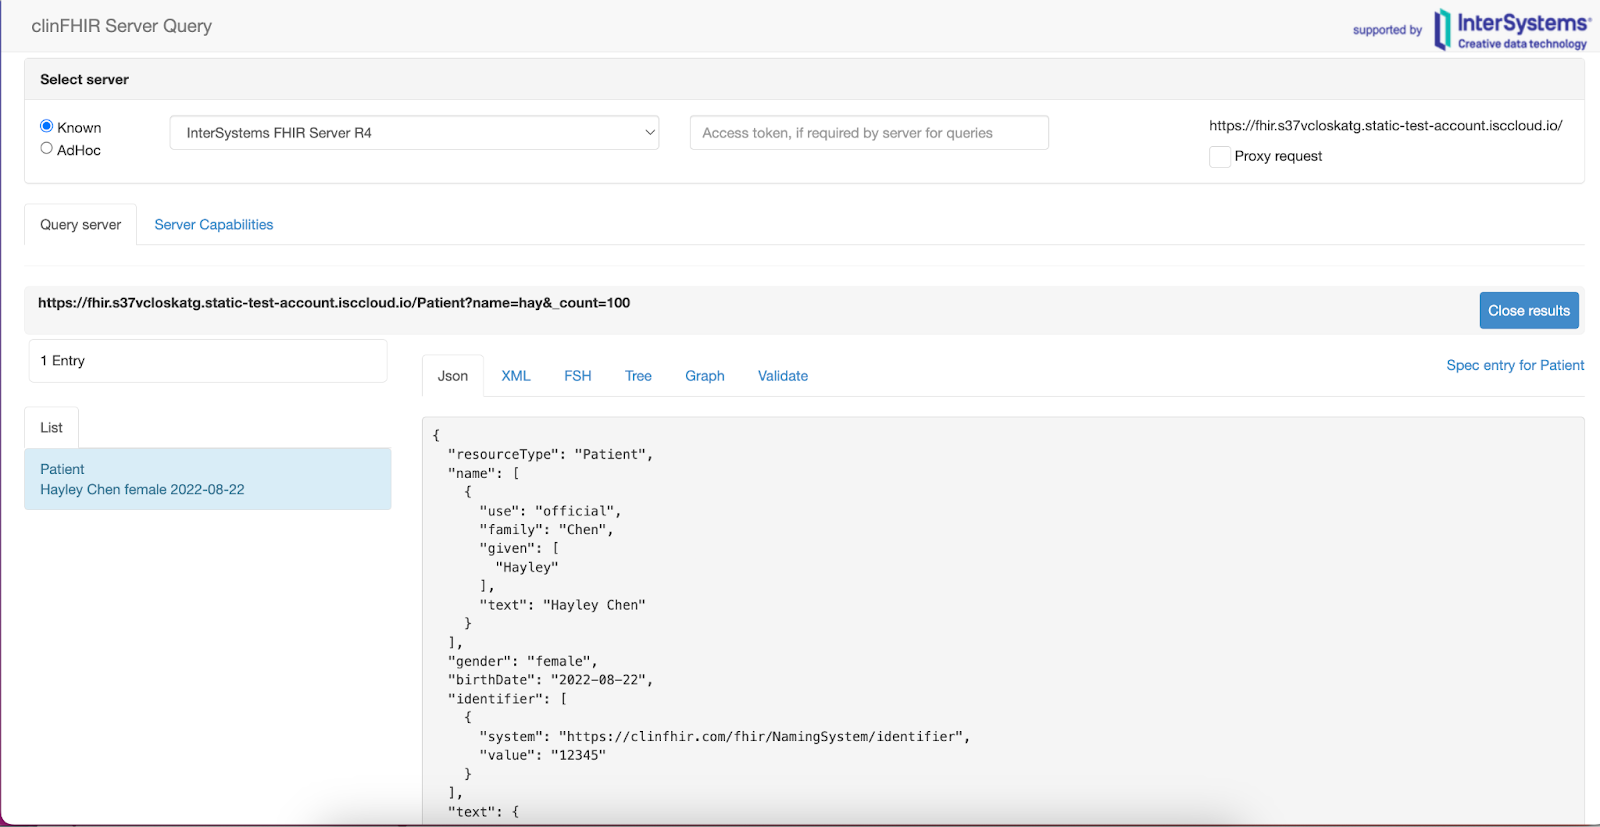
The Server Query is really a FHIR specific version of a REST client like POSTMan. When a server is selected, the CapabilitityStatement is retrieved from the server (using the [host]/metadata query) and this is used to render a UI that allows you to assemble a query using features that the server supports. This includes features such as includes and chaining.
The search parameters are defined for each resource in the spec and presented in the UI if the server supports it. (Search parameters are optional)
In the screenshot below I’m using the ‘name’ query to retrieve all patients who have ‘hay’ anywhere in their name
Executing the query will return the matching patients, and they can be viewed in different formats as shown in the screenshot below:
The Bundle Visualizer takes a FHIR bundle and displays the contents. There are a number of ways to use it, but the simplest is to paste in a bundle (json preferred) on the second tab.
The following screenshot shows an example bundle with one of the resources in that bundle selected. Note that it’s not particularly good with large graphs - the graph visualizer can take a while to render.

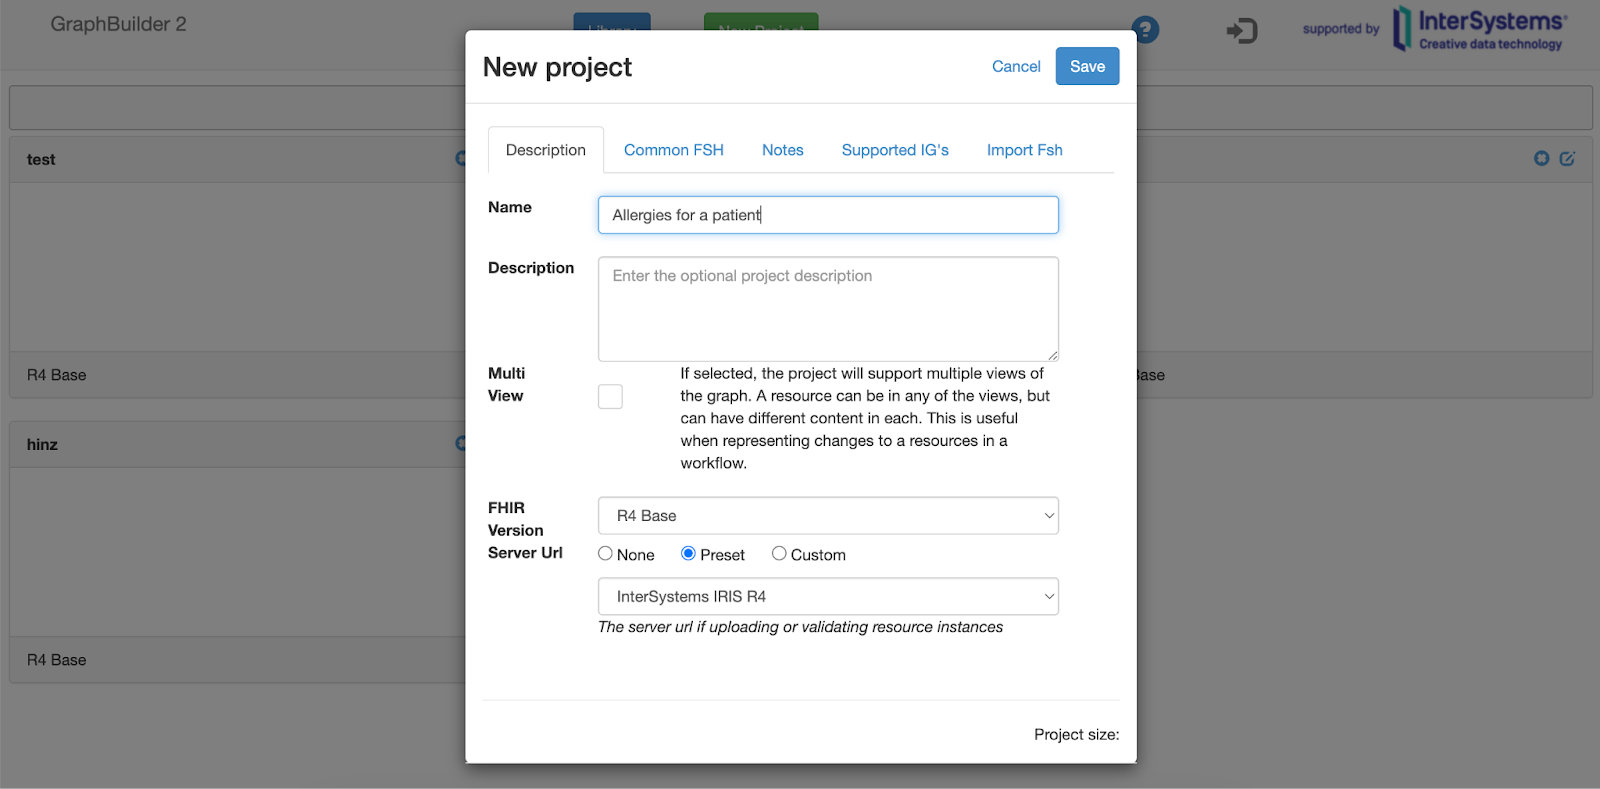
The Graph Builder is particularly helpful when deciding what resources are needed to describe some specific scenario. It’s actually quite a complex tool - there are a number of posts on my blog about it.
The overall flow is:
- Create a new project. You can select the FHIR version here, and a FHIR server if you intend to upload resources to it.
- Add resources to the graph. It’s best to start with the Patient, as subsequent resources will be automatically linked to the Patient is appropriate.
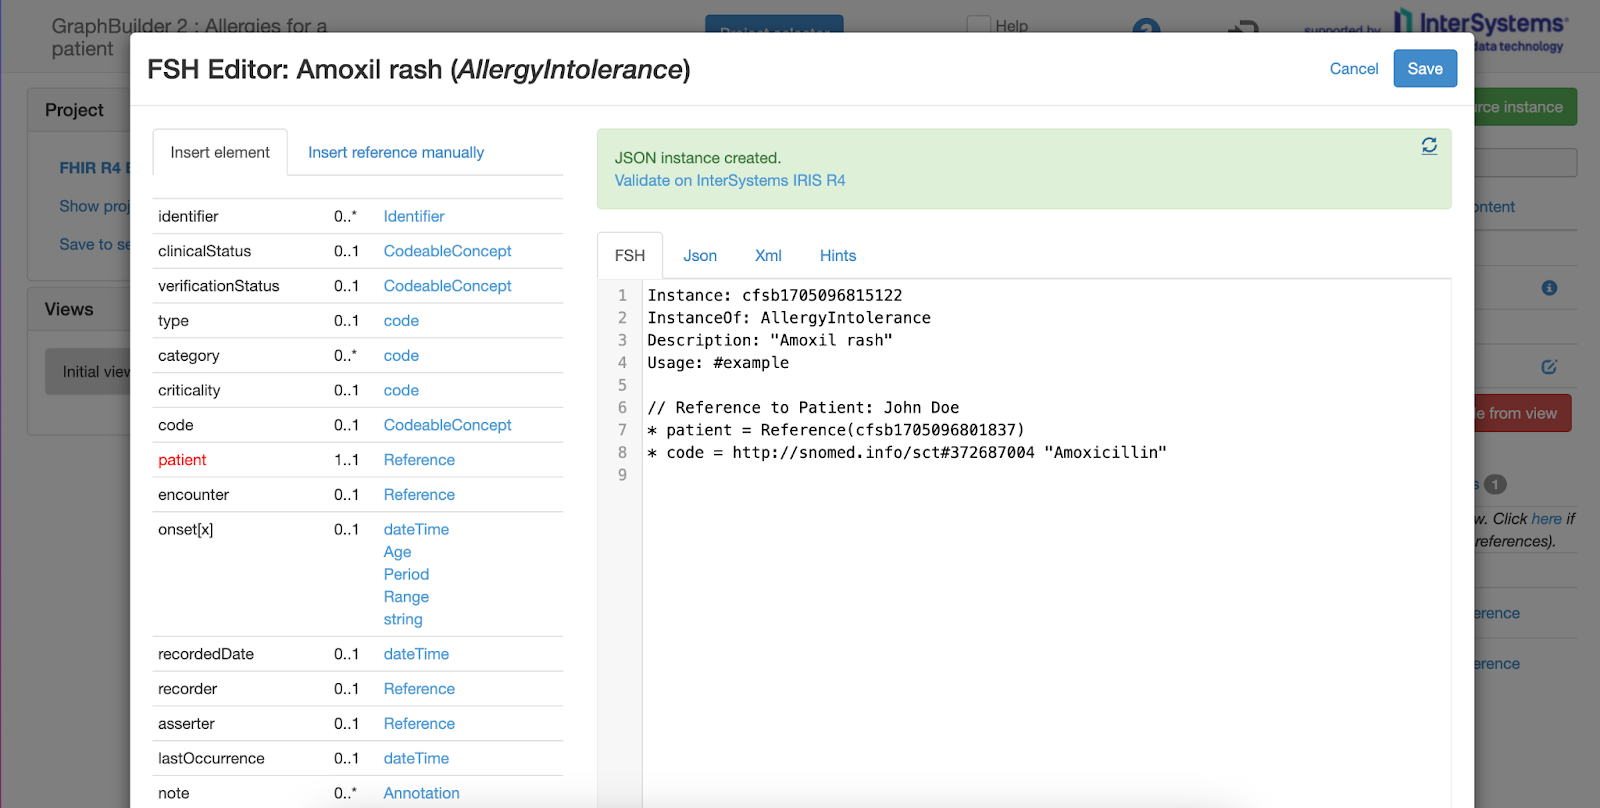
- To add content to a resource, double click on it in the graph which will load an editor screen.
- The editor has 2 panes - to the left are the resource elements where a value can be added and the right is the corresponding FSH representation of the resource.
- The FSH can be edited directly - sometimes it’s needed if the left pane value isn’t what you want.
- It pays to use the refresh icon (upper right) to generate and validate the resource. This uses the ‘sushi’ tooling provided by mitre to build the resource from the FSH
- Click the Save button to save the changes and return to the main screen
- If you selected a server when creating the project (in step 1) then you’ll have the option to upload the resources to the server. It’s a 2 step process - the resources are first validated then uploaded.
Here’s a set of screenshots showing a simple graph being created.
Creating the project:
Adding the patient and a couple of allergies:
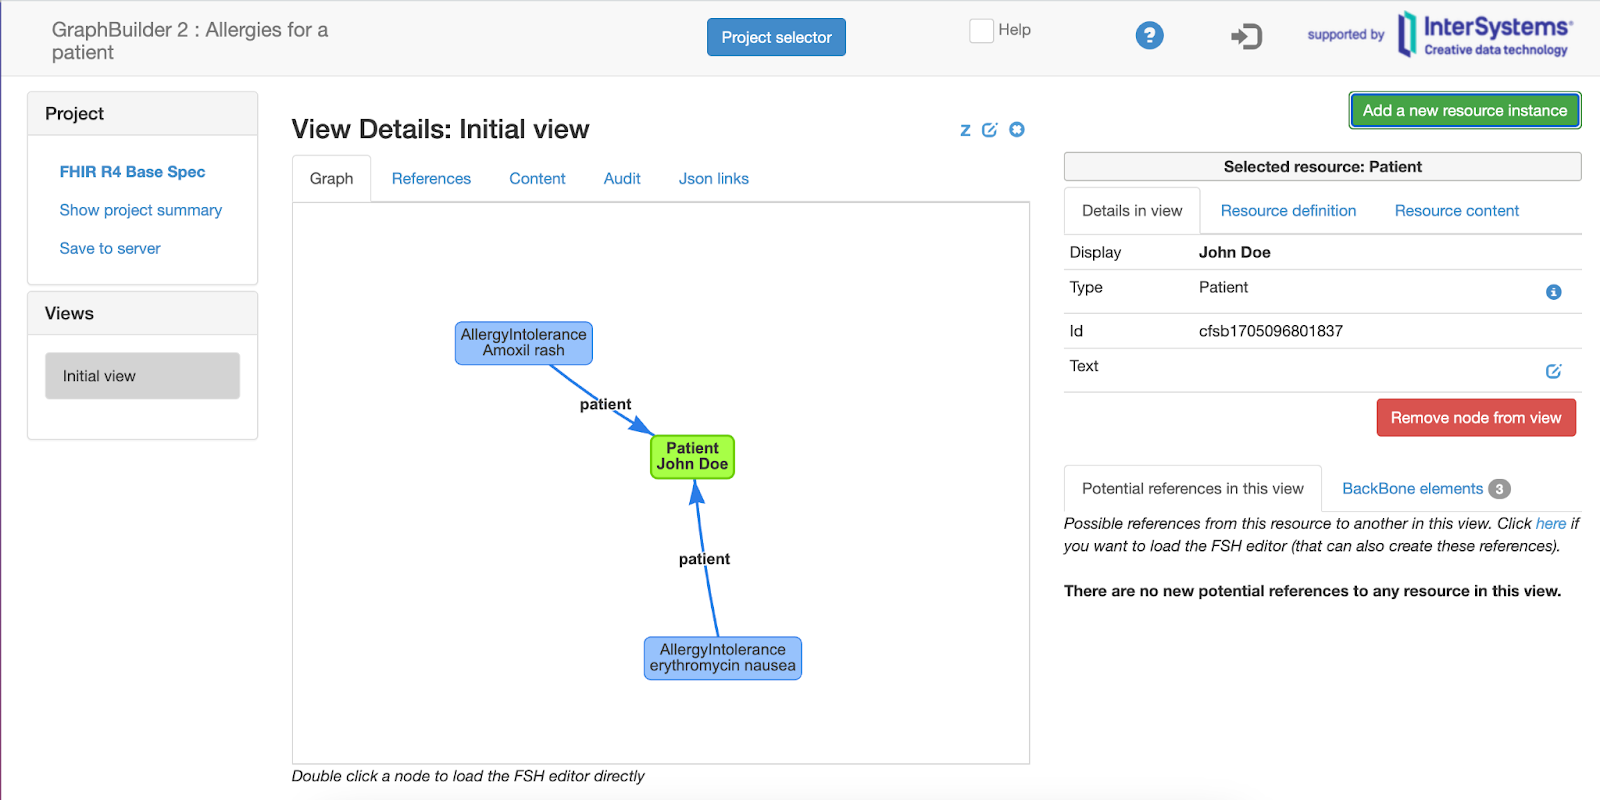
Note that you can drag the resources around. Selecting a resource displays information about it - including a link to the spec - in the right pane.
Editing the allergy:
Note:
- the reference to the patient was added automatically when the allergy was added to the graph and linked to the patient.
- The code value came from selecting ‘code’ on the left and using a terminology server lookup to retrieve the SNOMED-CT term
- I clicked the refresh link to generate and validate the resource. You can view it in the Json and xml tabs
Uploading to the server:
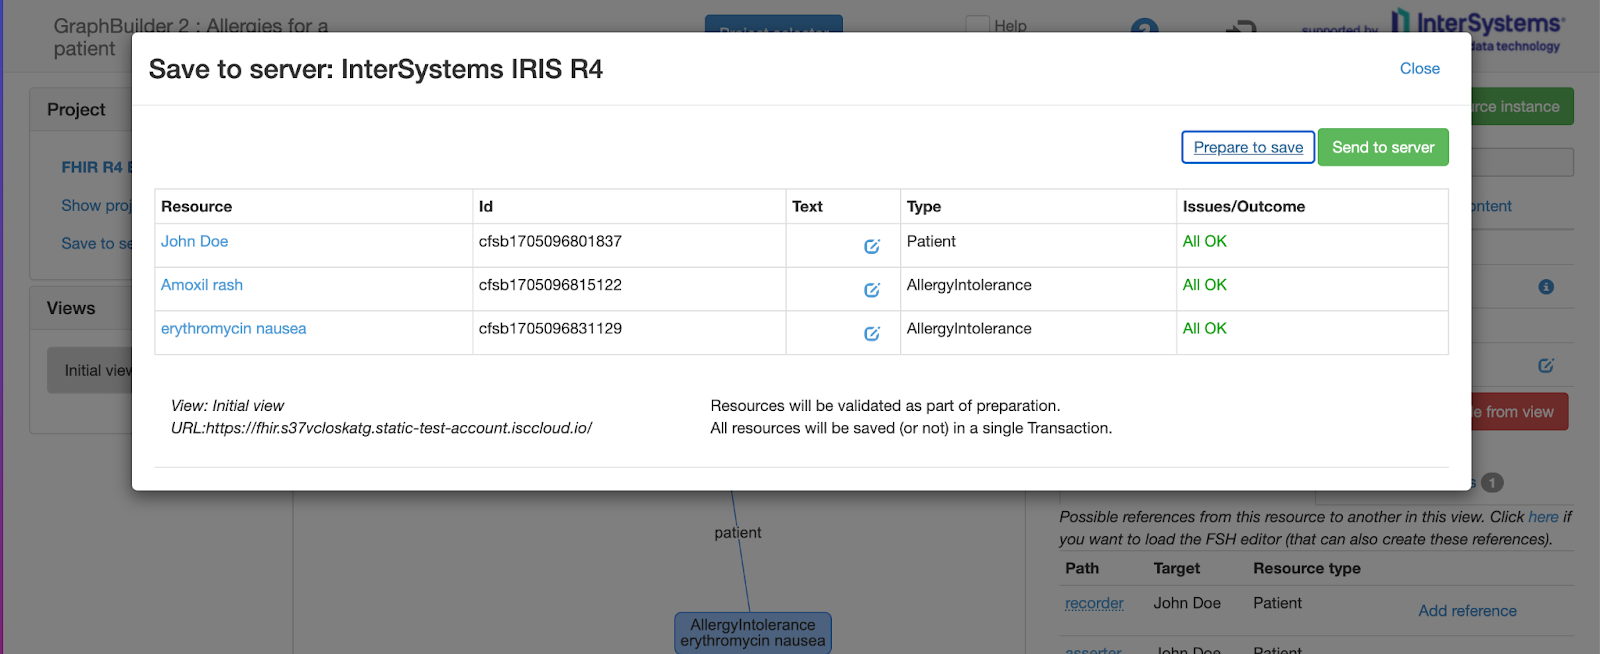
Note:
- The dialog is invoked from the ‘Save to server’ link on the upper left of the main screen
- I clicked the ‘Prepare to save’ link, which validates the resources (technically it uses the sushi API to create all the resources from the FSH, validating as it goes. This is not as comprehensive as the FHIR validator, but detects the main issues.
- Clicking the green ‘Send to Server’ will upload the resources to the server. Although I didn’t in this example, it’s often a good idea to add an identifier to the Patient to make it easier to find on the server.
Comments
Hi @David hay !
Thanks for sharing the info on such a profound tool for FHIR developers!
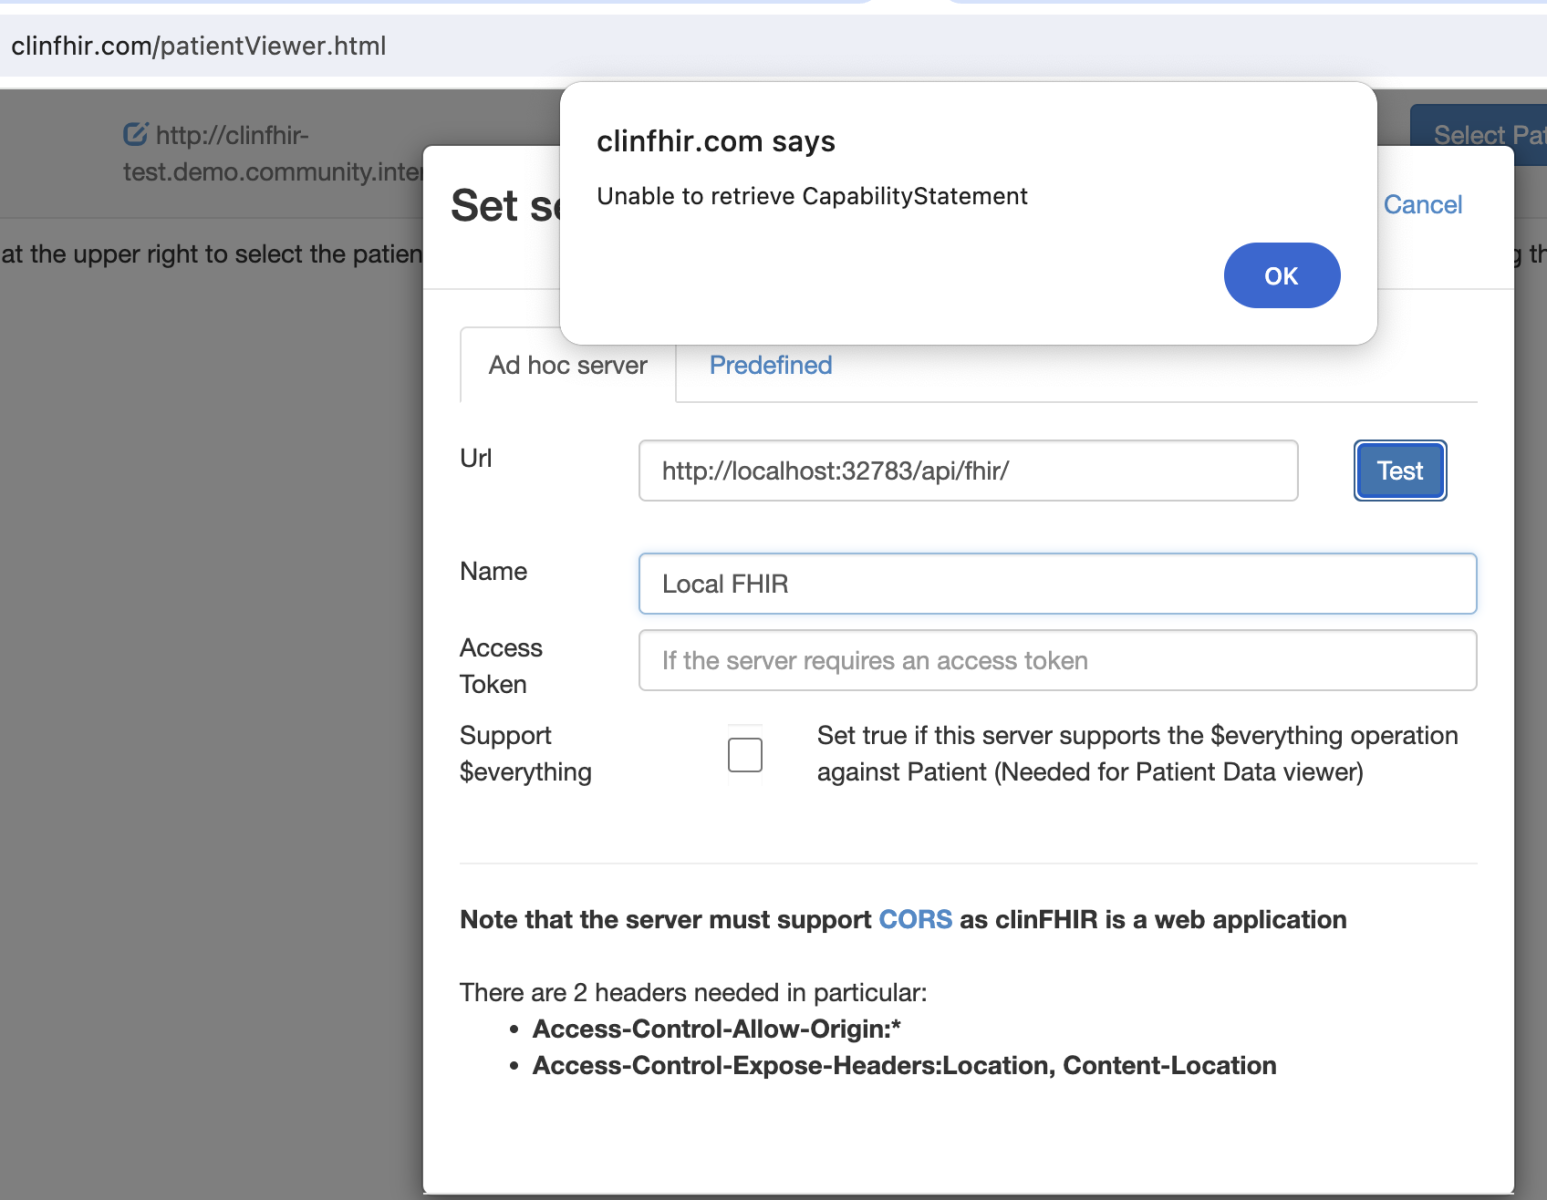
BTW, is there any local version of ClinFHIR that can be installed on a laptop? E.g. if I have the FHIR server locally for development purposes to be able to vusualise the data in local FHIR repository?
Thanks for the comment! Technically it's feasible to download, but not sure it's needed as the tool is an SPA so can access local servers (or should be able to)...
Oh, that'd be amazing!
Just've tried it - doesn't work for me:
Can you try doing this from the Patient Visualizer (icon at the top?) We've had some issues with this UI that I need to look into, but the Patient Visualizer seemed to work. That will help troubleshoot...
OK, I just checked and it didn't work. I'm sure it used to a few years back but I suspect that the browser security has been beefed up. Which module were you after?
Patient viewer if possible.
@Evgeny Shvarov , one way to expose your local FHIR Endpoint would be through https://ngrok.com/use-cases/ingress-for-dev-test-environments
Let me know if you have questions,
Theo.
Thank you, Theo! I'll give it a try
Hi @David hay !
If I don't know the ID of the patient any chance I can discover it with clinFHIR services to feed then to Patient Viewer?