Adding Google Social Login into InterSystems Management Portal
It is a recommended security practice to login into sensitive Administrator Portals without any input passwords. Thus, it is necessary to identify and authenticate the users correctly. A common technique employed by web portals and mobile applications is to use Google social login. Today, Google Gmail has 2 billion users (source: https://www.usesignhouse.com/blog/gmail-stats). Therefore, it is a perfect shared login service to utilize to login InterSystems IRIS users when they need to manage their instances. This article will detail all the steps to embed Google Login into your InterSystems Management Portal.
Register your InterSystems instance in the Google Console
1. Go to https://console.cloud.google.com and log in with your Google user account.
2. On the header click Select a project:
3. Click the button NEW PROJECT:

4. Create a sample project for this article called InterSystemsIRIS and click the button CREATE:

5. Go to the Header again and select the created project InterSystemsIRIS hyperlink in the table:

6. Now the selected project is the working one:

7. In the header look for credentials on the Search field and choose API credentials (third option for this image):

8. On the top of the screen, click the + CREATE CREDENTIALS button and select OAuth 2.0 Client ID option:

Now click CONFIGURE CONSENT SCREEN:

10. Choose External (any person who has Gmail is able to use it) and click the CREATE button:

11. In Edit app registration, complete the field values as follow:
App Information (use your email for user support email):

App Logo (save any vertical InterSystems Logo on your computer and use it here):
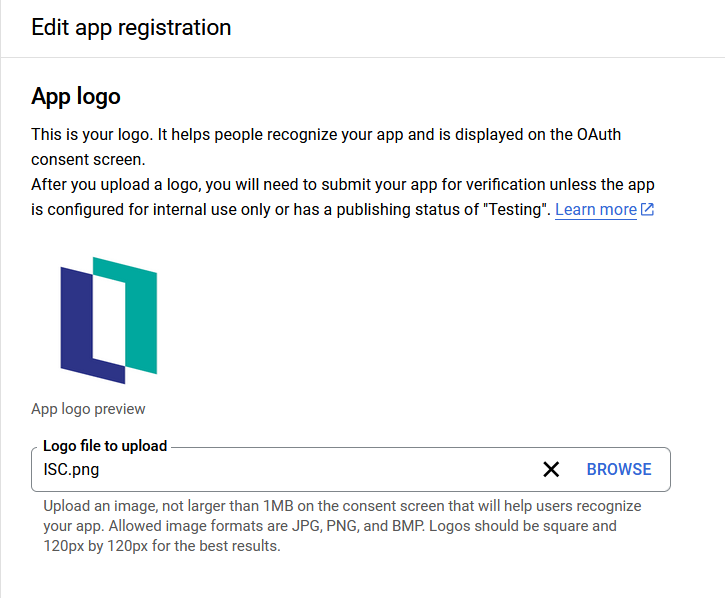
App Domain (set home page with the value http://localhost:52773/csp/sys/%25CSP.Portal.Home.zen)

For Authorized domains, it is not necessary to set anything because this sample will use localhost. Set the developer contact information with your email and click the SAVE AND CONTINUE button:

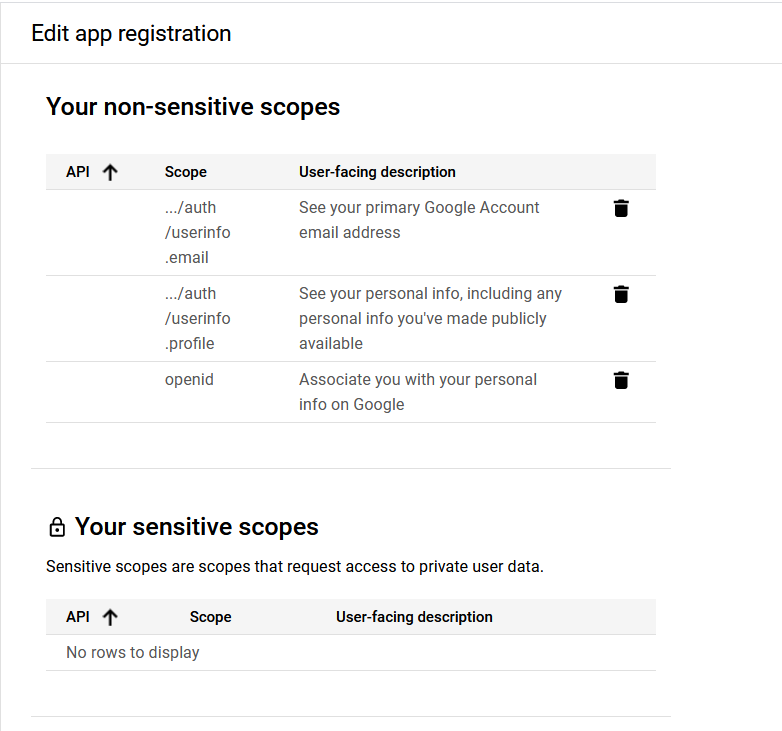
12. Click ADD OR REMOVE SCOPES and select the following scopes, scroll the dialog, and click the UPDATE button:

13. Your non-sensitive, sensitive, and restricted scopes are listed. Accept all of them and click the SAVE AND CONTINUE button:

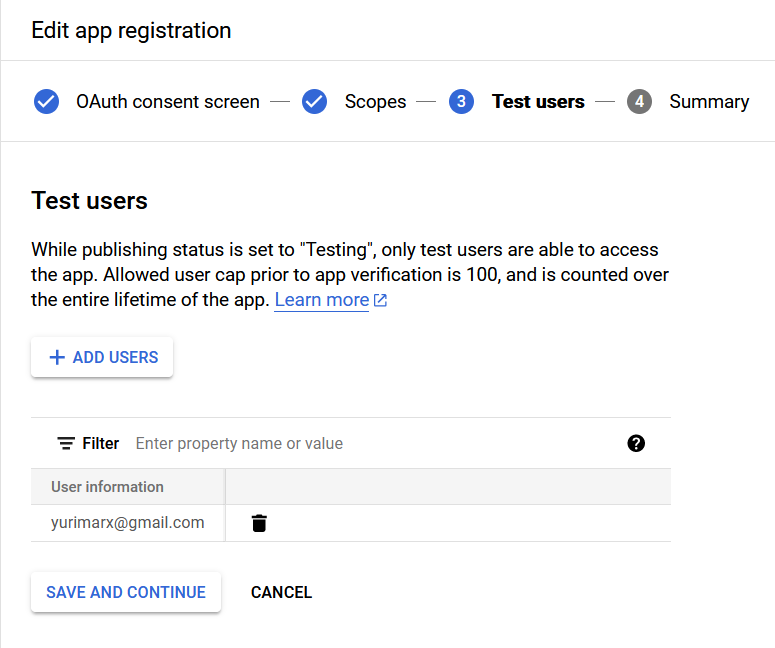
14. Include your email into the Test users list (using the +ADD USERS button) and click the SAVE AND CONTINUE button:
15. The wizard shows you the Summary of the filled fields. Scroll the screen and click the BACK TO DASHBOARD button.
16. Now, it is time to configure the credentials for this new project. Select the option Credentials:

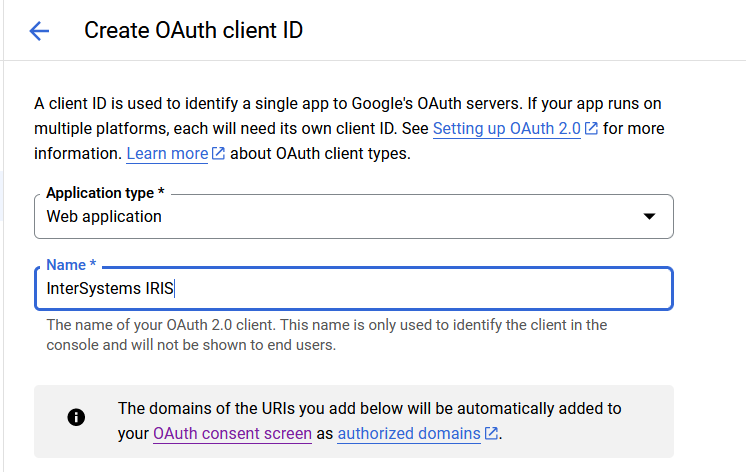
17. Click the button +CREATE CREDENTIALS and select OAuth client ID (we need to take this step again because now we have OAuth consent screen defined):

18. Select Web application in the Application Type and InterSystems IRIS in the Name field:
19. Configure JavaScript origins and redirects (click +ADD URI to get more fields) as follows and click the SAVE button:
- JavaScript URI 1: http://localhost:52773
- JavaScript URI 2: http://localhost
- Redirect URI 1: http://localhost:52773
- Redirect URI 2: http://localhost
- Redirect URI 3: http://localhost:52773/csp/sys/dc.login.GoogleLogin.cls

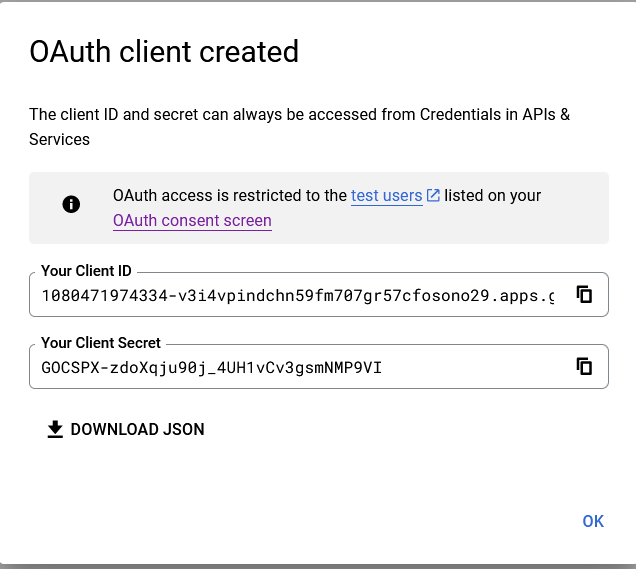
Now we will embed Google Login to our local InterSystems IRIS instance.
InterSystems IRIS Delegated Authentication Mechanism to the Management Portal
InterSystems IRIS allows us to use a few authentication options, including Instance Authentication (a default option that uses a user and a password managed by the IRIS instance), LDAP (users managed by an enterprise repository), and Delegated Authentication (for customized authentication mechanism).
We will choose Delegated Authentication because this is the option where the login uses OAuth and a custom code to get user credentials and authenticate users without the input passwords. When using OAuth, the OAuth server (Google in our use case) will authenticate and return to the InterSystems IRIS (OAuth client) the user details logged in.
In our example, we want to set up Delegated Authentication to the Management Portal (csp/sys application). To make it happen, you need to take the following steps:
- Create a class extending %CSP.Login and write the custom HTML, JavaScript, and CSS code for the customized login. In this article sample we will embed a Google button to log in with the Google user.
- Create and write Object Script in the macro ZAUTHENTICATE.mac with the custom backend authentication login logic.
- Enable Delegated Authentication to the InterSystems IRIS.
- Set up Delegated authentication and the custom login page (the class extending %CSP.Login) for the /csp/sys web application (Management Portal web application).
All these steps should be done in the %SYS namespace.
Using a sample application to learn how to embed Google Login into Management Portal
To learn how to embed Google Social Login into an instance of the InterSystems IRIS, we will use the application Google IRIS Login (https://openexchange.intersystems.com/package/Google-IRIS-Login). Follow these steps in order to get it:
1. Clone/git pull the repo into any local directory:
git clone https://github.com/intersystems-community/intersystems-iris-dev-template.git2. Go to the .env file and input your CLIENT_ID generated in your Google Cloud Console in the first part of this article.
3. Open the terminal in this directory and call the command to build InterSystems IRIS in a container
docker-compose build4. To run the InterSystems IRIS in a container, do the next:
$ docker-compose up -d5. Access the Management Portal (http://localhost:52773/csp/sys/%2525CSP.Portal.Home.zen) and use your Google user to enter:
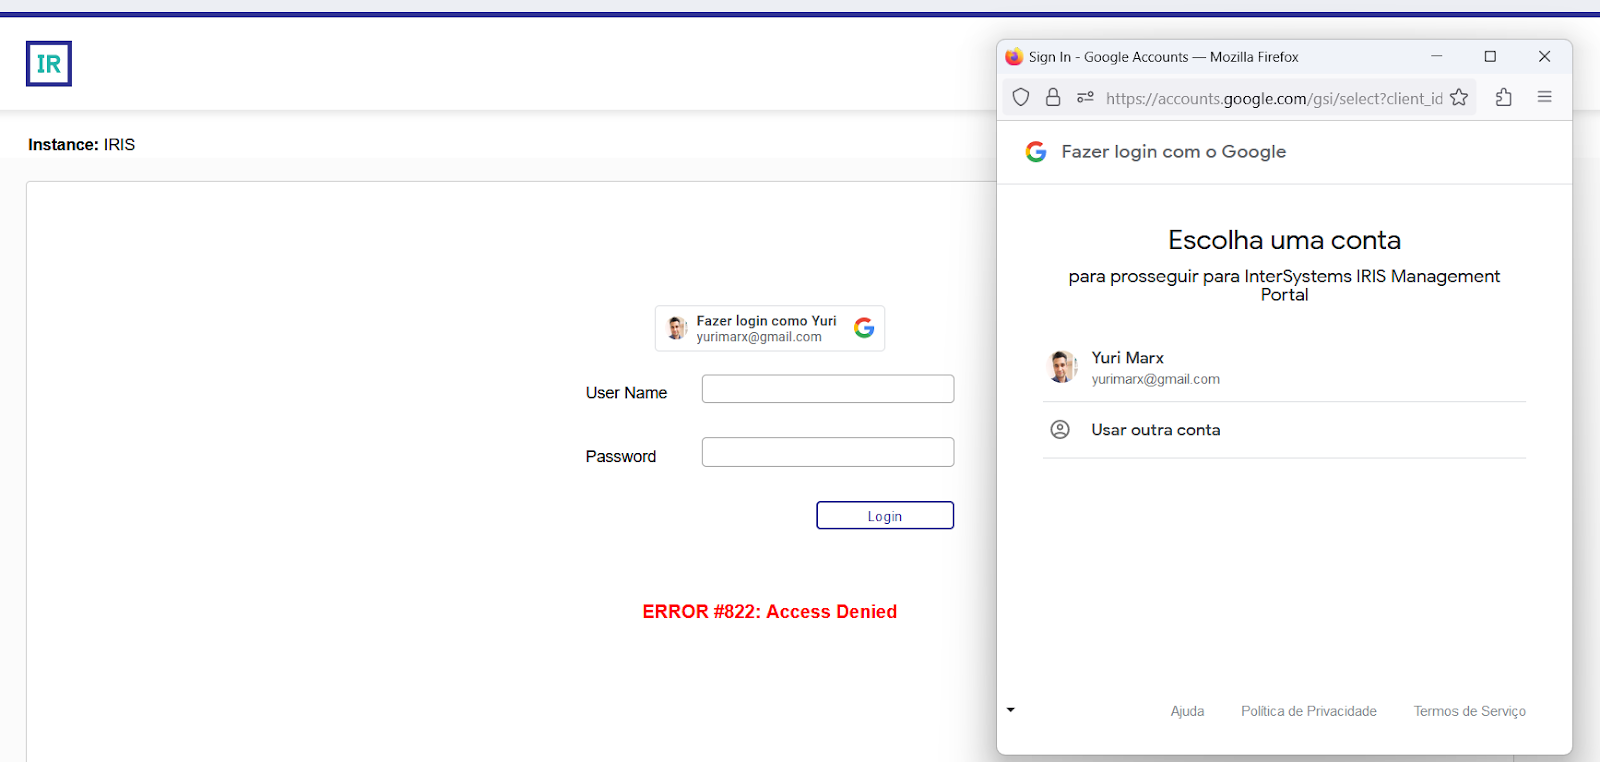
Ready! In the upcoming sections, we will see all the steps one needs to configure and develop inside IRIS to embed Google Social Login.
Creating a custom Login Page extended from %CSP.Login
To embed the Google Login into the Management Portal we need to create a new Login page extending from %CSP.Login. This allows us to reuse the default Login Page but requires adding the necessary source code for supporting Google Login. The custom login page will override the following class methods:
- OnLoginPage: used to write the HTML and JavaScript code to render the login form with the Google Login button.
- DrawHead: employed to add JavaScript code that will persist Google Login credentials returned into cookies for the backend logic use.
GoogleLogin.cls source code
Important actions on this page:
1. We got CLIENT_ID and LOGIN_URI from the env file to use as parameters for the Google Login button:
Set envClientId = ##class(%SYSTEM.Util).GetEnviron("CLIENT_ID")
Set envLoginURI = ##class(%SYSTEM.Util).GetEnviron("LOGIN_URI")
2. Before the content, we needed to load the Google JavaScript library
<script src="https://accounts.google.com/gsi/client" async defer></script>3. Our next step was to write the HTML code to render the Google button using LOGIN_URI and CLIENT_ID environment variables collected from the .env file:
    <div id="g_id_onload"
     data-client_id="#(envClientId)#"
     data-context="signin"
     data-ux_mode="popup"
     data-callback="handleCredentialResponse"
     data-login_uri="#(envLoginURI)#"
     data-auto_prompt="false">
    </div>
    <div class="g_id_signin"
     data-type="standard"
     data-shape="rectangular"
     data-theme="outline"
     data-text="signin_with"
     data-size="large"
     data-onsuccess="onSignIn"
     data-logo_alignment="left">
    </div>
4. On the DrawHead class method, we wrote JavaScript functions to get the Google user credentials and store them in cookies for the backend use:
function setCookie(name,value,days) {
        var expires = "";
        if (days) {
            var date = new Date();
            date.setTime(date.getTime() + (days*24*60*60*1000));
            expires = "; expires=" + date.toUTCString();
        }
        document.cookie = name + "=" + (value || "")  + expires + "; path=/";
    }


    function newSession() {
        eraseCookie('email');
        window.location.reload();
    }


    function eraseCookie(name) {
        // This function will attempt to remove a cookie from all paths.
        var pathBits = location.pathname.split('/');
        var pathCurrent = ' path=';

        // do a simple pathless delete first.
        document.cookie = name + '=; expires=Thu, 01-Jan-1970 00:00:01 GMT;';

        for (var i = 0; i < pathBits.length; i++) {
            pathCurrent += ((pathCurrent.substr(-1) != '/') ? '/' : '') + pathBits[i];
            document.cookie = name + '=; expires=Thu, 01-Jan-1970 00:00:01 GMT;' + pathCurrent + ';';
        }
    }

    function deleteAllCookies() {
        const cookies = document.cookie.split(";");

        for (let i = 0; i < cookies.length; i++) {
            const cookie = cookies[i];
            const eqPos = cookie.indexOf("=");
            const name = eqPos > -1 ? cookie.substr(0, eqPos) : cookie;
            document.cookie = name + "=;expires=Thu, 01 Jan 1970 00:00:00 GMT";
        }
    }

    // called when page is loaded
    function pageLoad()
    {
        // see if we can give focus to the UserName field:
        if (self.document.Login && self.document.Login.IRISUsername) {
            self.document.Login.IRISUsername.focus();
            self.document.Login.IRISUsername.select();
        }

        return true;
    }

    function decodeJwtResponse(token) {
        var base64Url = token.split('.')[1];
        var base64 = base64Url.replace(/-/g, '+').replace(/_/g, '/');
        var jsonPayload = decodeURIComponent(window.atob(base64).split('').map(function(c) {
            return '%' + ('00' + c.charCodeAt(0).toString(16)).slice(-2);
        }).join(''));

        return JSON.parse(jsonPayload);
    }

    function handleCredentialResponse(response) {

        const responsePayload = decodeJwtResponse(response.credential);
        console.log("ID: " + responsePayload.sub);
        console.log('Full Name: ' + responsePayload.name);
        console.log('Given Name: ' + responsePayload.given_name);
        console.log('Family Name: ' + responsePayload.family_name);
        console.log("Image URL: " + responsePayload.picture);
        console.log("Email: " + responsePayload.email);

        setCookie('email', responsePayload.email);
        setCookie('googleToken', response.credential);

        if(responsePayload.email !== null) {
            document.getElementsByName('Login')[0].submit();
        }
    }
5. To see all the content for the Login Page go to src > cls > dc > login > GoogleLogin.cls file.
Creating the backend code to authenticate Google users
To write the backend logic to handle custom login using delegated mechanism, it is necessary to apply a macro with the name ZAUTHENTICATE.mac into %SYS namespace.
ZAUTHENTICATE.mac source code
Important actions in this file:
1. Define and store an encrypted password for the new user selected in the Google Login prompt:
Set GooglePassword = $SYSTEM.Util.GetEnviron("GOOGLE_PASSWORD")
Set GlobalPassword = $EXTRACT(##class(dc.login.CypherUtil).DoAESCBCEncrypt(GooglePassword),1,20)
2. Refer to the Management Portal application (csp/sys) for Google Login:
Set App = $SYSTEM.Util.GetEnviron("ISC_App")
Set:App="" App = "/csp/sys"
Set GN = "^%ZAPM.AppsDelegate"
If $EXTRACT(App,*)'="/" {
    Set App=App_"/"
}
3. Get the Google user selected and stored in the email cookie:
Set Email = %request.GetCookie("email")4. Test if the user already exists. If not, create the user as a Superuser (My choice is the %All role, but you can pick another option, for example, the %Developer role). If the user already exists, just log in:
Set EmailUser = $PIECE(Email,"@")

Set qry = "select * from Security.Users where EmailAddress = ?"
Set tStatement = ##class(%SQL.Statement).%New()
Set qStatus = tStatement.%Prepare(qry)

Set rset = tStatement.%Execute(Email)

While rset.%Next() {
    Set UserExists = 1
}

If UserExists = 1 {
    Set Username = rset.Name
    Set Password = GlobalPassword
    Quit $SYSTEM.Status.OK()
} Else {
    Set $nameSpace = "%SYS"
    if '##class(Security.Users).Exists($PIECE(Email,"@")) {
        Set status = ##class(Security.Users).Create($PIECE(Email,"@"),"%ALL",GlobalPassword,$PIECE(Email,"@"),"","","",0,1,"",1,0,"","","","")
        Set status = ##class(Security.Users).Get($PIECE(Email,"@"),.properties)
        Set properties("EmailAddress")=Email
        Set status = ##class(Security.Users).Modify($PIECE(Email,"@"), .properties)

        If status = 1 {
            Set Username = $PIECE(Email,"@")
            Set Password = GlobalPassword

            Quit $SYSTEM.Status.OK()
        }
    }
}
5. Compile these files into the “%SYS” namespace.
It is time to set some parameters to ensure the delegated authentication using the custom source code written above.
Adjust the settings to ensure delegated login
1. Go to the Management Portal (http://localhost:52773/csp/sys/%2525CSP.Portal.Home.zen) and log in with _system/sys credentials.
2. Proceed to System Administration > Security > System Security > Authentication/Web Session Options:

The option “Allow Delegated authentication” must be checked:

4. Now go to System Administration > Security > Users and select the user CSPSystem. The user must have the role DB_IRISSYS or %All role (it is necessary because this user is utilized to run the login page and the authenticate.mac logic with the permissions required to execute it):

5. Move to the System Administration > Security > Applications > Web Applications and select the /csp/sys application.
6. In the "Allowed Authentication Methods" field, check the option "Delegated.
7. The Login Page field must have dc.login.GoogleLogin.cls as a value (we need it to call our custom login page, instead of the IRIS default page):

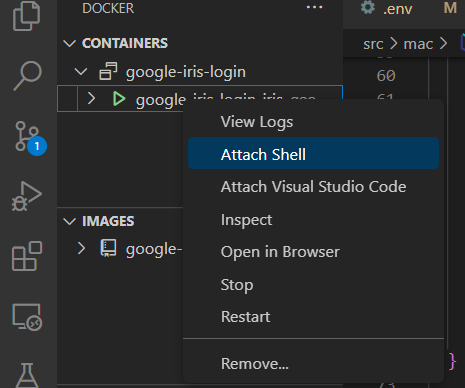
8. Now to ensure the correct functioning, attach Shell to your IRIS docker instance:
9. Now restart the page from the prompt writing and execute the command "iris restart iris":

Comments
wow - what an incredibly in-depth tutorial! thank you @Yuri Marx for the time you took putting this together for the Community!
Many thanks!
@Yuri Marx
Thank you so much for this great work - tutorial, and application! 👏👏
Looks like you implemented the idea:
💡Please add google oauth authorization to login to the management portal💡
from Ideas Portal ✨
Many thanks!👏
Thanks! Yes, I implemented it.
Thank you, @Yuri Marx!
Can we have the similar implementation for GitHub OAuth too? Github is the most popular site for developers, so authentication via GItHub will be very handy for developers.
Yes, I will work on Github too.