Access Matrix - Assigning a List of Roles to a List of Users
When you have more than ten thousand users in your database, it becomes time-consuming and inconvenient to assign group access rights through the standard IRIS interface. In this artilce I want to introduce you an application to automate this process.
I’ll show you how to assign and change the role lists for the users, selecting them by context, and I will also show you how to expand this application’s functionality. you know how to apply your work as an administrator and developer to the new features of the well-proven apptools software complex. With the addition of an adminLTE template, you can now quickly and easily create interface interactions for any entity and many functional modules. The goal while developing this toolkit is to write as little JavaScript as possible as well as transfer and implement all the dynamics as much as possible in the ObjectScript.
Panel Description
The administrative panel we are building has the classic structure of a single-page application (SPA). The left-sided set of two-level menus retract and resize when the browser window resizes. The navigation panel contains a two-level top menu, with, as a standard, an account group with an exit point from the session in the last element.
Install the apptools-admin application in any way according to the instructions, the easiest one is using the ZPM package manager.
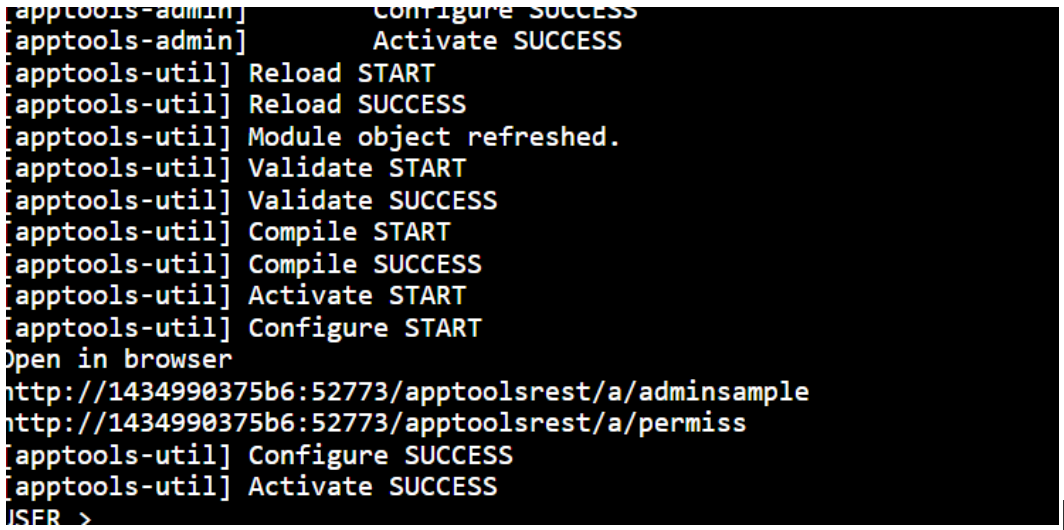
You can see the application here: http://you-host:52773/apptoolsrest/a/permiss.
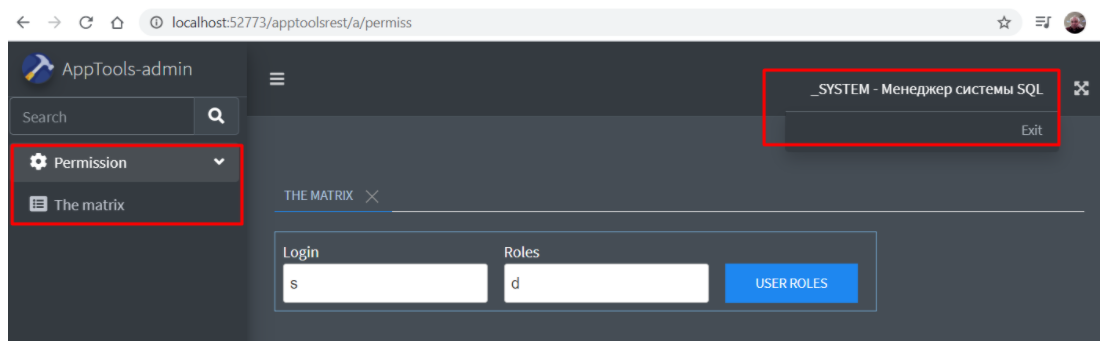
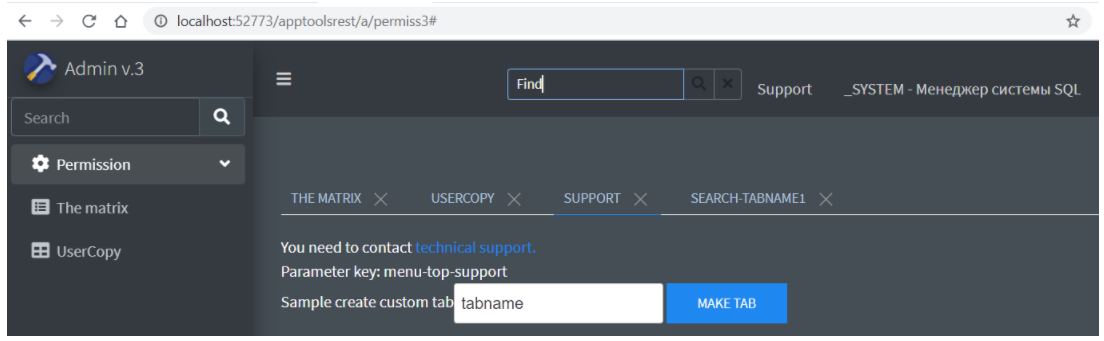
Clicking any menu item creates a tab in the largest content area and launches a method that renders the interface components of the interaction in that tab. If the tab is already created, then clicking on the menu item makes it active. You can make tabs that close. The names of the HTML elements inside the tab depend on the ID of the menu item and don’t intersect with neighboring tabs.
Creating the Application
To create your application, first copy the template in the class apptools.lte.permiss under your own name.
The principles are a set of menus and a set of associated tabs, regulated by an array opt в ClassMethod GetAllApps.
ClassMethod GetAllApps(opt) As %Status
{
	;side menu
	set sideMenuName="Permission",
		sideMenuNumer=1,
		sideMenuOpen=1, //3 =1 open menu
		sideMenuIcon="fa-cog"  //4 icon
		set sideMenu= $lb(sideMenuNumer, sideMenuName, sideMenuOpen, sideMenuIcon)
			set key="MenuMatrix"
			set opt(key,"Menu")=sideMenu
			set opt(key)=$$$aText("The matrix","") ;The name of the menu
			set opt(key,"id")="Matrix"
			set opt(key,"TabName")=$$$aText("The matrix","") ;the name of the tab
			set opt(key,"ClassName")=..%ClassName(1)
			set opt(key,"Role")="%All" ;To be able to edit access rights, the user must have the %All role
			set opt(key,"Namespace")="%SYS"
			set opt(key,"Method")="ShowTabSample"
			set opt(key,"Disable")=0 ;developed
			set opt(key,"TabMenu","Close")=1
			set opt(key,"Active")=1 ;active menu item
			set opt(key,"aw-icon")="fa-list-alt" ;fa-table"
	;top menu
	set topMenuName="Account",
		topMenuNumer=99
	set key="menu-top-account3"
		set opt(key,"MenuTop")=$lb(topMenuNumer,topMenuName) ; 99-account has nested items
		set opt(key)="Exit"
		set opt(key,"id")="AccountExit"
		set opt(key,"TabName")="Logoit"
		set opt(key,"ClassName")=..%ClassName(1)
		set opt(key,"Method")="Logout"

	do ..CheckRoleMenu(.opt)
	quit $$$OK
}
Each tab has a prefix to distinguish it from others and so that variables are not confused when collected by the serialize function. This prefix must be unique and defined in the node opt(key,"id")=prefix.
When loading any tab, the ShowTabSample method executes, displaying a template with a form MainForm with two divs: prefixMainHeader и prefixMainContent.
The prefixFirstHead method’s content immediately displays in the prefixMainHeader container, and an action forms there to output the result prefixResult method.
Example: apptools.lte.permiss
/// download form template search users and roles
ClassMethod MatrixFirstHead(Par = "") As %Status
{
	do ##class(apptools.core.Form).BlockUI(0)
	set key=Par("key")
	set divId=Par("divId")
	set %ui=1

	set onclick=$$$blockui("Load...")_
		$$$onclick(divId_"MainForm",divId_"MainContent",$namespace,..%ClassName(1),divId_"Result","&key="_key_"&divId="_divId_"&mode=*")
	&html<
		<table>
		<tr>
			<td>
 			Login <br>#($$$appText(divId_"name","title='"_$$$aText("Names separated by a comma or by context","")_"'","ms"))#
			</td>
			<td>
			Roles <br>#($$$appText(divId_"roles","title='"_$$$aText("Roles separated by a comma or by context","")_"'","d"))#
			</td>
			<td> <br>
			#($$$appButton(divId_"appButtonResult1","onclick="""_$tr(onclick,"*",1)_"""",""_$$$aText("User roles","")))#
			</td>
		</tr>
		</table>
	>
	$$$SetHeightContent(divId,250)
	q $$$OK
}

/// Search result
ClassMethod MatrixResult(Par = "") As %Status
{
	set %ui=1
	do ##class(apptools.core.Form).BlockUI(0)
	set key=Par("key")
	set divId=Par("divId")
	set mode=Par("mode")
	//Geting elements from form and prepare array Par
	set name=##class(apptools.core.Action).GetElemForm(%request,.Par,divId_"name")
	set roles=$g(Par("%request.Data",divId_"roles"))
	write ..ButtonAgain(divId,key)
	do ##class(apptools.Tabs.security).UiMatrixPermission(name,roles,divId,key,"apptools.Tabs.security","UiSavePermiss")
	quit $$$OK
}
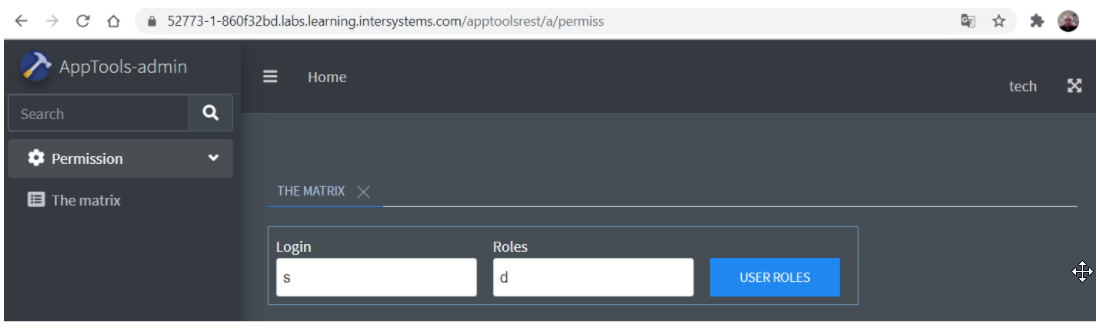
The result of these methods appears in the appendix.
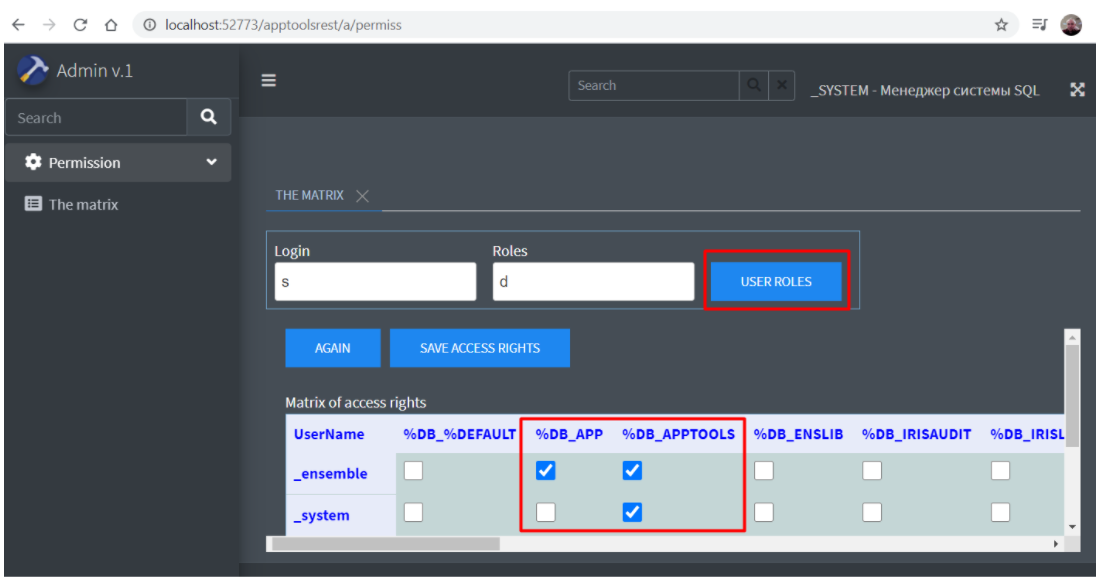 The main convenience of this solution is that the output of the list of roles and users appears in a table with fixed columns and rows. This enables you to visually assign roles to users.
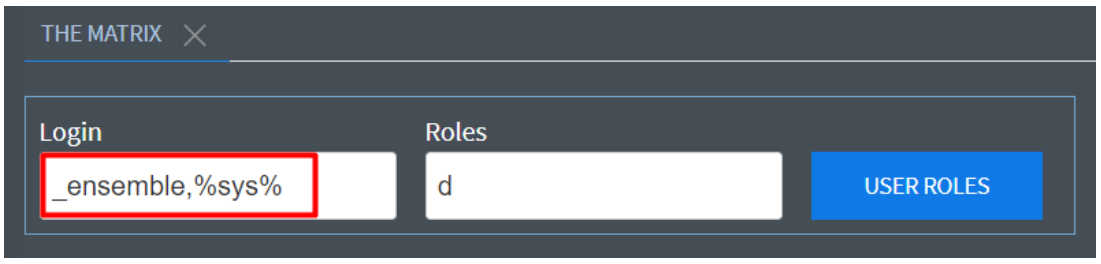
For more convenience, you can specify users in the filter, separated by commas. You can also specify a user and assign roles to other users based on the first user’s role.
The main convenience of this solution is that the output of the list of roles and users appears in a table with fixed columns and rows. This enables you to visually assign roles to users.
For more convenience, you can specify users in the filter, separated by commas. You can also specify a user and assign roles to other users based on the first user’s role.
Expanding the Panel with New Features
Let's add new menu items to our application’s interface, in the upper profile of the current account and in the side module for changing access rights. You can open an example here: http://you-host:52773/apptoolsrest/a/permiss2
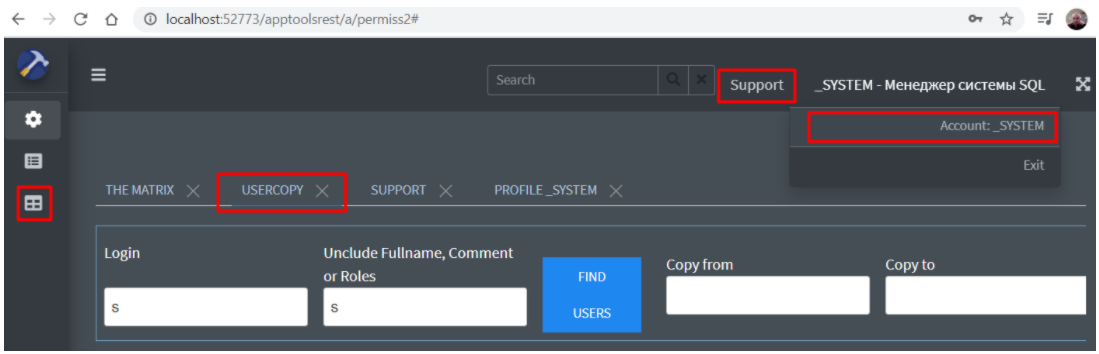 This tab provides a search for users and their roles and the ability to copy all access rights from one user to another. Copying has to be executed because in the management portal, you can’t copy more than 1,000 users.
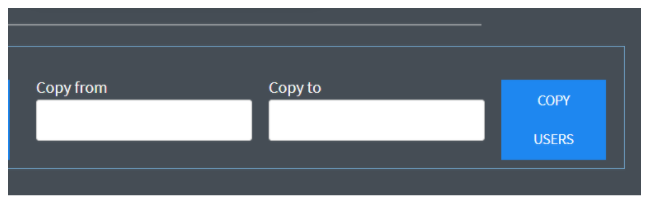 You can continue to expand this panel quickly to implement new features. See an example at: http://you-host:52773/apptoolsrest/a/permiss3
Creating a Demo Stand
Let's create a demo stand and check it with an example. First, open the link:
https://learning.intersystems.com/course/view.php?name=Java%20Build
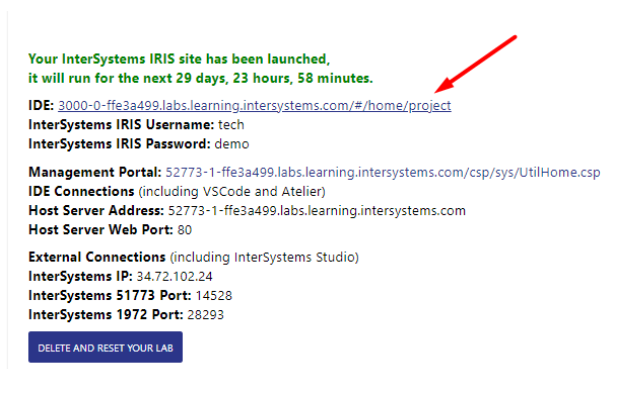
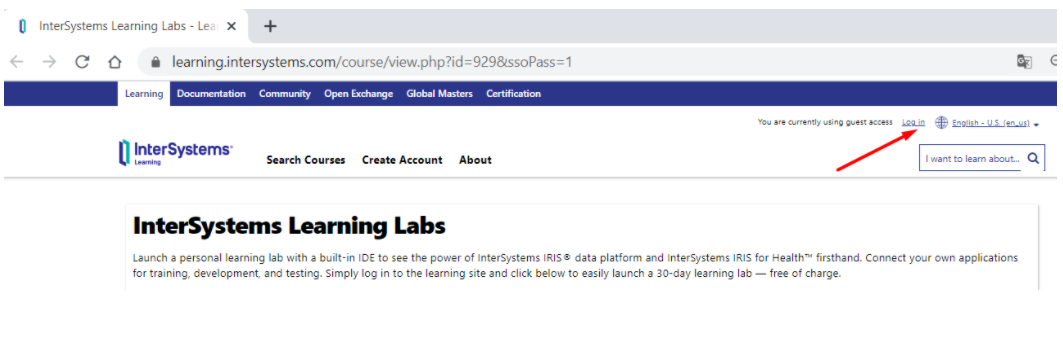 Let's register, click the "LAUNCH" button, and get the IRIS container.
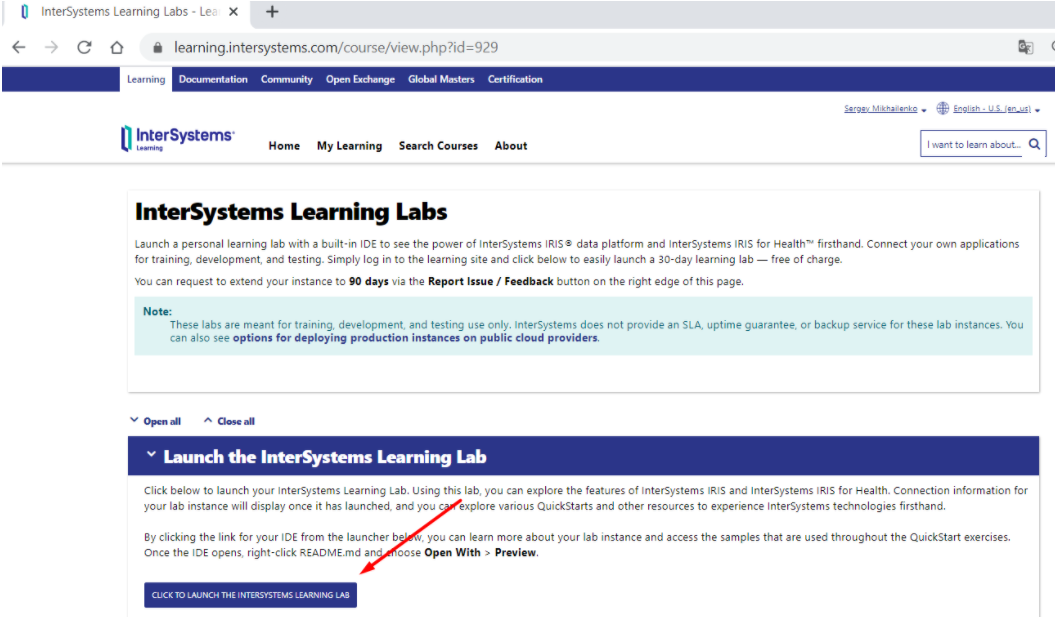 Next, follow the link that appears like this:
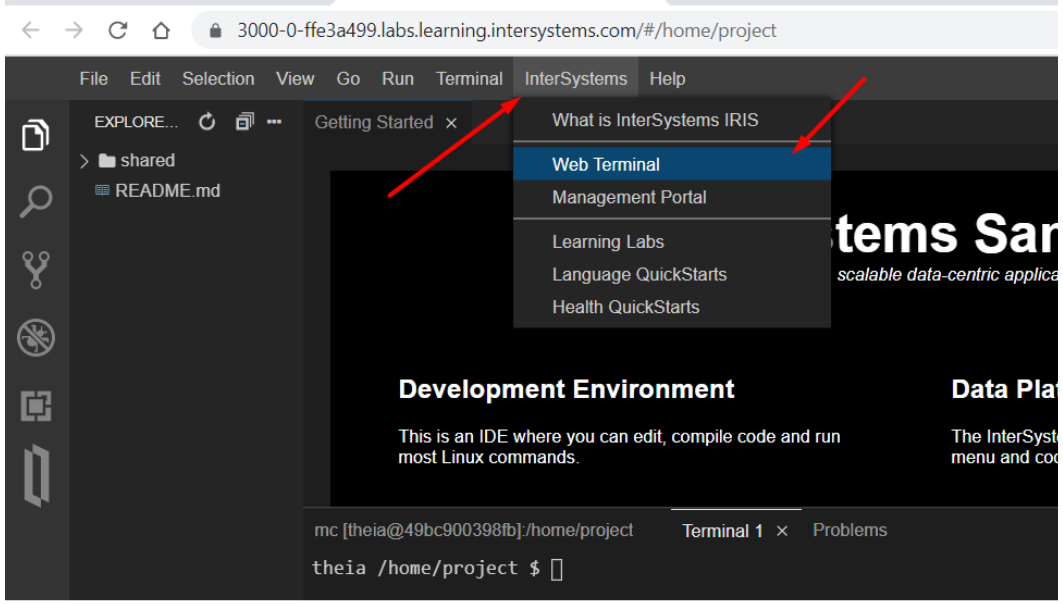
 Then, load the web terminal from the menu.
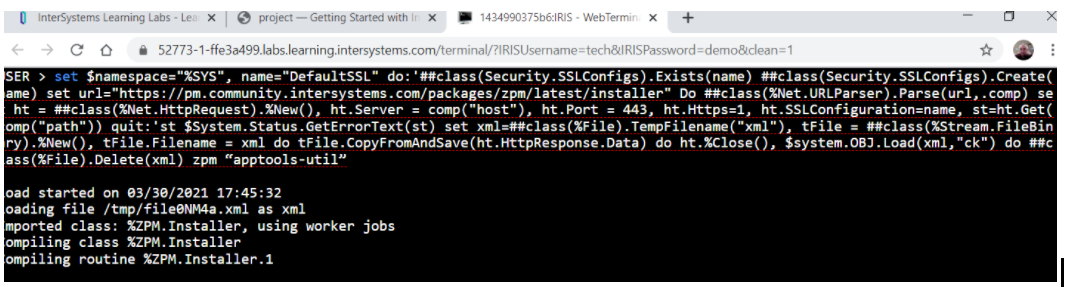
 Load the application in one line:
set $namespace="%SYS", name="DefaultSSL" do:'##class(Security.SSLConfigs).Exists(name) ##class(Security.SSLConfigs).Create(name) set url="https://pm.community.intersystems.com/packages/zpm/latest/installer" Do ##class(%Net.URLParser).Parse(url,.comp) set ht = ##class(%Net.HttpRequest).%New(), ht.Server = comp("host"), ht.Port = 443, ht.Https=1, ht.SSLConfiguration=name, st=ht.Get(comp("path")) quit:'st $System.Status.GetErrorText(st) set xml=##class(%File).TempFilename("xml"), tFile = ##class(%Stream.FileBinary).%New(), tFile.Filename = xml do tFile.CopyFromAndSave(ht.HttpResponse.Data) do ht.%Close(), $system.OBJ.Load(xml,"ck") do ##class(%File).Delete(xml) zn "user" zpm "install apptools-util"
 After installation, which takes a few minutes, close the session with the “Halt” command.
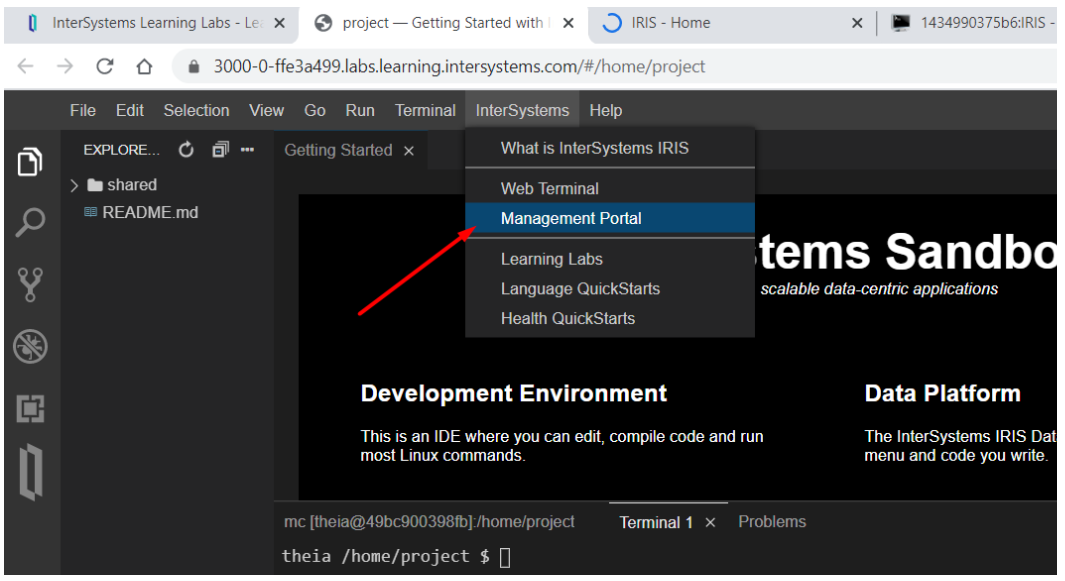 Then, open the management portal from the menu and paste the link of the “permiss” application:
https://52773-1-860f32bd.labs.learning.intersystems.com/apptoolsrest/a/permiss
Use the user: tech password: demo credentials to log into the app
Then, open the management portal from the menu and paste the link of the “permiss” application:
https://52773-1-860f32bd.labs.learning.intersystems.com/apptoolsrest/a/permiss
Use the user: tech password: demo credentials to log into the app
 You can find the entire application code at GitHub.
Next Steps
Hopefully you, and other administrators and developers, found this article helpful. You now know how to create a role-assignment tool using just a little JavaScript. You can use this tool to quickly change relationships in the IRIS data platform. In the future, we hope to make the panel 100 percent Wi-Fi Protected Access (WPA) compliant for use in mobile applications. You can also add your own features or adjust the code to suit your data adjustment needs. To learn more about the InterSystems IRIS data platform, explore their website and start coding for free.