Continuous integration in IRIS with Git and Jenkins
Introduction
In healthcare interoperability environments, InterSystems Health Connect typically contains critical components such as productions, business processes, operations, services, utility classes, routines, and other ObjectScript artifacts. Traditionally, many deployments of these components have been done manually, by copying classes, importing XML, or using administrative tools from the management portal.
While this approach may work in the initial stages, it becomes difficult to maintain as the project grows, when multiple developers are working in parallel, or when repeatable deployments are needed across environments such as development, integration, pre-production, and production.
A more robust alternative is to integrate Health Connect within a continuous integration flow , using Git as the source code repository and Jenkins as the deployment orchestrator.
The aim of this article is to show a practical approach to:
- Versioning Health Connect code on GitHub.
- Detect only the files modified since the last deployment.
- Copy those files to a staging folder.
- Load and compile the changes to a Health Connect namespace.
- Run the entire process remotely from Jenkins using SSH.
Architecture
For our example, we have configured the following elements:
IRIS for Health Instance
I have deployed InterSystems IRIS for Health on an AWS machine with RHEL10 with its own Apache Server and enabled connectivity via HTTP and SSH.
For development, I have configured Visual Studio Code to work on a local instance of IRIS, on which I will make the code changes that I will then upload to GitHub.
GitHub repository
We have chosen GitHub as our version control system, taking advantage of the extension available in Visual Studio Code. This will allow us to work with branches if necessary.
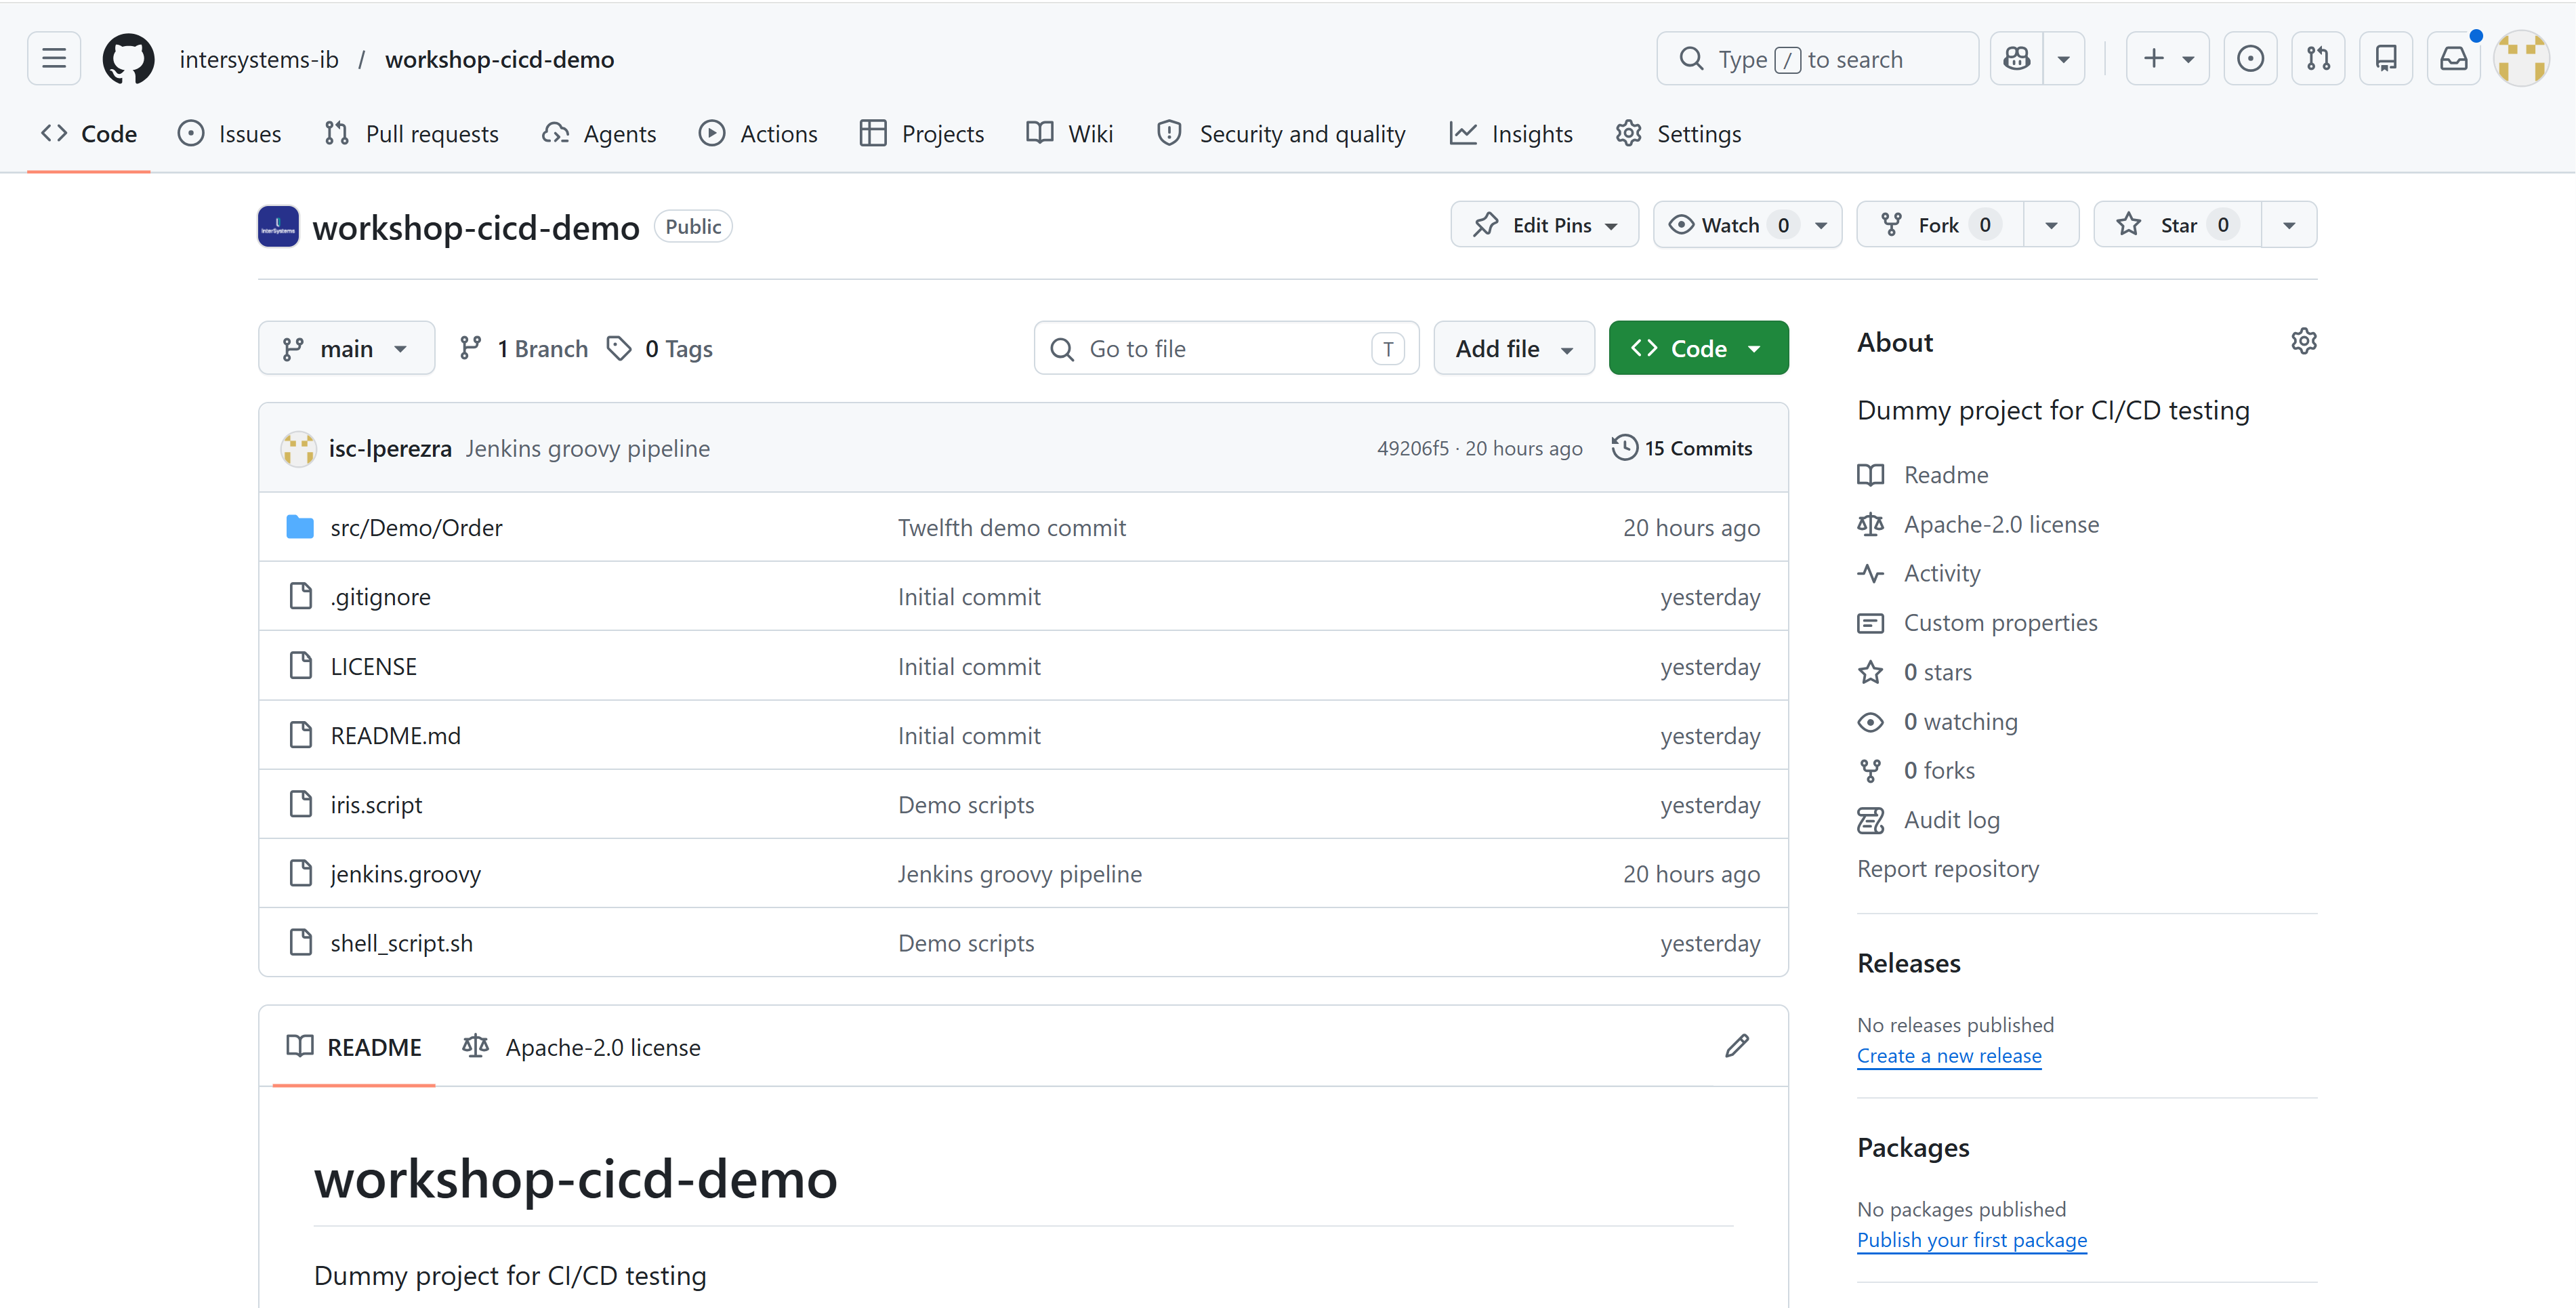
This element will be key to the CI/CD process since it is where we can obtain the latest code developed for deployment.
Jenkins
For those of you who don't know Jenkins, it's an open-source automation server widely used for continuous integration processes because it has a multitude of plugins that will make the task easier.
Jenkins has a Groovy scripting tool that allows us to implement the necessary steps for the integration process. For this example, we won't get too complicated.
Integration procedure
For this example, we've assumed we're working on an interoperability project with a DEVELOPMENT instance (deployed on the AWS server) where we want to deploy the changes developers make to their local instances for testing. The steps would be roughly as follows:
- The developer implements the functionalities in their local instance.
- The developer uploads changes to the corresponding branch of the GitHub repository.
- The person responsible for the deployment accesses Jenkins and launches a pipeline.
- Jenkins connects via SSH to the DEVELOPMENT server.
- A Linux script is running on the server.
- The script downloads the latest changes from the repository using a git pull.
- This script identifies new or modified files that are copied to a server directory.
- With the files identified, the script invokes a second script in ObjectScript.
- The second script loads and compiles the files into the IRIS for Health instance.
- If the upload was successful, the script restarts production.
As you can see, we have chosen a very basic operation, but one that can be quite helpful.
Let's now take a look at the scripts we will run using Jenkins on our DEVELOPMENT server:
#!/usr/bin/env bash
set -euo pipefail

# =========================
# Configuration
# =========================
REPO_URL="https://github.com/intersystems-ib/workshop-cicd-demo"
BRANCH="main"

# Local clone used to compare commits
CACHE_REPO="/opt/git-cache/project_repo"

# Folder to copy the files to be uploaded into Health Connect
EXPORT_DIR="/projectGit"

# File with the latest processed commit
STATE_FILE="${CACHE_REPO}/.last_sync_commit"

# CLean up EXPORT_DIR before to copy the new updates
CLEAN_EXPORT_DIR="true"

# =========================
# Validations
# =========================
if ! command -v git >/dev/null 2>&1; then
  echo "Error: git is not installed."
  exit 1
fi

mkdir -p "${EXPORT_DIR}"
mkdir -p "$(dirname "${CACHE_REPO}")"

# =========================
# Clone or update cache folder
# =========================
if [ ! -d "${CACHE_REPO}/.git" ]; then
  echo "Cloning repository into cache..."
  git clone --branch "${BRANCH}" "${REPO_URL}" "${CACHE_REPO}"
else
  echo "Updating local cache..."
  git -C "${CACHE_REPO}" fetch origin
  git -C "${CACHE_REPO}" checkout "${BRANCH}"
  git -C "${CACHE_REPO}" reset --hard "origin/${BRANCH}"
fi

REMOTE_COMMIT="$(git -C "${CACHE_REPO}" rev-parse HEAD)"

# =========================
# First execution
# =========================
if [ ! -f "${STATE_FILE}" ]; then
  echo "First execution."
  echo "Copying all the contains from branch into ${EXPORT_DIR}..."

  if [ "${CLEAN_EXPORT_DIR}" = "true" ]; then
    find "${EXPORT_DIR}" -mindepth 1 -maxdepth 1 -exec rm -rf {} +
  fi

  rsync -av --delete --exclude ".git" "${CACHE_REPO}/" "${EXPORT_DIR}/"

  echo "${REMOTE_COMMIT}" > "${STATE_FILE}"
  echo "First export finished."
  exit 0
fi

LAST_COMMIT="$(cat "${STATE_FILE}")"

if [ "${LAST_COMMIT}" = "${REMOTE_COMMIT}" ]; then
  echo "No updates."
  exit 0
fi

echo "Comparing commits:"
echo "  anterior: ${LAST_COMMIT}"
echo "  actual:   ${REMOTE_COMMIT}"

if [ "${CLEAN_EXPORT_DIR}" = "true" ]; then
  echo "Cleaning up export folder..."
  find "${EXPORT_DIR}" -mindepth 1 -maxdepth 1 -exec rm -rf {} +
fi

# =========================
# Export just added or modified files
# =========================
while IFS= read -r -d '' status && IFS= read -r -d '' path1; do
  case "${status}" in
    M|A)
      echo "Exporting ${status}: ${path1}"
      mkdir -p "${EXPORT_DIR}/$(dirname "${path1}")"
      cp -f "${CACHE_REPO}/${path1}" "${EXPORT_DIR}/${path1}"
      ;;

    D)
      # Ignoring deletes
      echo "Ignoring deleted: ${path1}"
      ;;

    R*)
      IFS= read -r -d '' path2
      echo "Exporting renamed: ${path1} -> ${path2}"
      mkdir -p "${EXPORT_DIR}/$(dirname "${path2}")"
      cp -f "${CACHE_REPO}/${path2}" "${EXPORT_DIR}/${path2}"
      ;;

    *)
      echo "Change not automatically managed: ${status} ${path1}"
      ;;
  esac
done < <(git -C "${CACHE_REPO}" diff --name-status -z "${LAST_COMMIT}" "${REMOTE_COMMIT}")

echo "${REMOTE_COMMIT}" > "${STATE_FILE}"
echo "Incremental export concluded in ${EXPORT_DIR}"
echo "Starting file upload and compile in Health Connect"
(echo '_system'; echo 'SYS'; cat iris.script) | iris session IRISHEALTH
echo "Compilation successfully finished"
As you can see, this script executes the git pull on our GitHub repository, updates the source code in a directory on the DEVELOPMENT server, detects the changes compared to the last downloaded version, extracts them to a second directory ( /projectGit ) and finally invokes the IRIS script.
(echo '_system'; echo 'SYS'; cat iris.script) | iris session IRISHEALTH Those first two echo commands will allow us to pass the username and password to the terminal session we need to open to run our ObjectScript script:
zn "DEMO"
set sc = $SYSTEM.OBJ.LoadDir("/projectGit/src/Demo", "ck", , 1)
if '$SYSTEM.Status.IsOK(sc) do $SYSTEM.Status.DisplayError(sc) quit
set production = "Demo.Order.Production"
set ^Ens.Configuration("csp","LastProduction") = production
do ##class(Ens.Director).SetAutoStart(production)
do ##class(Ens.Director).StartProduction(production)
write !,"Produccion iniciada correctamente: ",production,!
This script is where we import the classes we've identified as modified or created and compile them. If the compilation is successful, we restart the corresponding production environment of our DEMO namespace so that the changes are implemented.
Perfect, we have our scripts, our DEVELOPMENT server and our GitHub, let's configure our Jenkins.
Configuring Jenkins
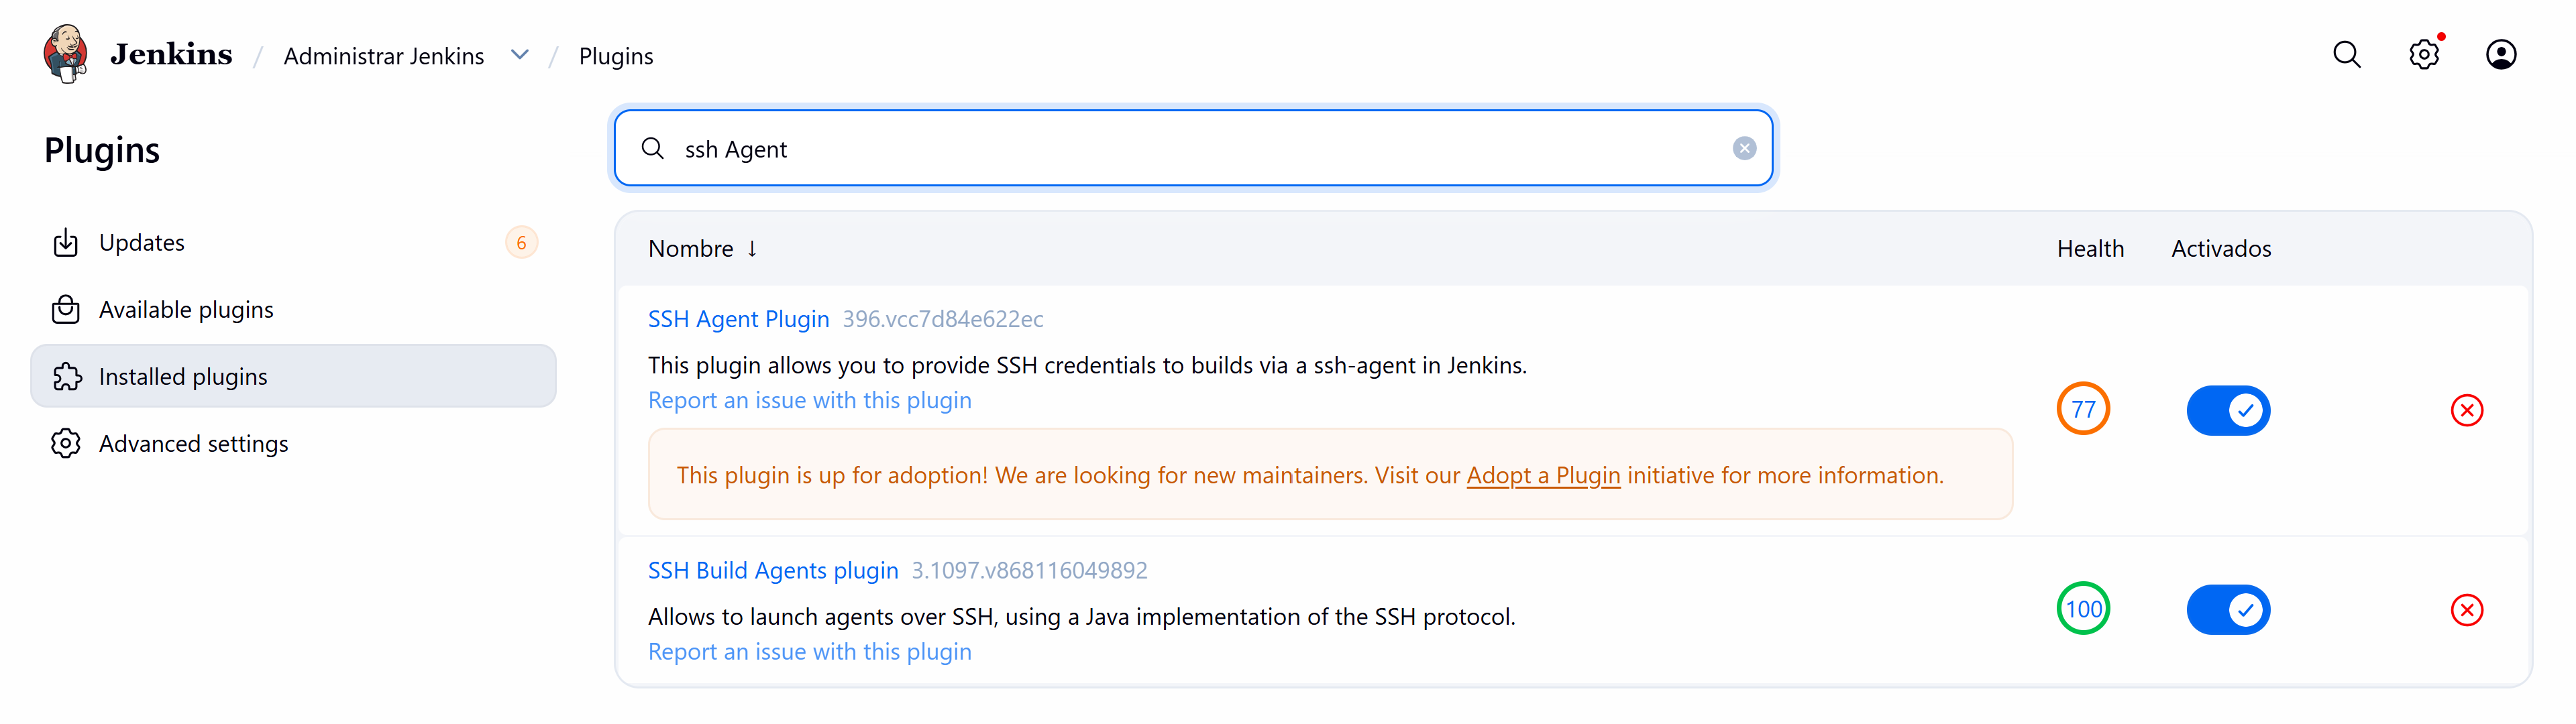
Before we start creating our pipeline, we must install a plugin that allows us to connect via SSH to our DEVELOPMENT server with our primary username and password.
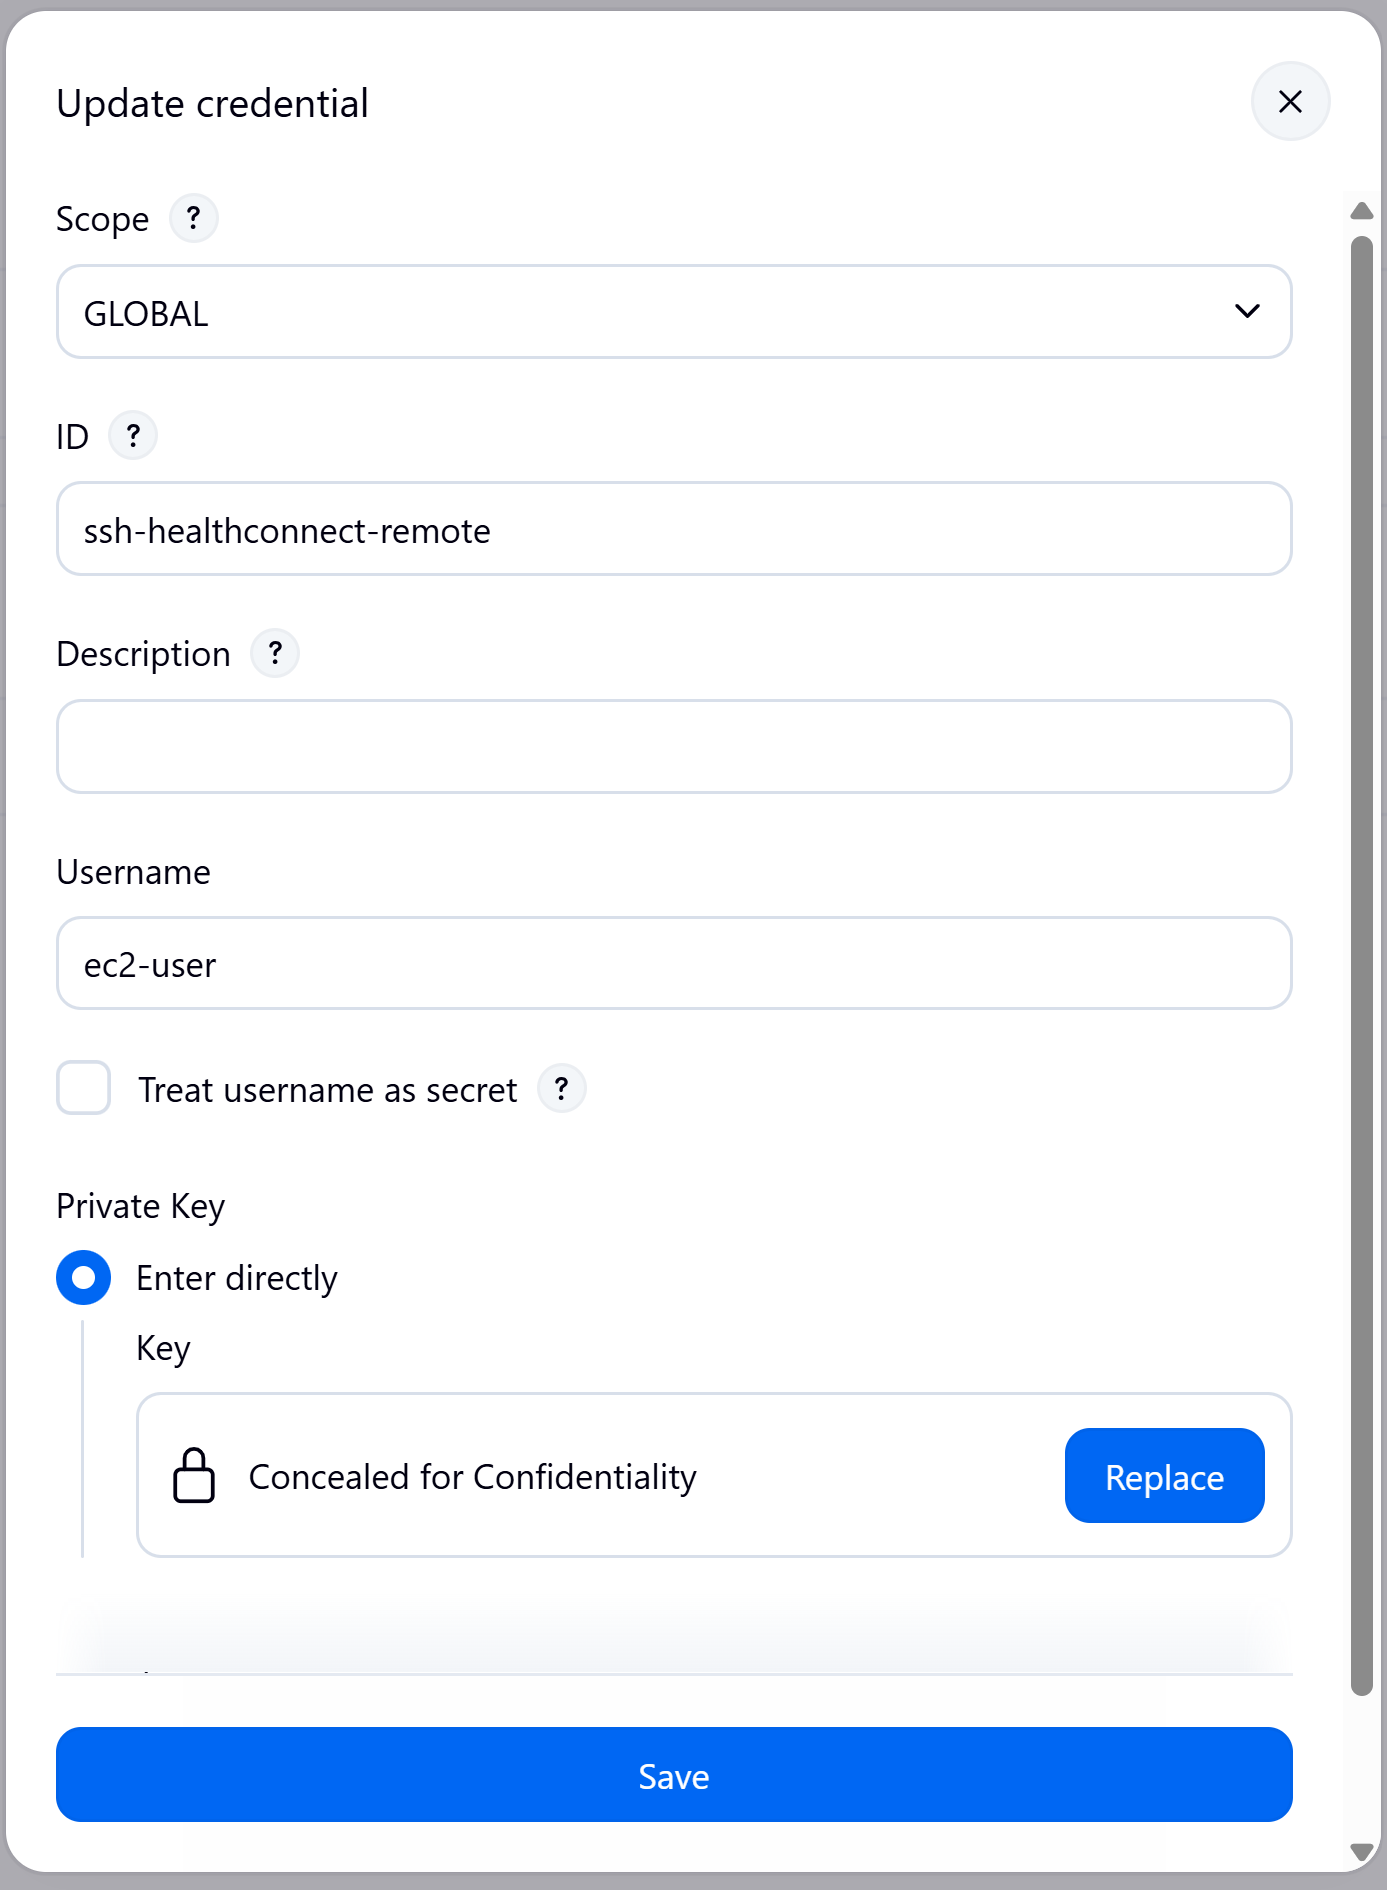
From the Jenkins configuration, we created an access credential to our DEVELOPMENT server:
And finally we proceed to create the Pipeline.

Within the pipeline configuration, we define the following script that will allow us to deploy:
pipeline {
    agent any

    parameters {
        string(name: 'GIT_BRANCH', defaultValue: 'main', description: 'Repository branch')
        string(name: 'REMOTE_HOST', defaultValue: 'ec2-**-**-***-**.**-*****.compute.amazonaws.com', description: 'Remote Host')
        string(name: 'REMOTE_USER', defaultValue: 'ec2-user', description: 'Remote SSH user')
        string(name: 'REMOTE_SCRIPT_NAME', defaultValue: 'shell_script.sh', description: 'Remote script name')
    }

    environment {
        REPO_URL = 'https://github.com/intersystems-ib/workshop-cicd-demo'
        SSH_CREDENTIALS_ID = 'ssh-healthconnect-remote'
    }

    stages {
        stage('Checkout') {
            steps {
                git branch: "${params.GIT_BRANCH}", url: "${env.REPO_URL}"
            }
        }

        stage('Validate script') {
            steps {
                sh '''
                    set -eu
                    test -f shell_script.sh
                    chmod +x shell_script.sh
                '''
            }
        }

        stage('Launch remote script') {
            steps {
                sshagent(credentials: ["${env.SSH_CREDENTIALS_ID}"]) {
                    sh '''
                        set -eu

                        ssh -o StrictHostKeyChecking=no "${REMOTE_USER}@${REMOTE_HOST}" \
                          "sudo sh '/${REMOTE_SCRIPT_NAME}'" | tee remote_execution.log
                    '''
                }
            }
        }
    }

    post {
        always {
            archiveArtifacts artifacts: 'remote_execution.log', allowEmptyArchive: true
        }
        success {
            echo 'Remote deployment successfully finished.'
        }
        failure {
            echo 'Remote deployment failed. Check remote_execution.log.'
        }
    }
}
What does our script do? Very simple, it checks that our GitHub repository exists with its associated branch and then, via SSH, sends the instruction to execute the Linux script that will be in charge of downloading and updating our instance.
Let's see it in action with a small example.
Running the process
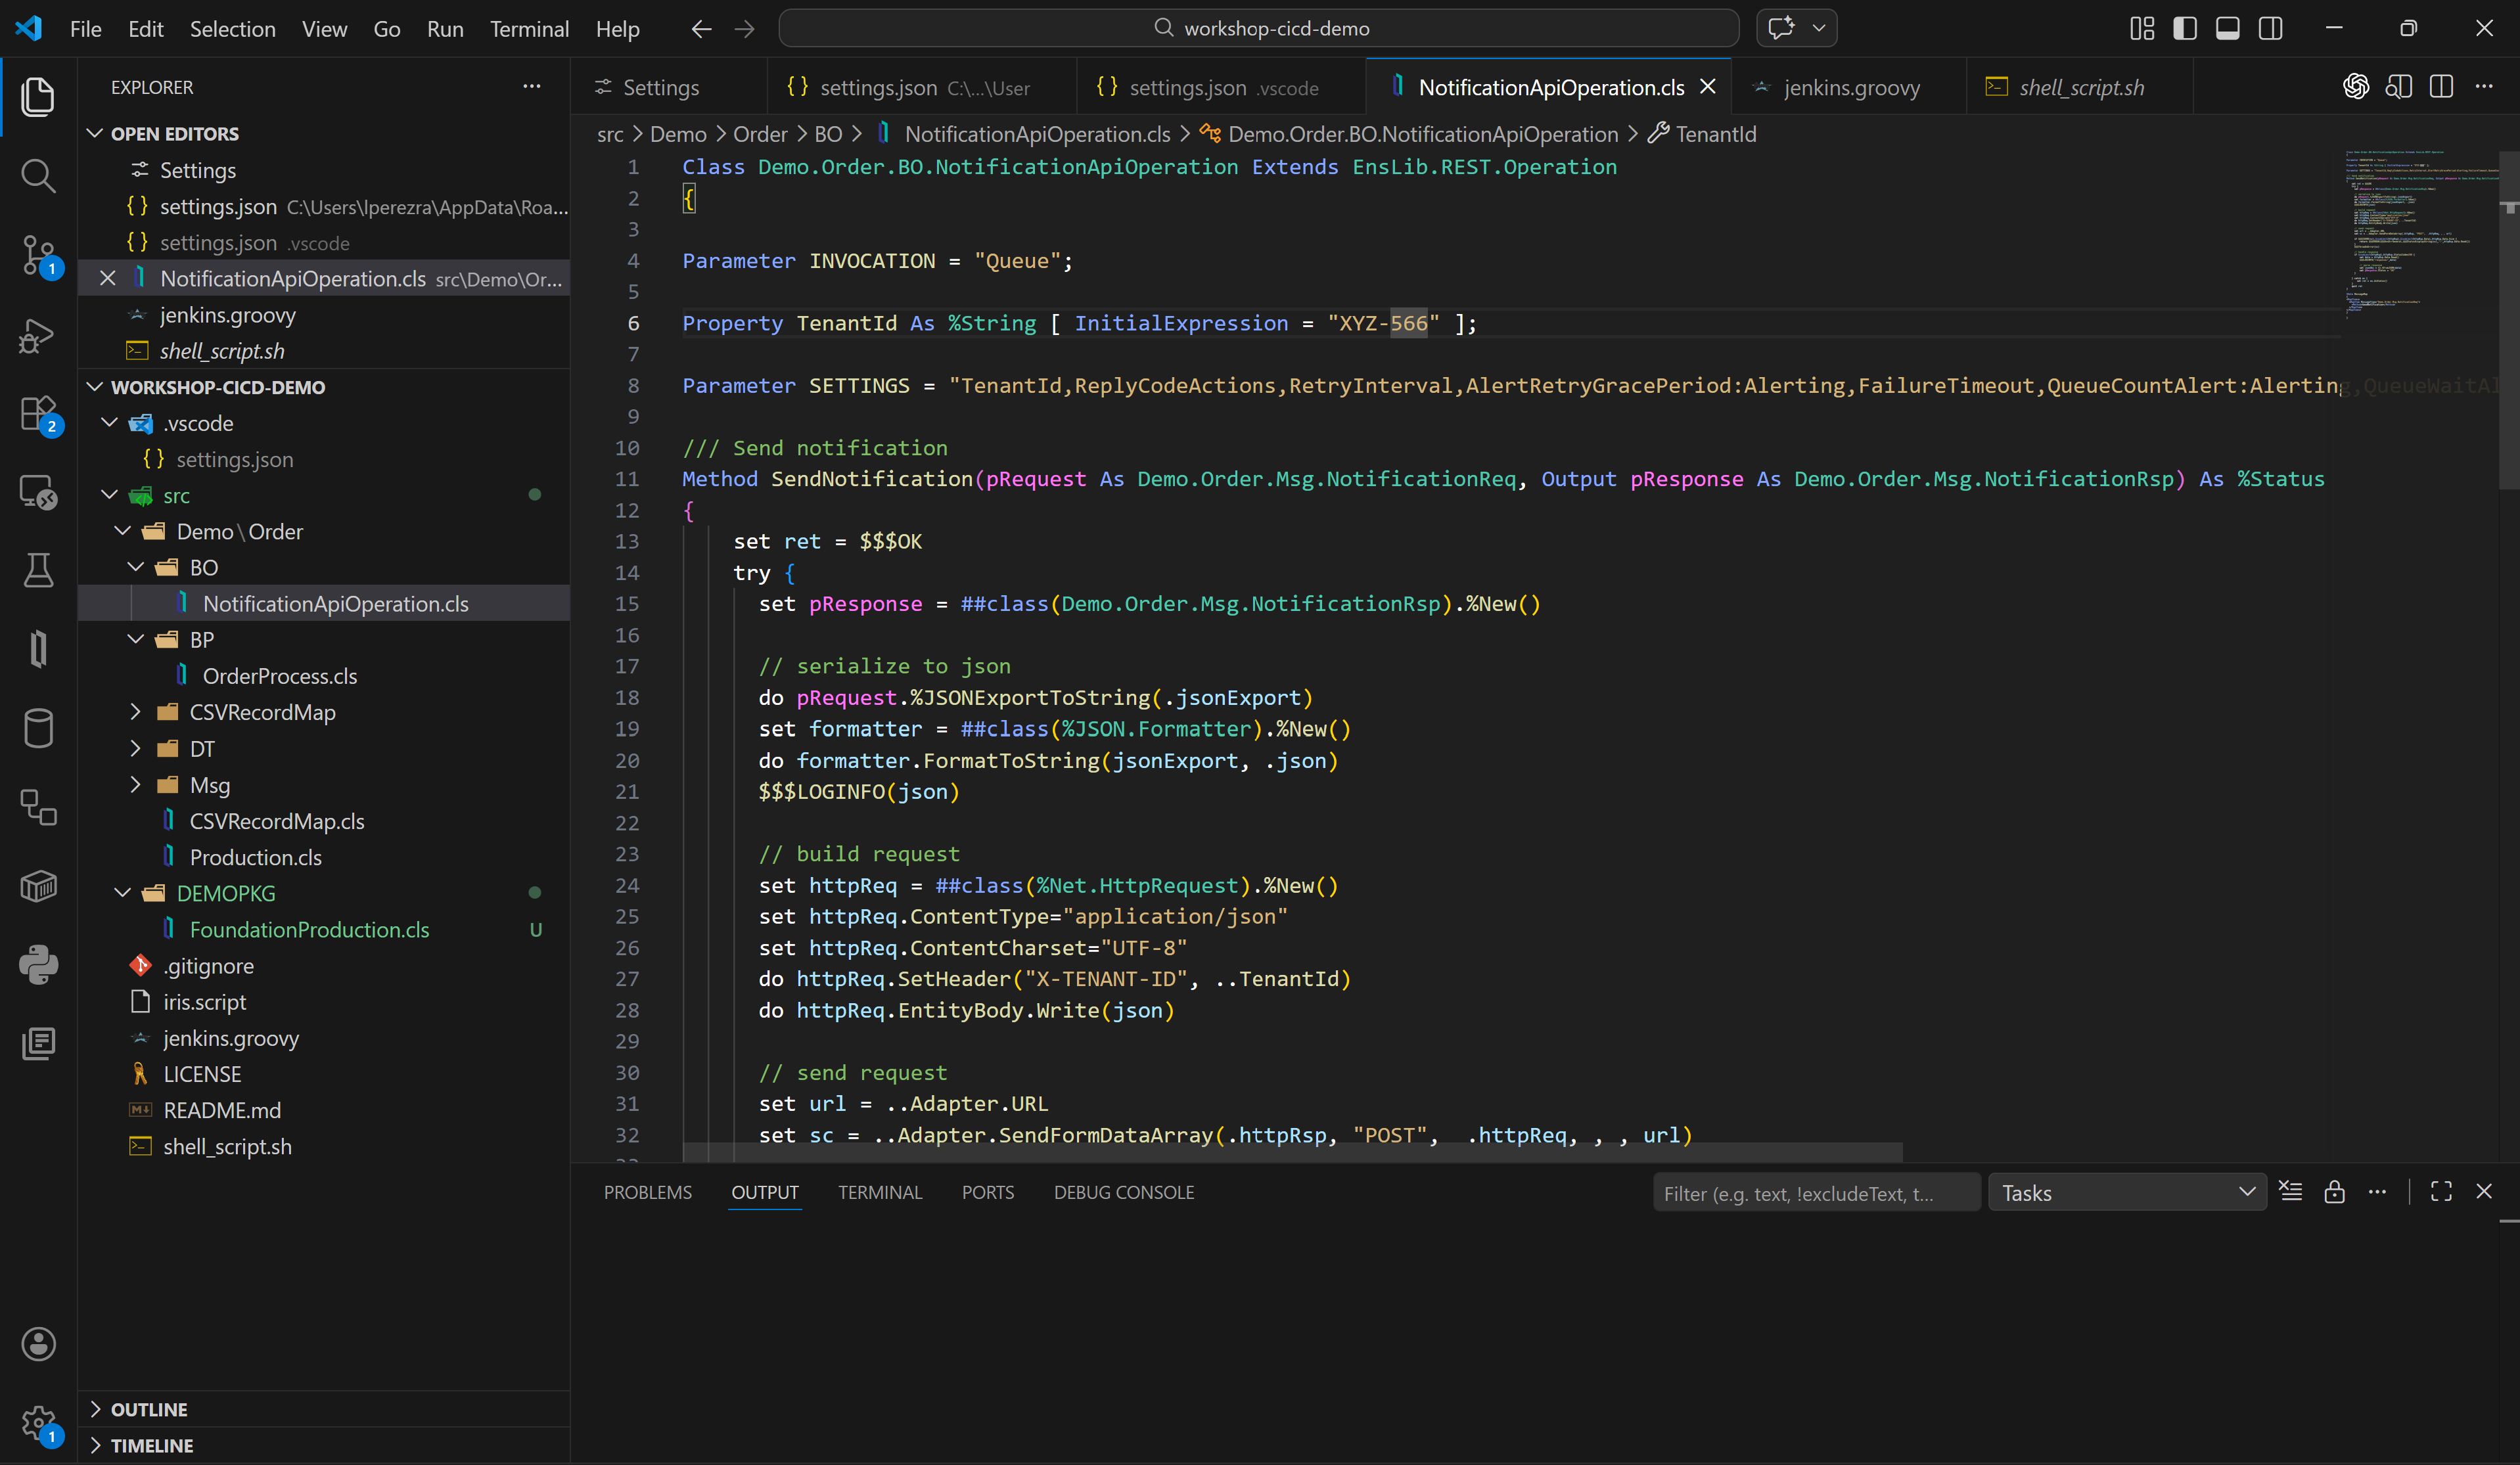
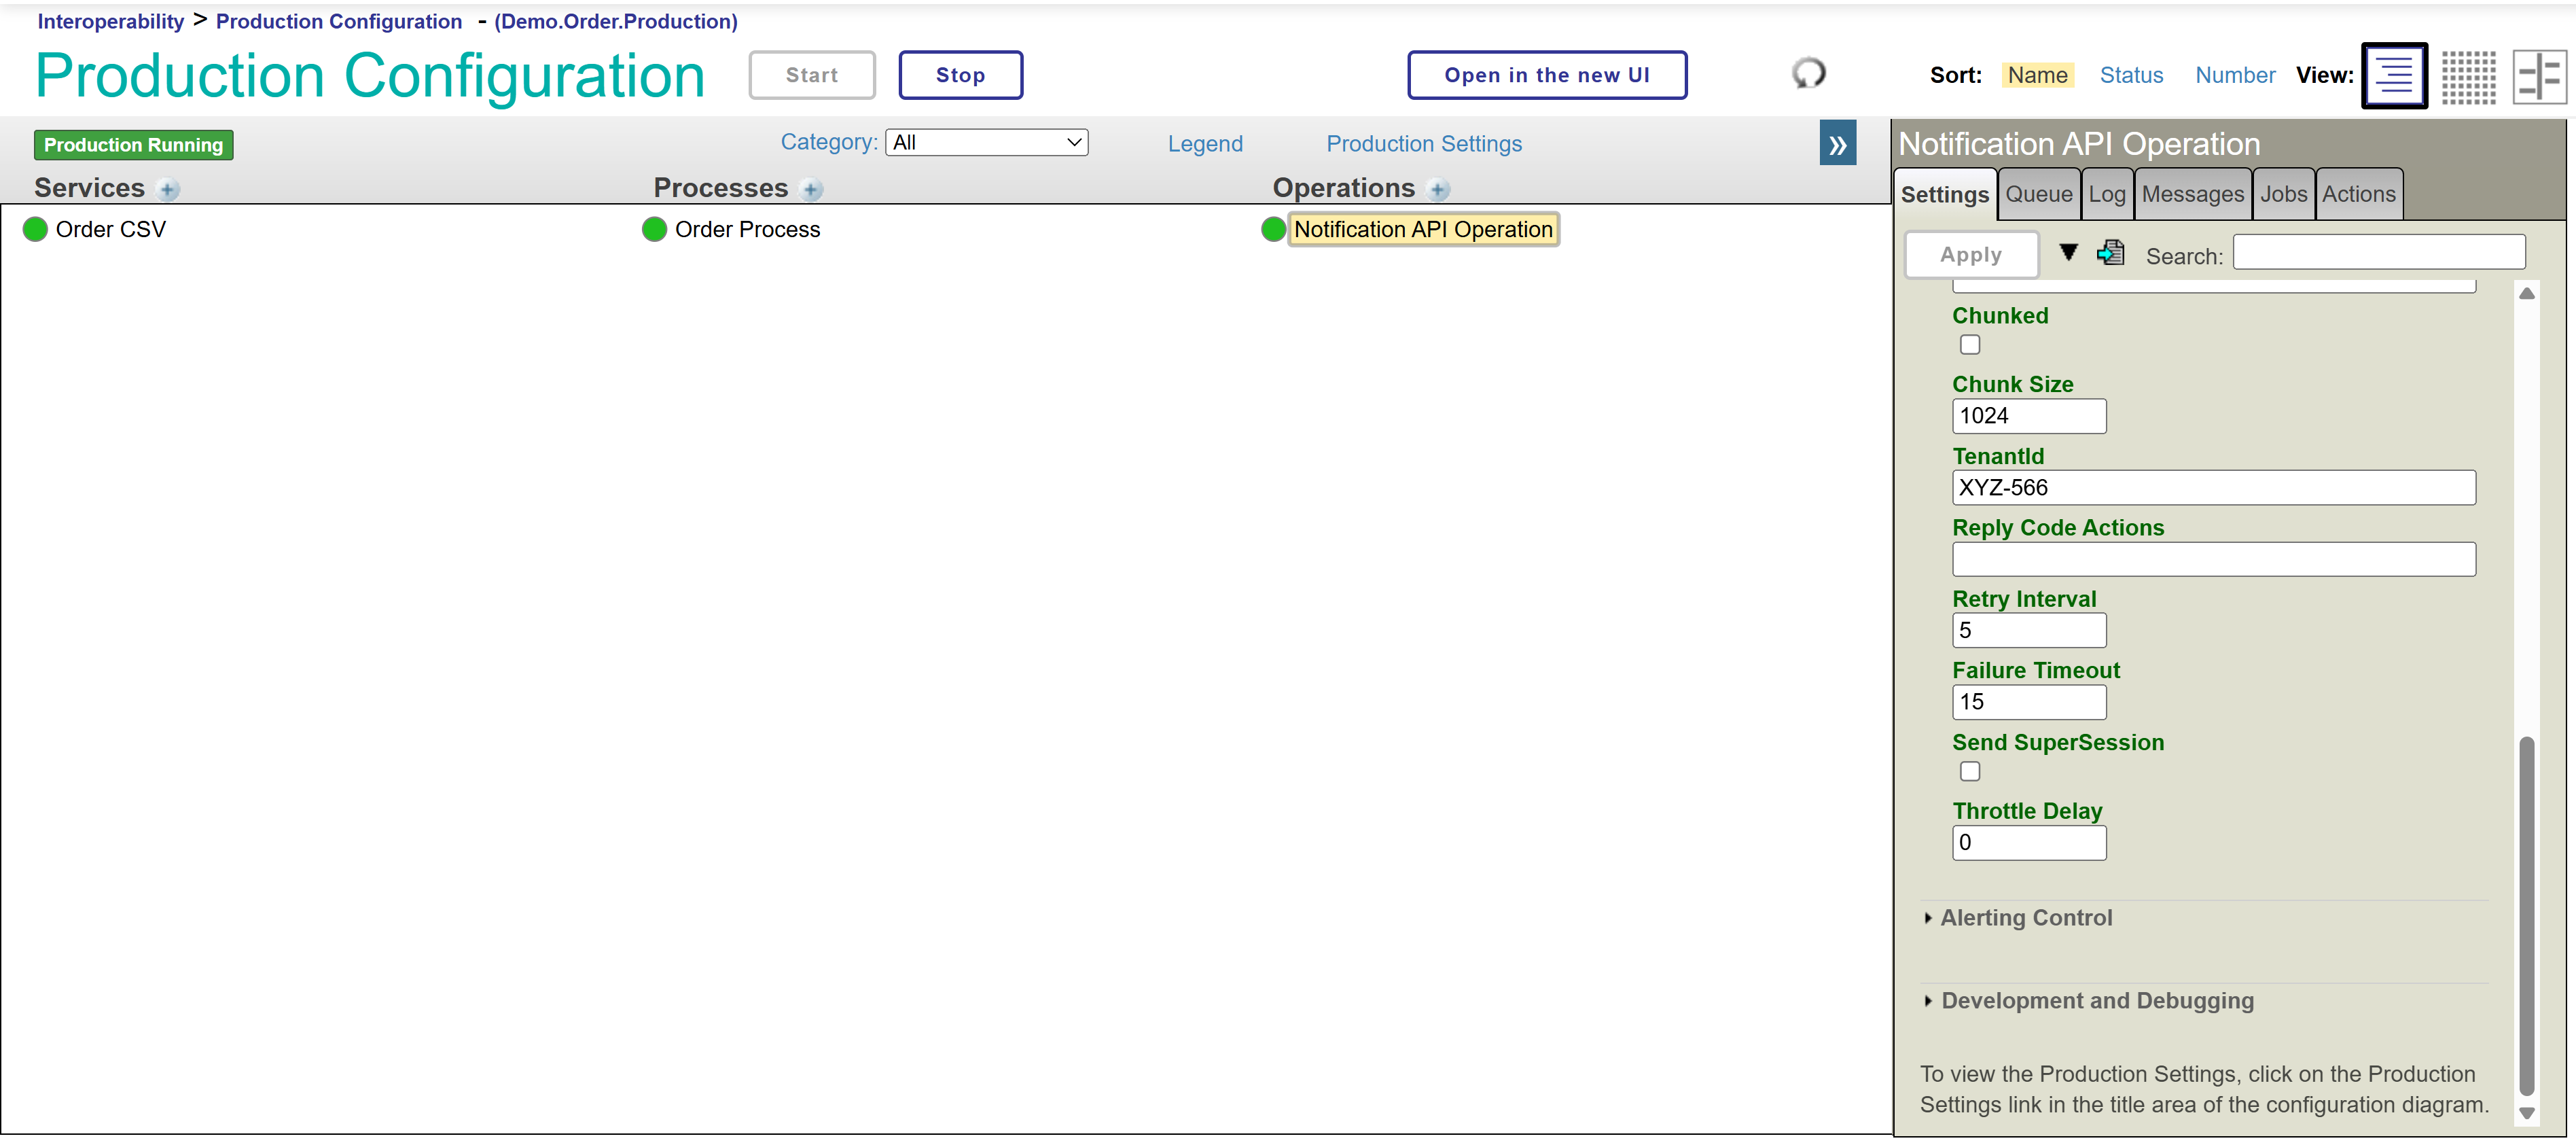
Our production is running normally and we want to make a change to one of our components so that the default value shown in one of the parameters is different:
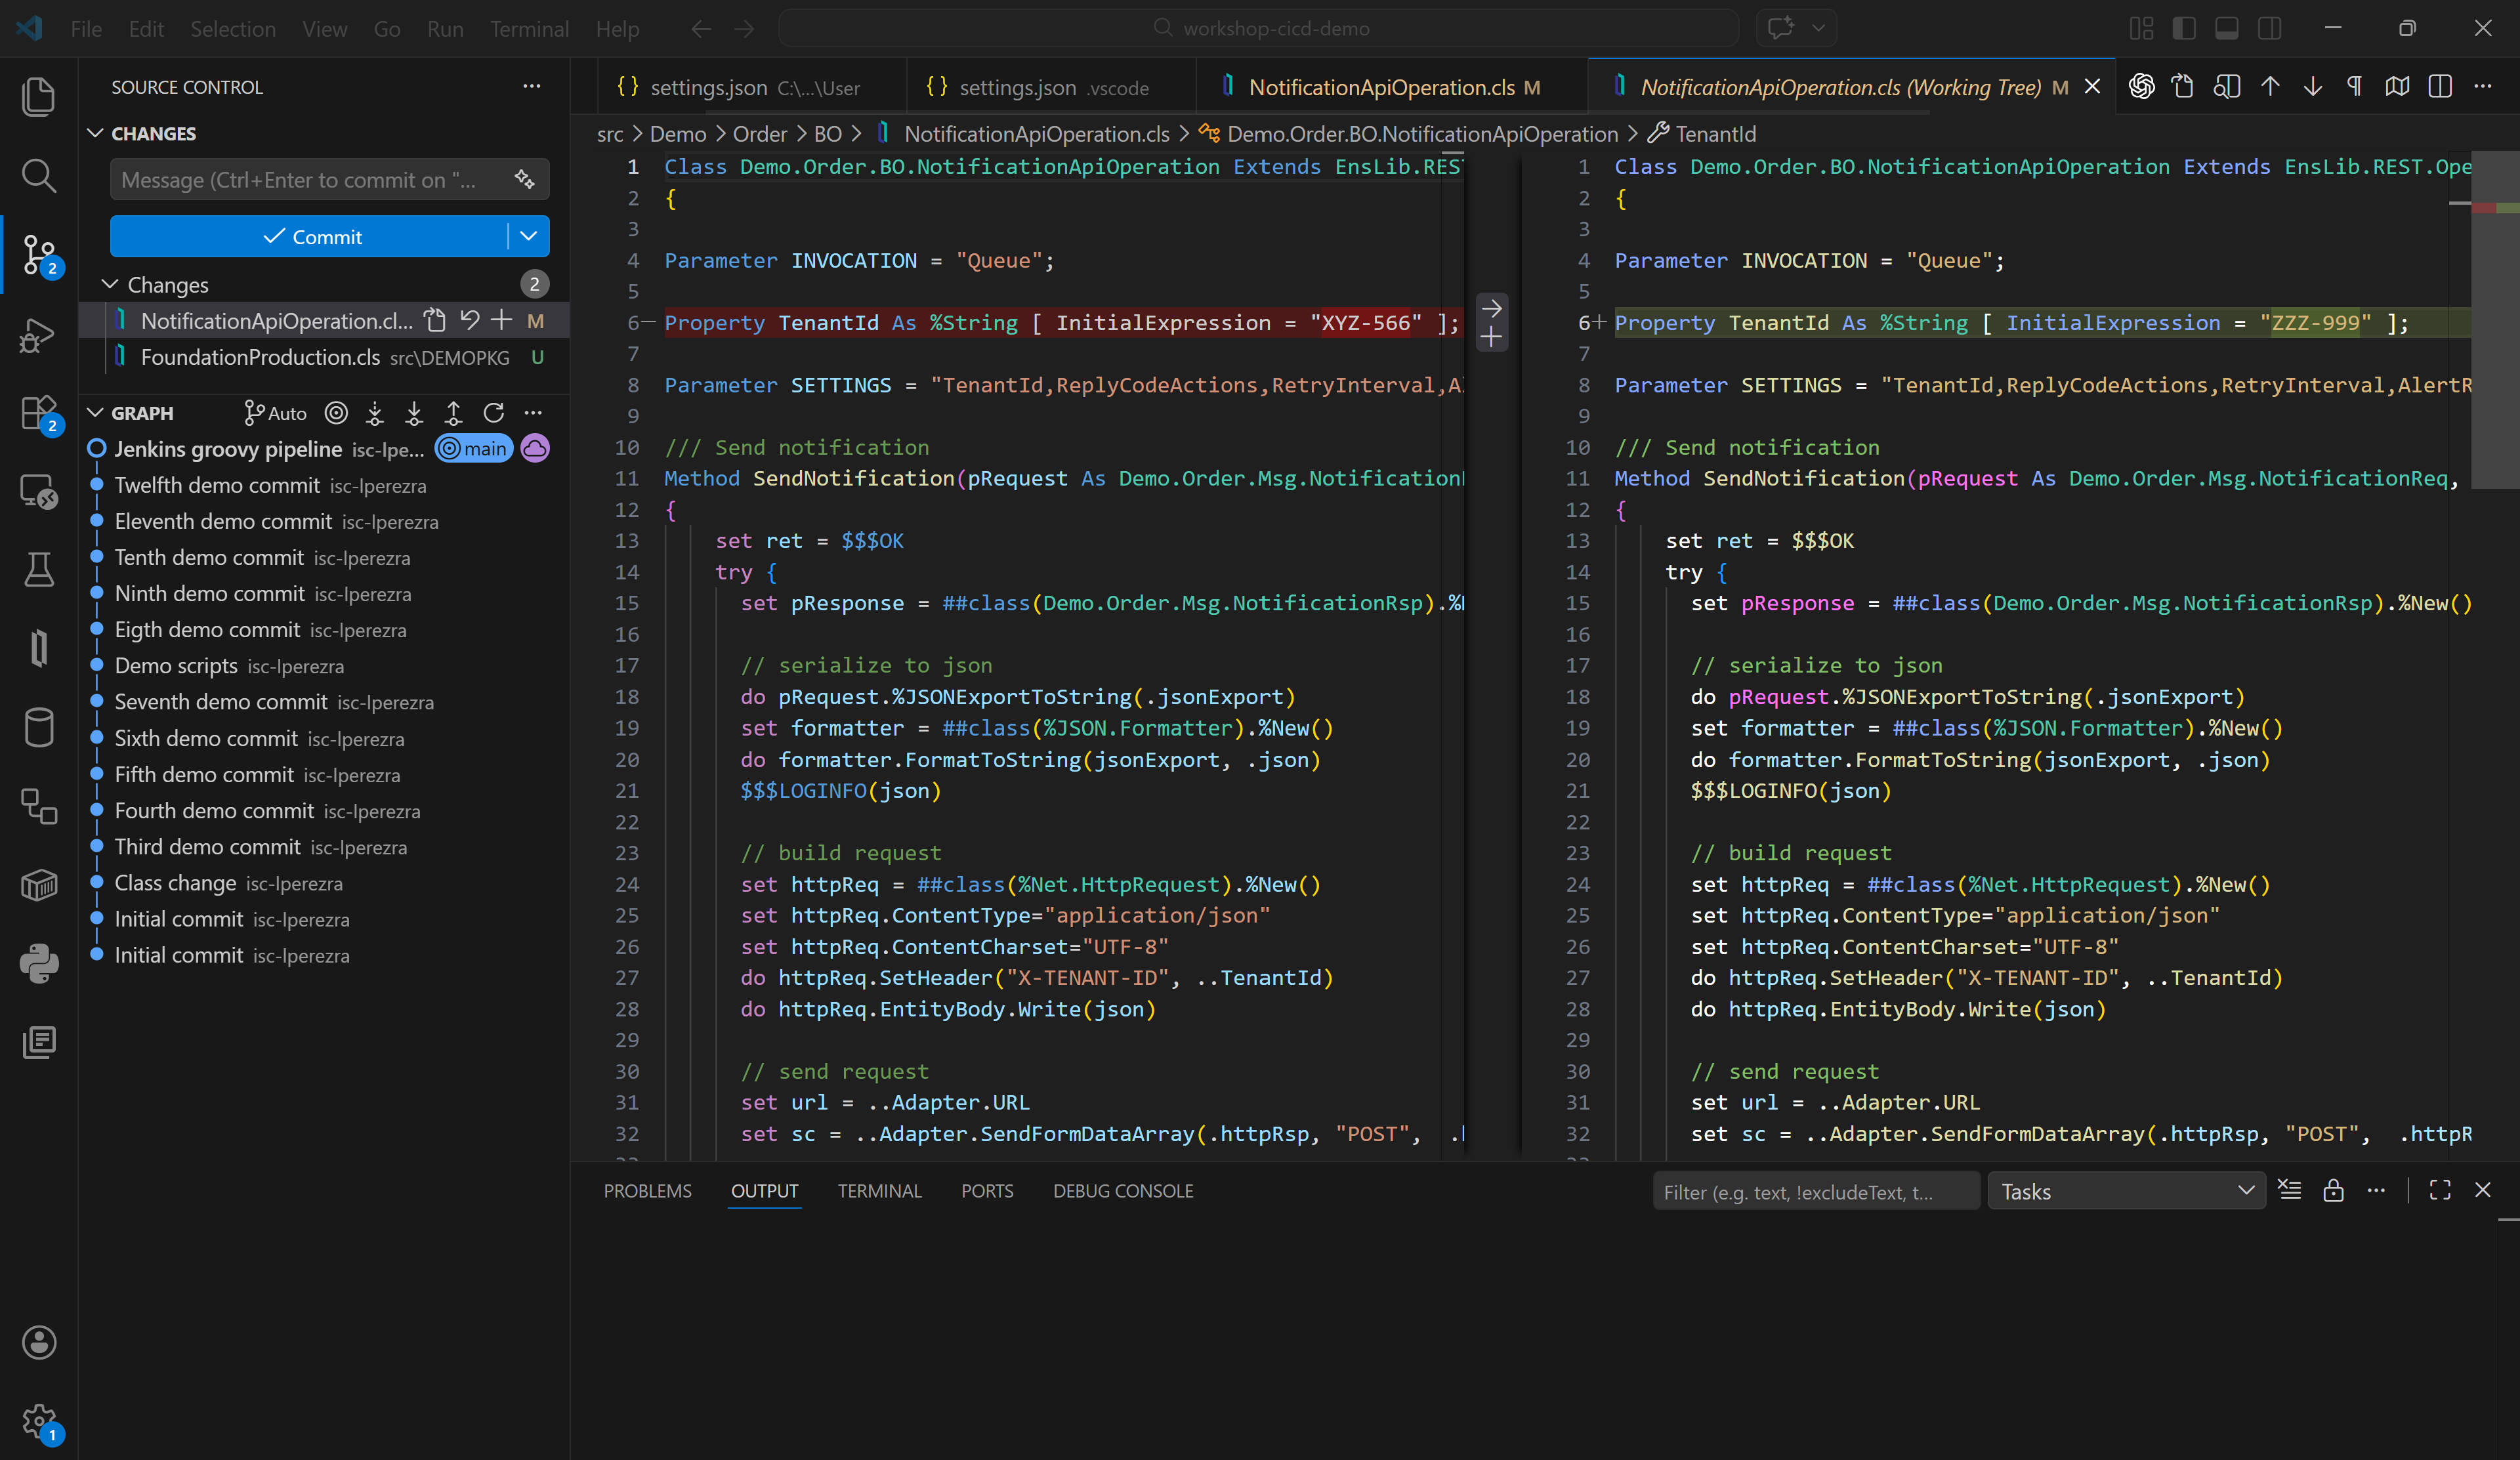
Now we want our TenantId parameter to have the value ZZZ-999, great, let's correct the code we have in our local instance from Visual Studio Code and upload the change to our GitHub.
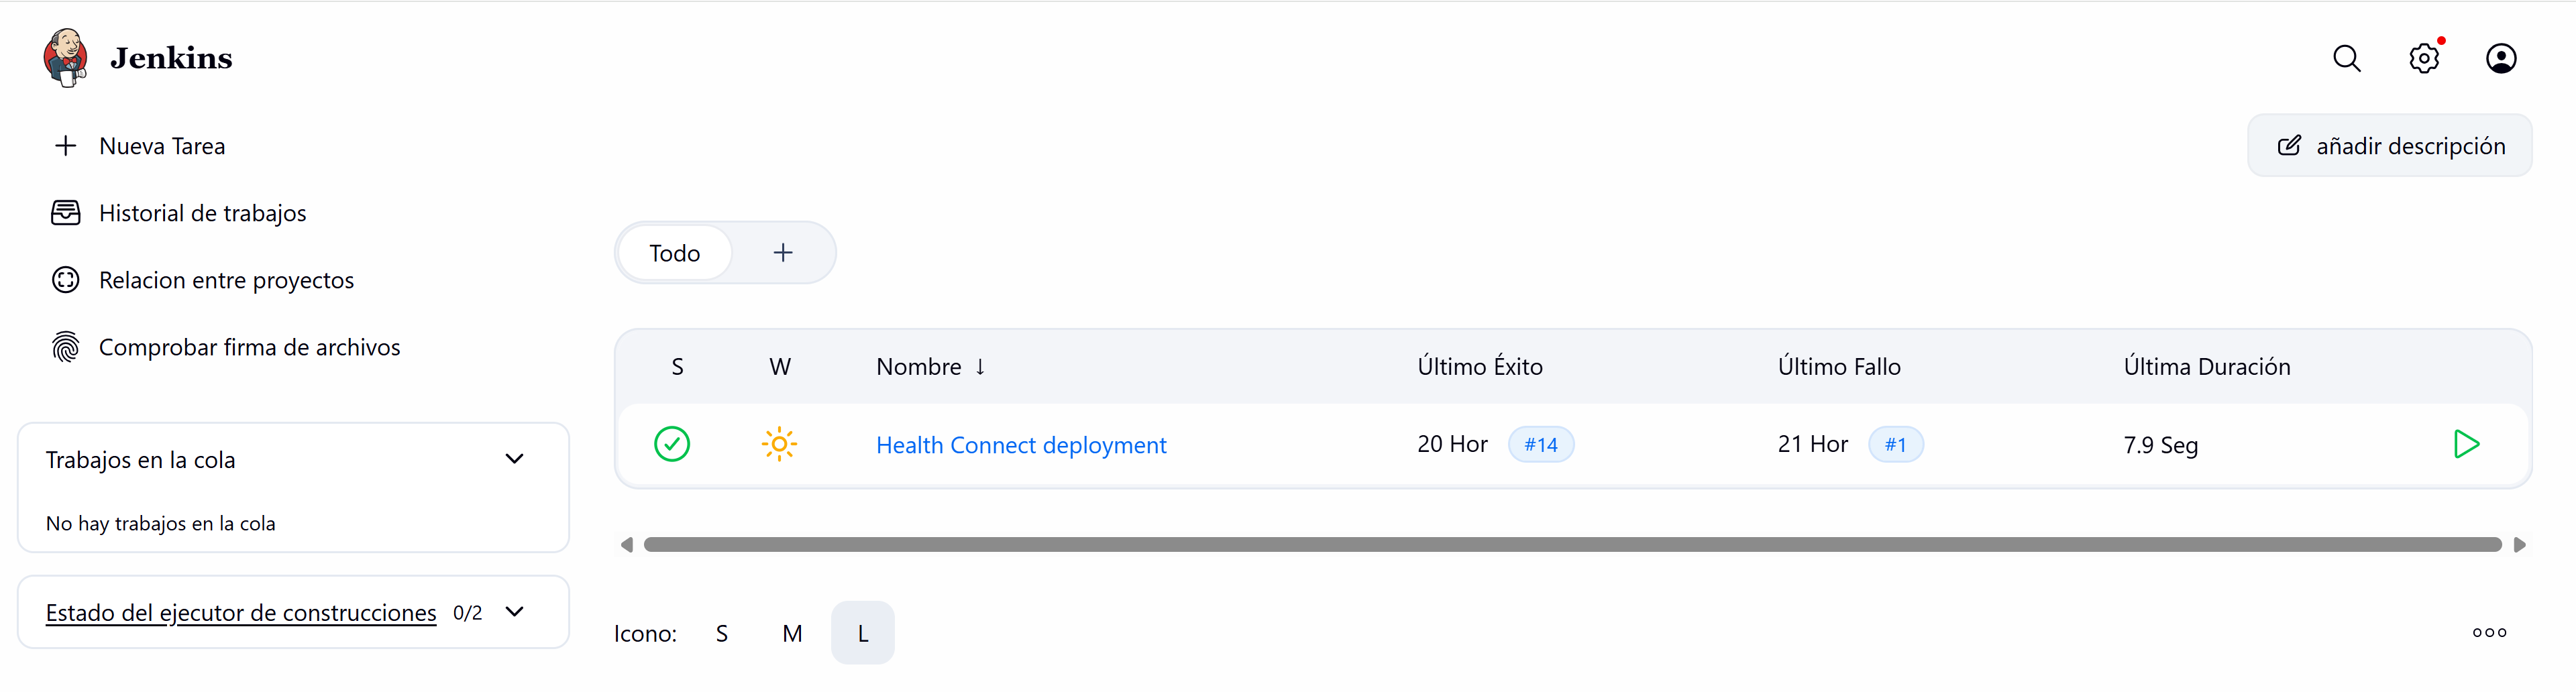
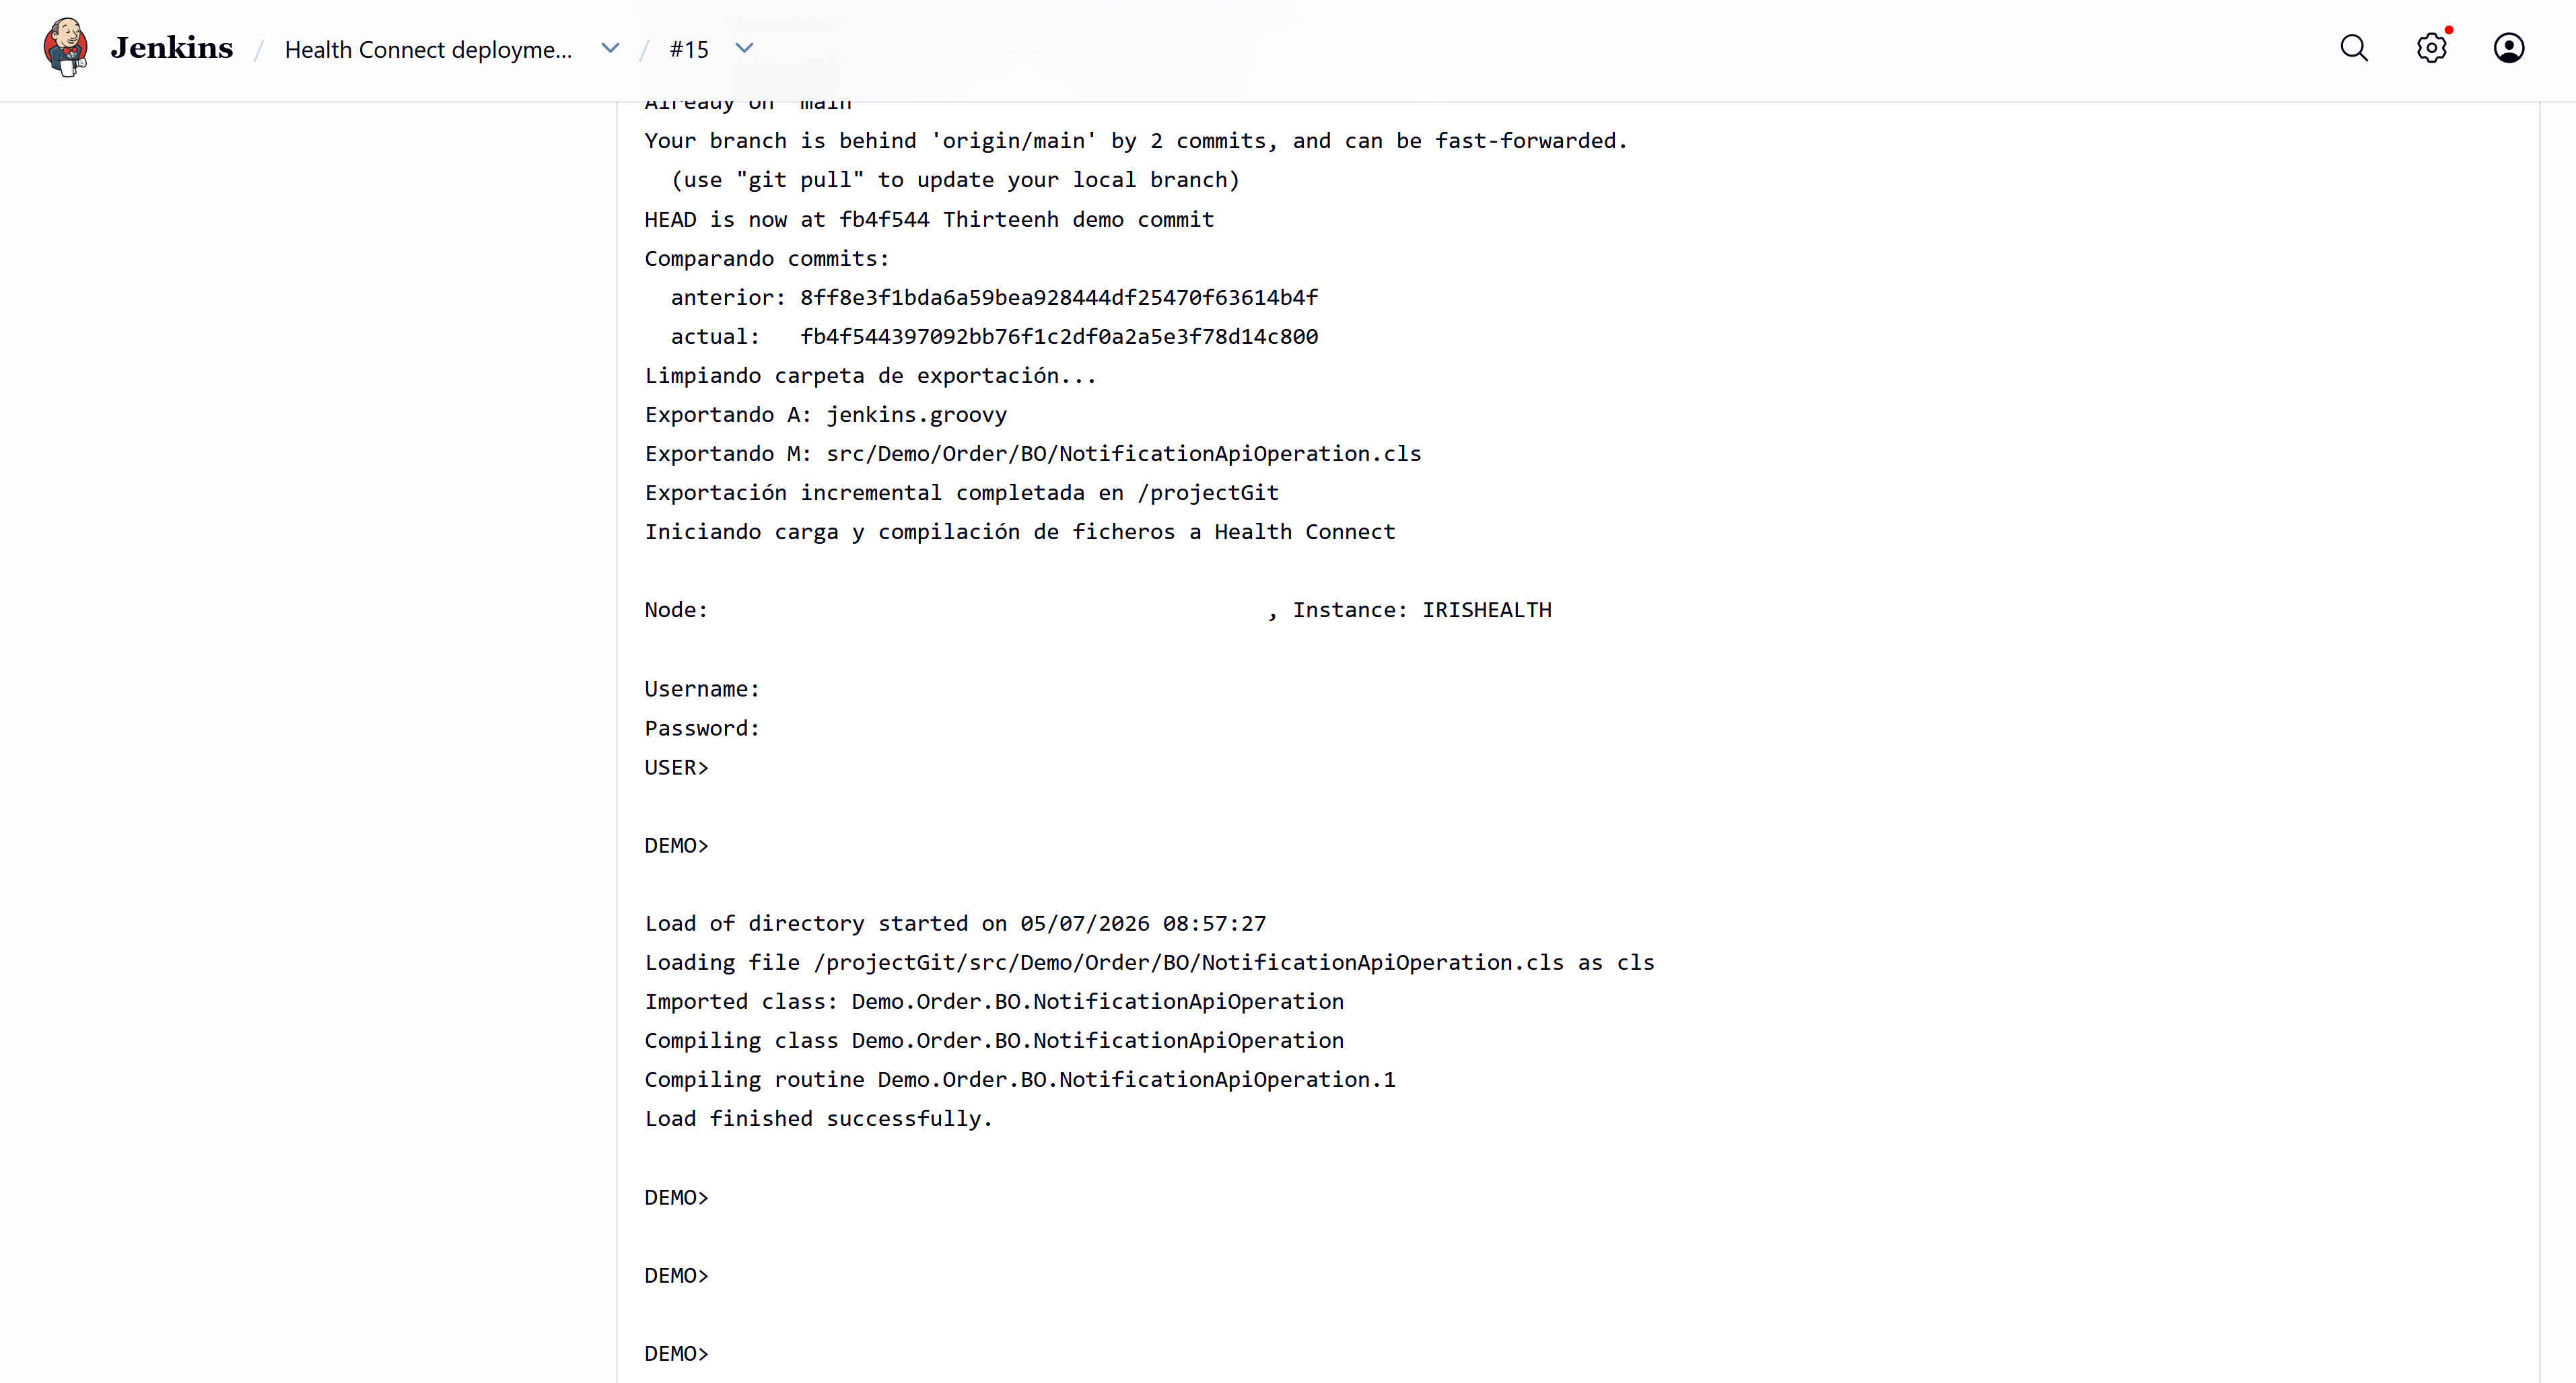
With our change now pushed to our repository, we can run the pipeline from our Jenkins instance. Let's see the pipeline's output:
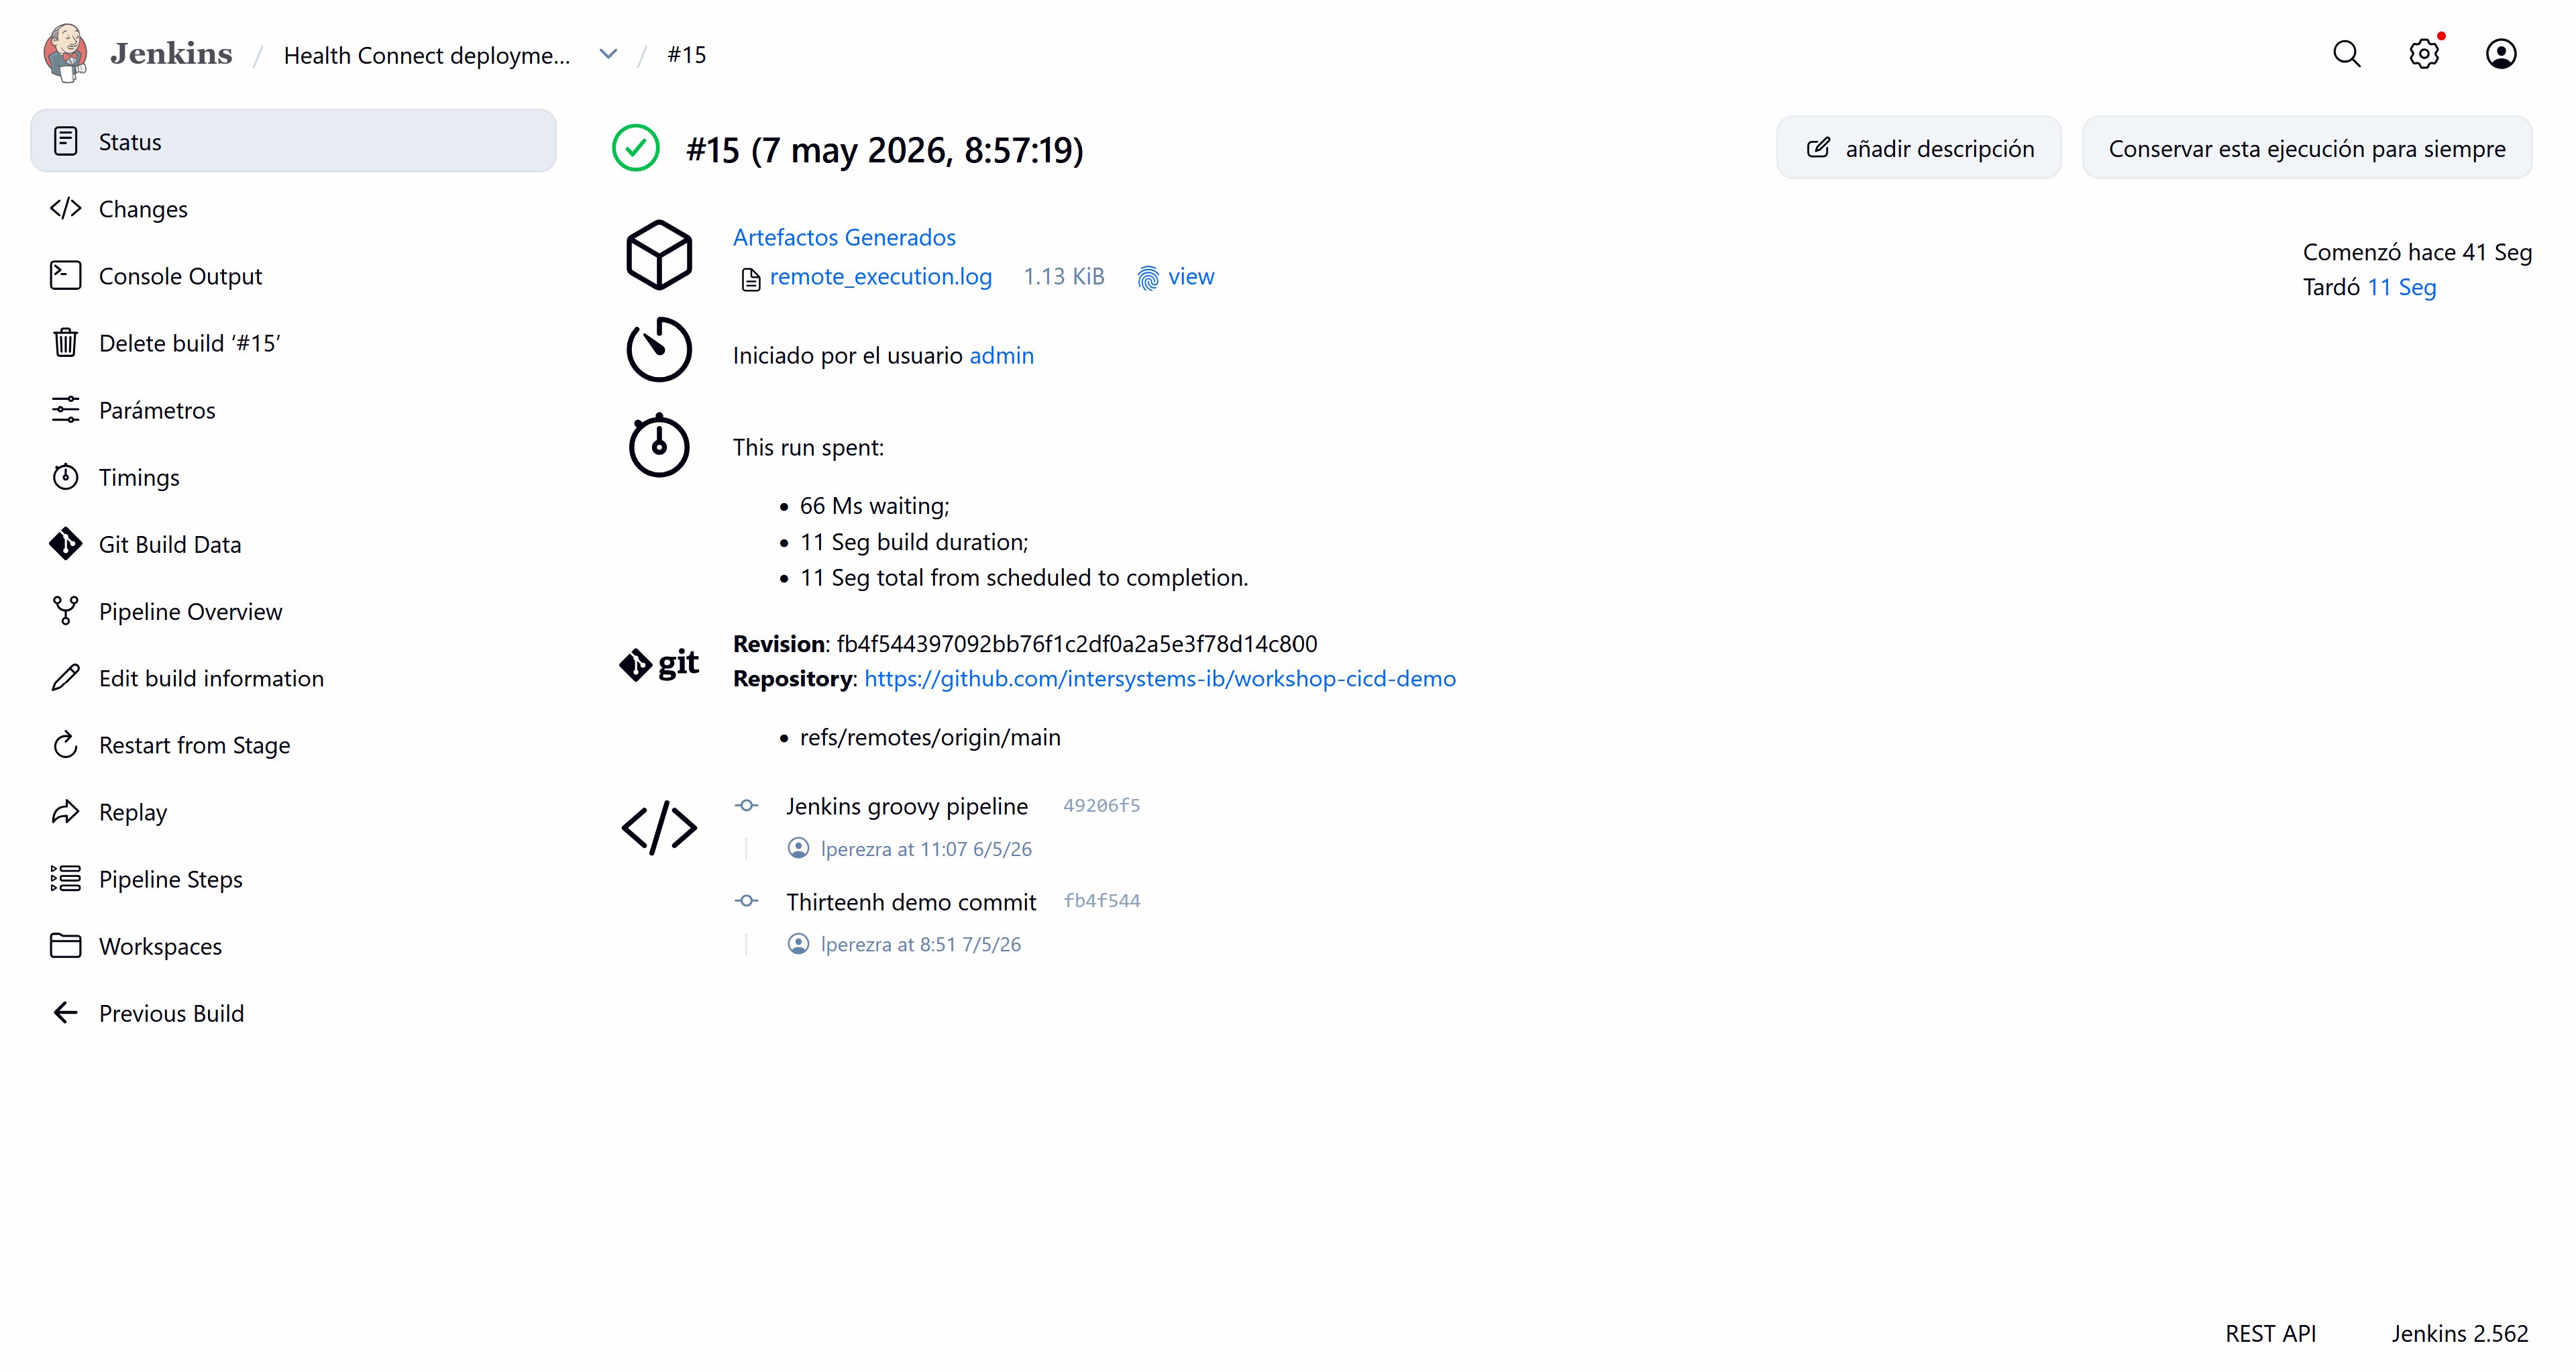
Everything is correct; it has detected our change and executed the script successfully.
Let's verify that the parameter has changed and production has restarted successfully.

There we have our new TenantId! A complete and resounding success!
Conclusions and next steps.
As you may have noticed, there are no technological limitations from IRIS for participating in a continuous integration process. You simply need the appropriate scripts that best suit your daily operations.
In this article we have seen a small example of continuous integration with IRIS for Health, but this could be expanded to certain configurations that could be deployed using features such as Configuration Merge.
Give it a try!
Comments
Nice work on this! Thank you for sharing with the Community!