Hi Developers!
As you know InterSystems IRIS Interoperability solutions contain different elements of the solution, such as: production, business rule, business process, data transformation, record mapper. And sometimes we can create and modify these elements with UI tools. And of course we need a handy and robust way to source-control the changes made with UI tools.
For a long time this was a manual (export class, element, global, etc) or cumbersome settings procedure, so the saved time with source-control UI automation was competing with lost time to setup and maintain the settings.
Now the problem doesn't exist any more. With two approaches: package first development and usage of IPM package git-source-control by @Timothy Leavitt
.

The details are below!
Disclaimer: this relates to a client-side approach of development, when the elements of the Interoperability production are the files in the repository.
So, this article will not be long at all, as the solution is fantastically simple.
I suppose you develop with docker and once you build the dev environment docker image with IRIS you load the solution as an IPM module. This is called "Package first" development and there is the related video and article. The basic idea is that dev-environment docker image with iris gets the solution loaded as package, as it is being deployed on a client's server.
To make a package first dev environment for your solution add a module.xml into the repository, describe all the elements of it and call "zpm load "repository/folder" command at a building phase of docker image.
I can demonstrate the idea with the example template: IRIS Interoperability template and its module.xml. Here is how the package is being loaded during docker build:
zpm "load /home/irisowner/irisdev/ -v":1:1
the source.
See the following two lines placed before loading the package source control. Because of it source control starts working automatically for ALL the interoperability elements in the package and will export it in a proper folders in a proper format:
zpm "install git-source-control"
do ##class(%Studio.SourceControl.Interface).SourceControlClassSet("SourceControl.Git.Extension")
the source
How is it possible?
Since recently git-source-control app supports IPM pakcages for source control that are loaded in a dev mode. It reads the folder to export, and imports the structure of sources from module.xml. @Timothy Leavitt can give provide more details.
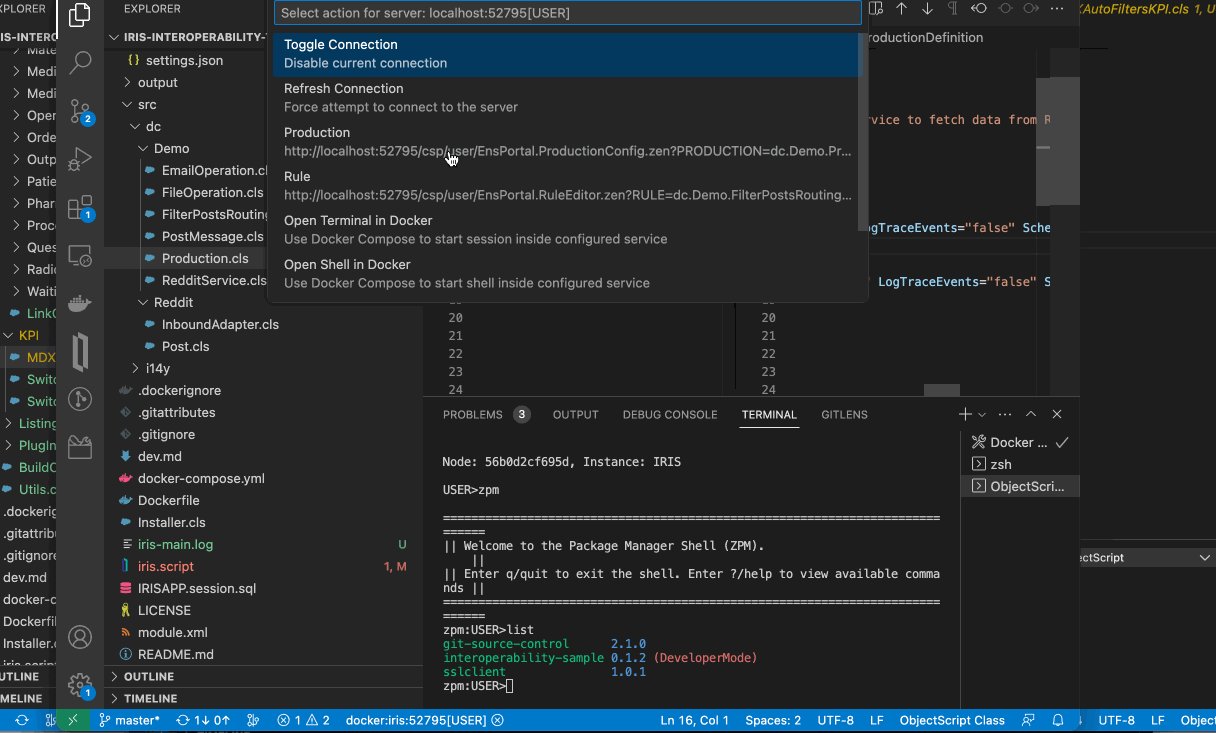
If we check in terminal the list of IPM modules after the environment is built we can see that loaded module is indeed in dev mode:
USER>zpm
=============================================================================
|| Welcome to the Package Manager Shell (ZPM).                             ||
|| Enter q/quit to exit the shell. Enter ?/help to view available commands ||
=============================================================================
zpm:USER>list
git-source-control      2.1.0
interoperability-sample 0.1.2 (DeveloperMode)
sslclient               1.0.1
zpm:USER>
Let's try?
I cloned this repository, opened in VSCode and built the image. And below I test Interoperability UI and source control. I make a change in UI and it immediately appear in the sources and diffs:
It works! That's it!
As a conclusion, what is needed to let you have source control for Interoperability UI elements in your project:
1. Add two lines in iris.script while building docker image:
zpm "install git-source-control"
do ##class(%Studio.SourceControl.Interface).SourceControlClassSet("SourceControl.Git.Extension")
And load your solution as a module after that, e.g. like here:
zpm "load /home/irisowner/irisdev/ -v":1:1
2. Or you can start a new one by creating repository from Interoperability template.
Thanks for reading! Comments and feedback are welcome!
.png)
.png)
.png)
.png)
.png)
.png)
 (もちろん、この記事への返信でも大丈夫です!)
.png)
 Open Exchange