Salesforce Integration with InterSystems IRIS
In 2023, according to IDC, Salesforce's market share in CRM reached 21.7%. This company owns a substantial amount of critical corporate business processes and data, so the InterSystems IRIS must have an interoperability connector to fetch data from the Salesforce data catalog. This article will show you how to get any data hosted by Salesforce and create an interoperation production to get data and send it to such targets as files and relational databases.
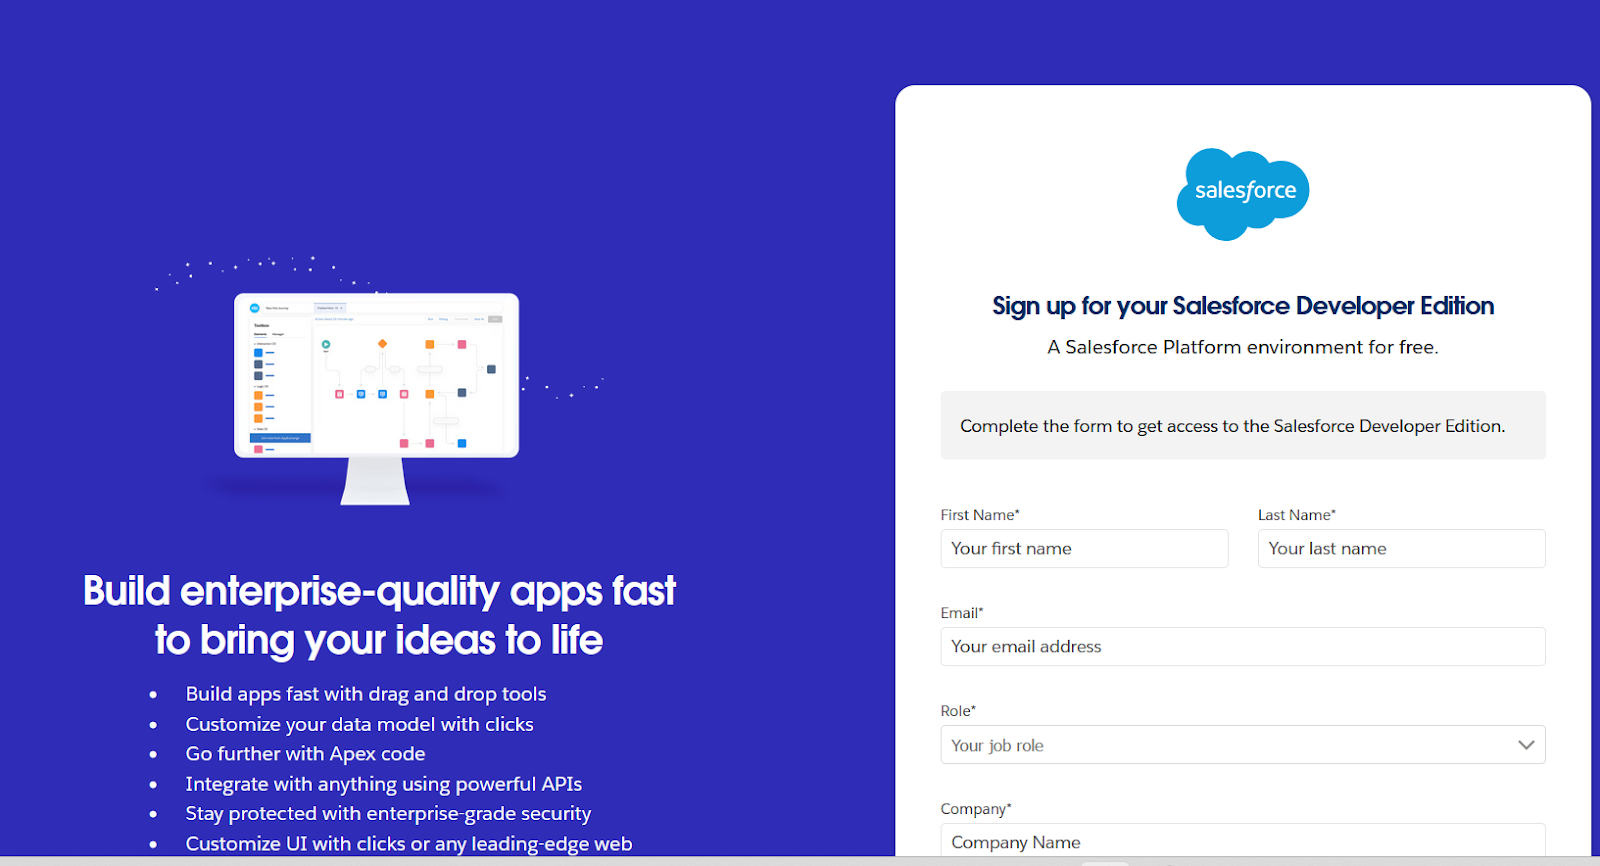
Create your development account on Salesforce:
1. Go to https://developer.salesforce.com/signup:
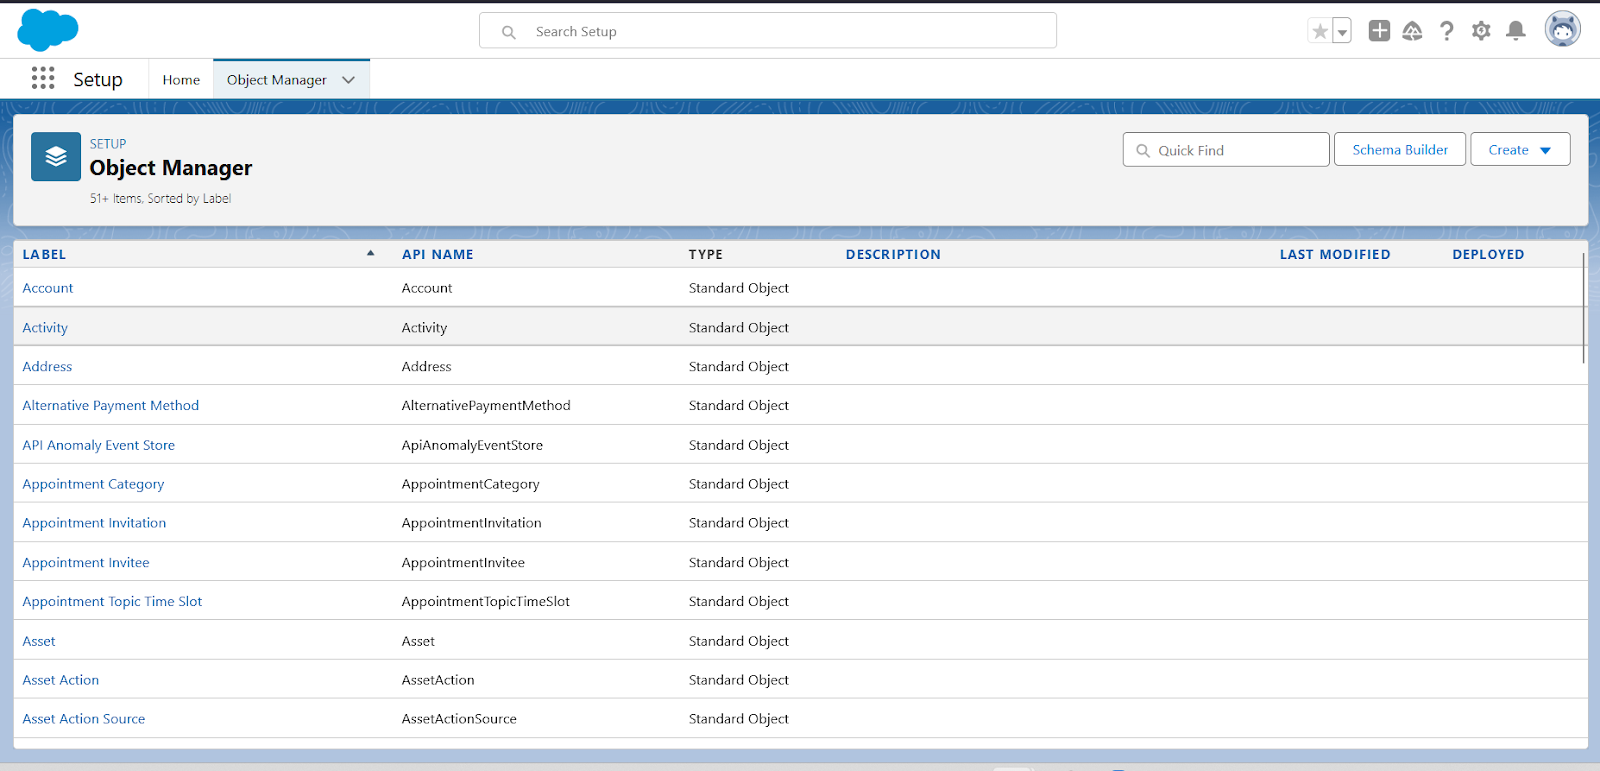
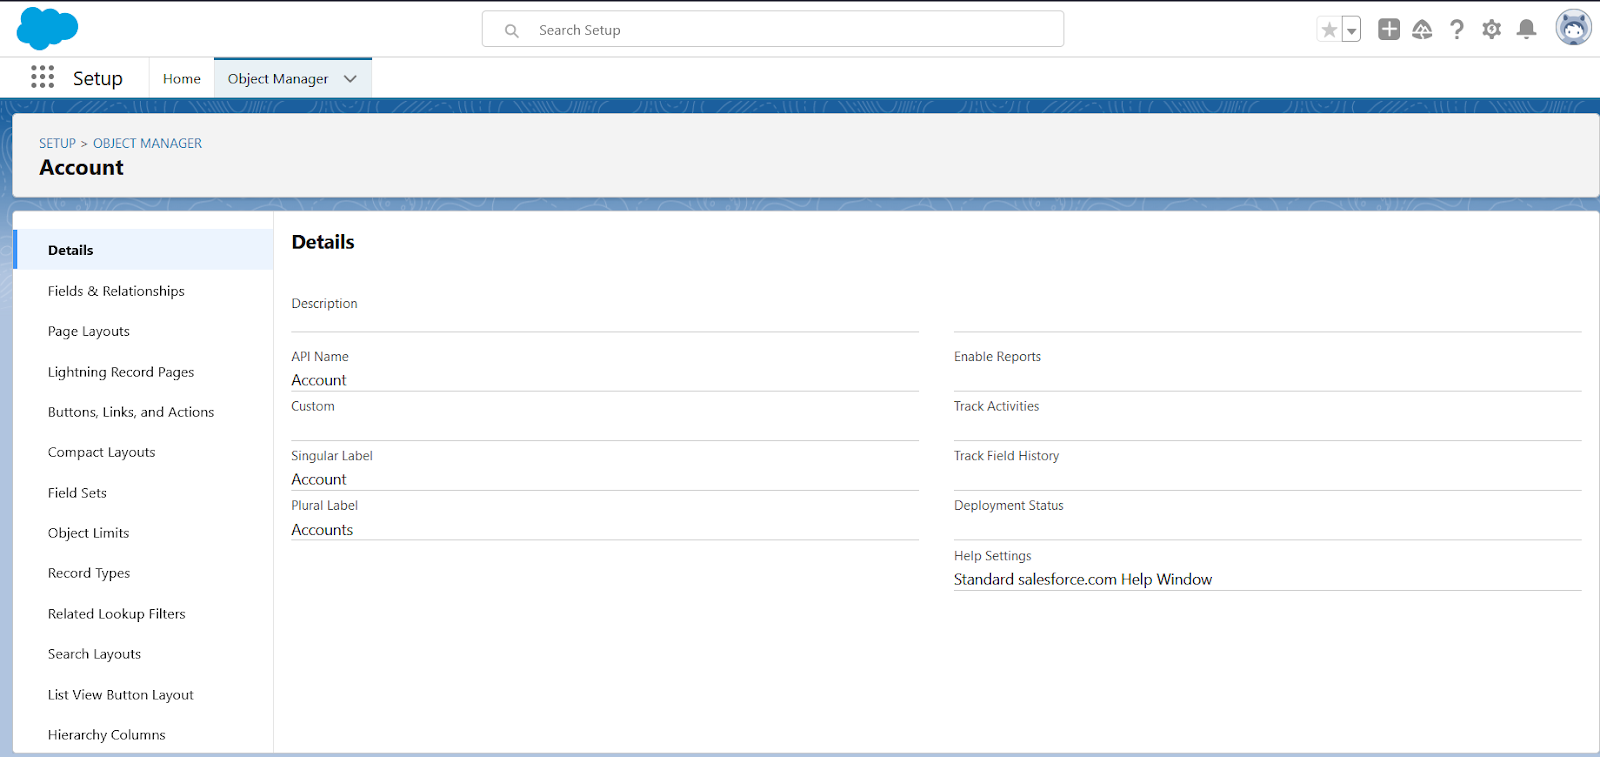
4. Click the Account Label to go to the Account data object details (the API Name is Account):
5. Head to the Fields & Relationships tab to see the Account fields:
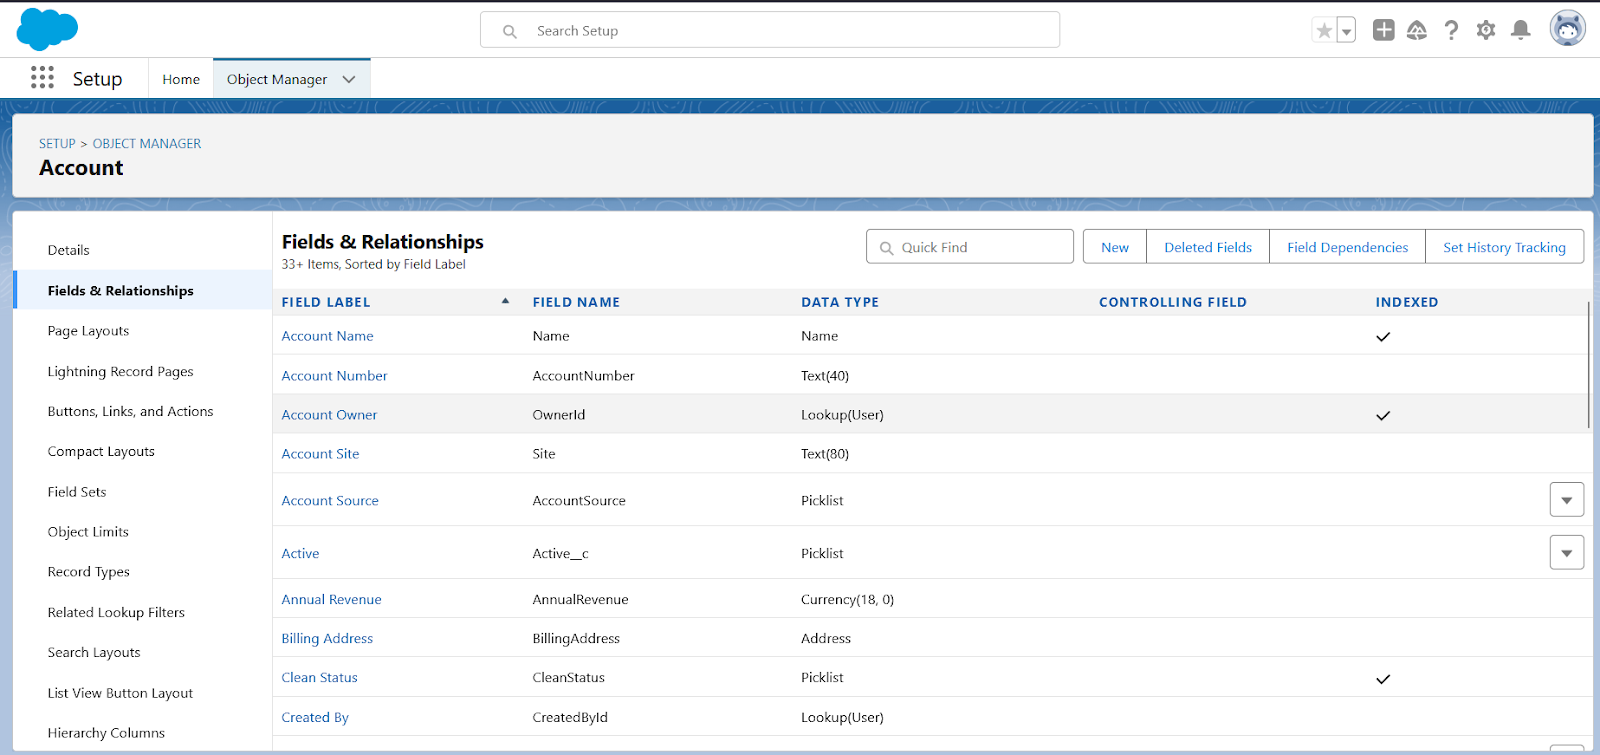
6. We will consume the Account data in our sample.
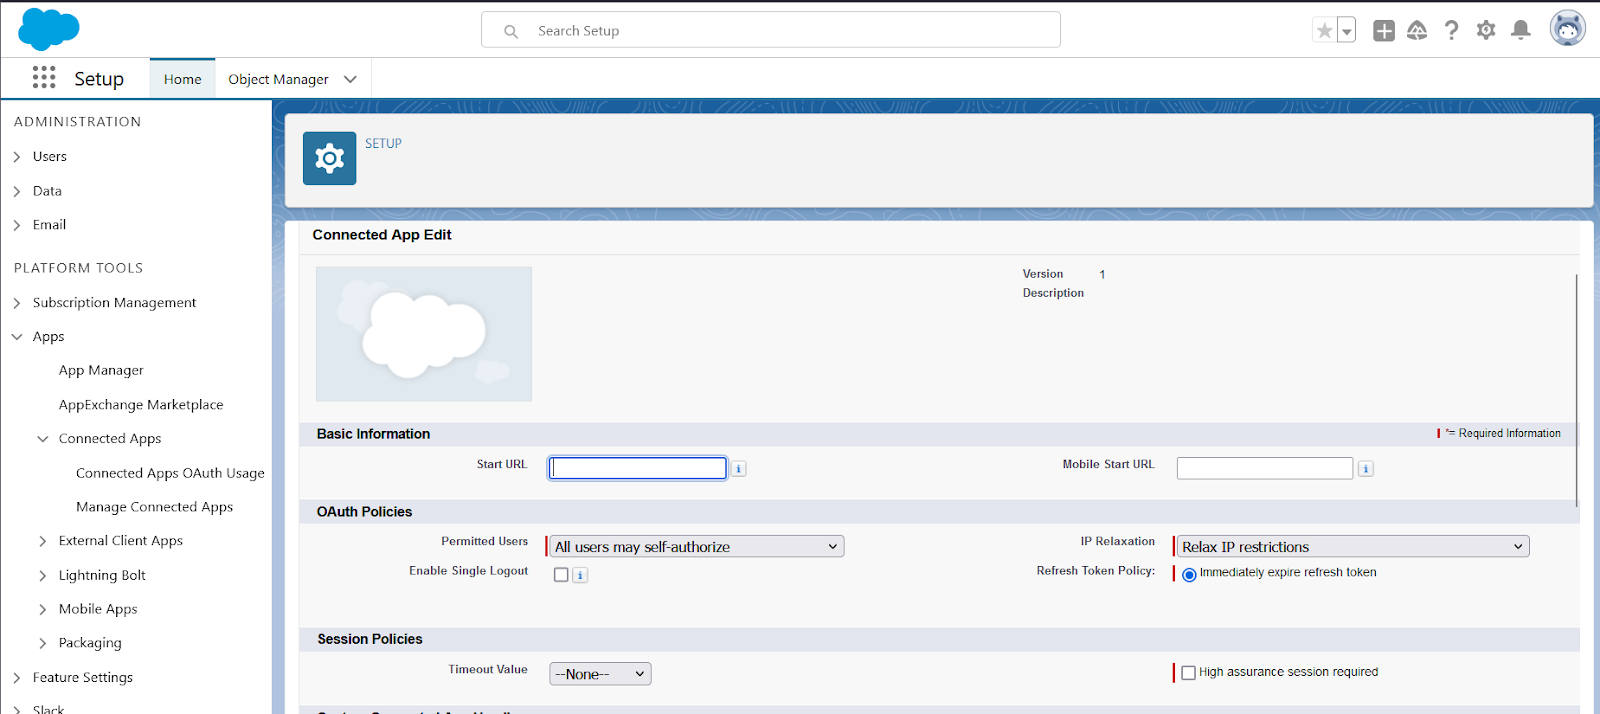
Configure the OAuth credentials:
To consume the Salesforce API, you must configure the OAuth credentials:
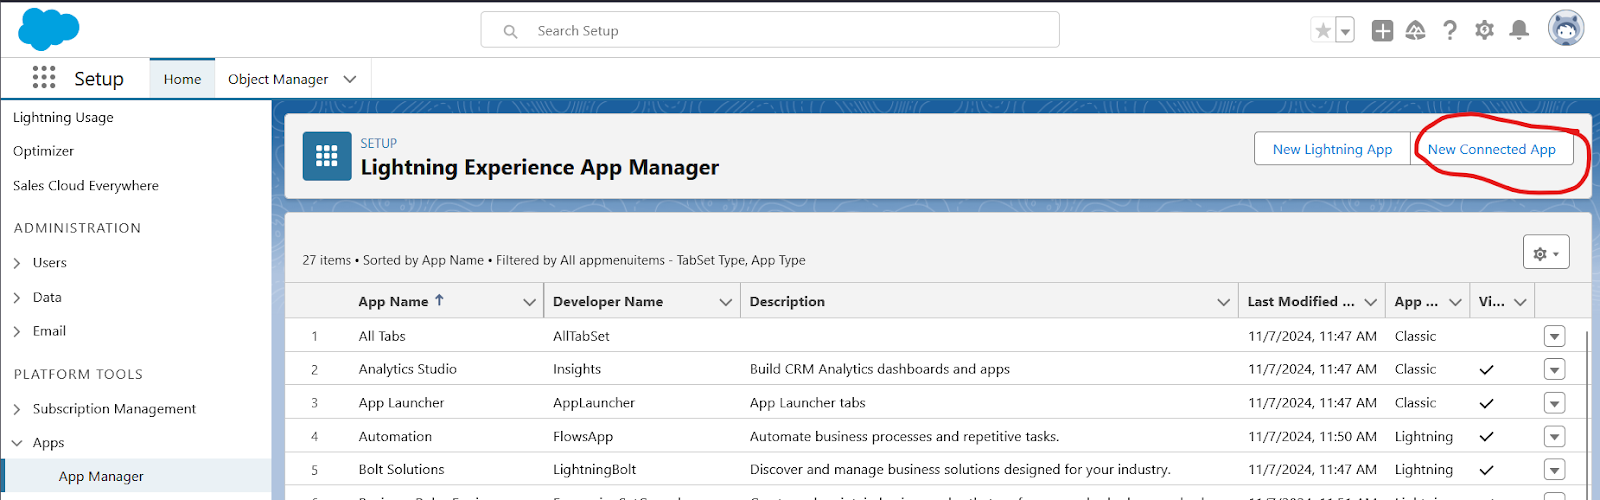
1. Go to https://[YOUR SALESFORCE INSTANCE].lightning.force.com/lightning/setup/NavigationMenus/home.
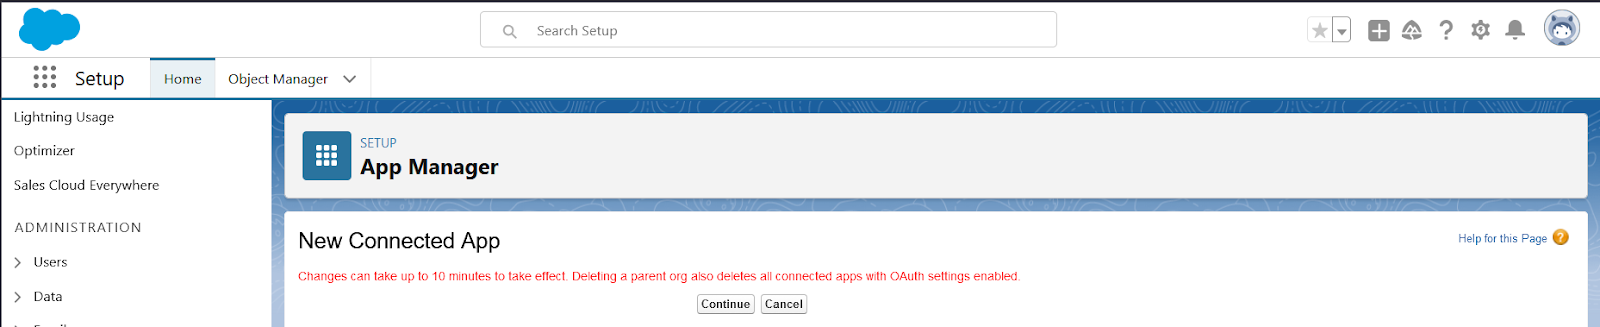
2. Click the button "New Connected App":
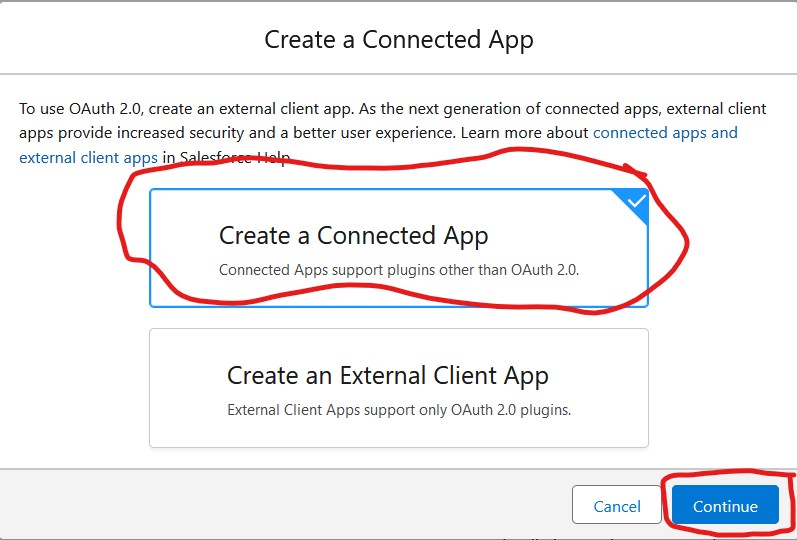
3. Select "Create a Connected App" and click "Continue":
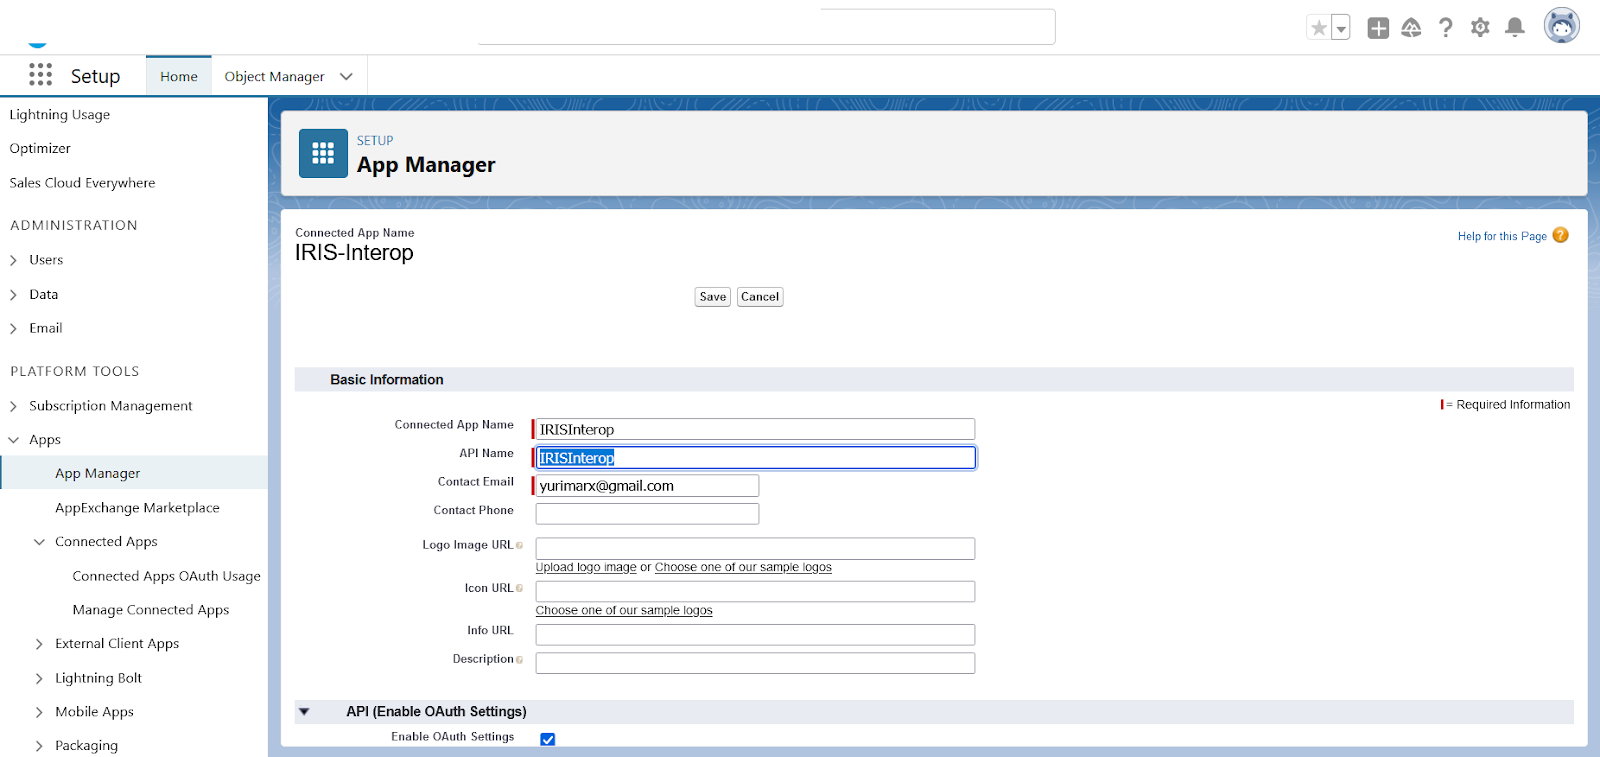


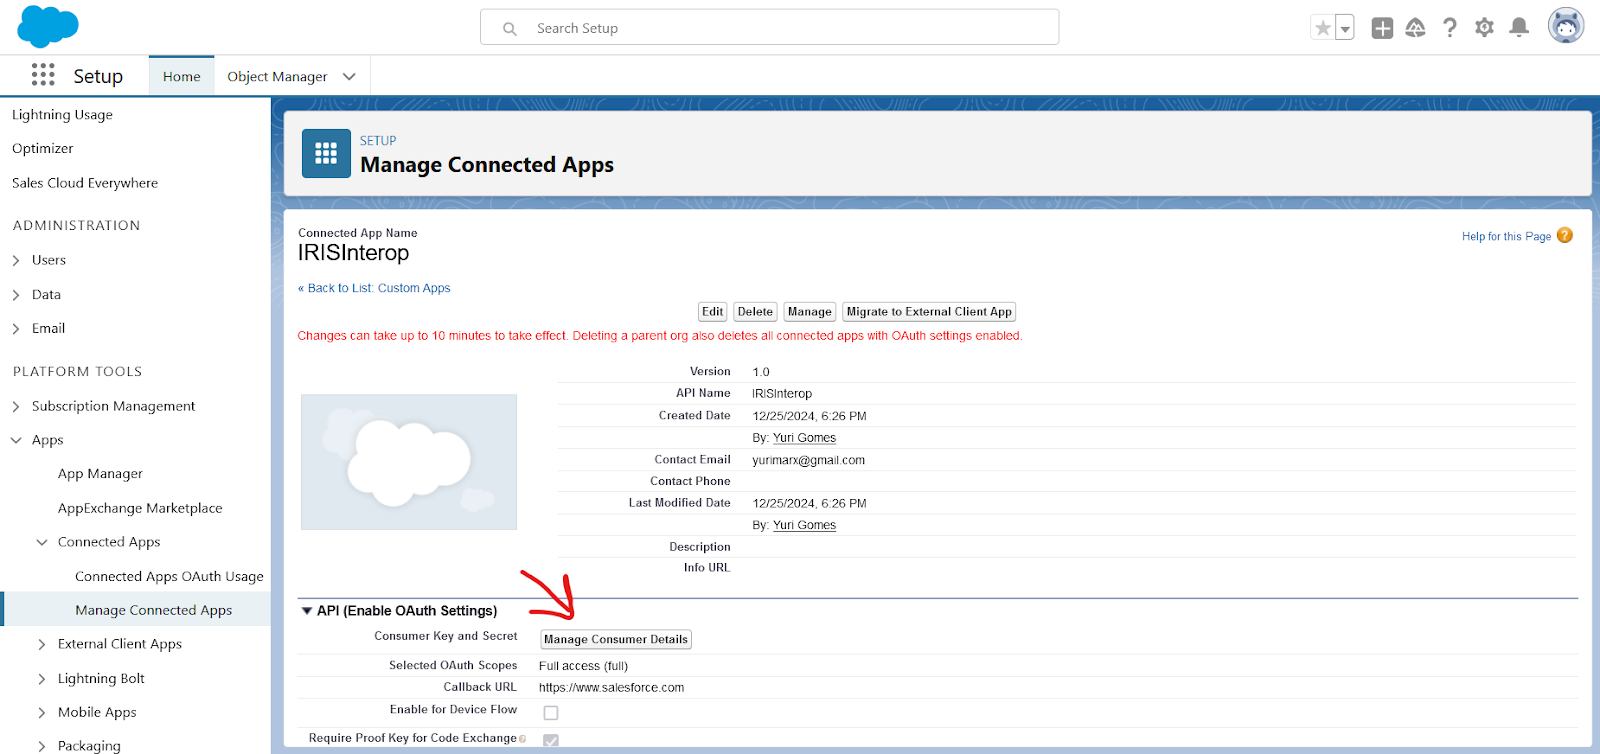
5. Wait for 30 to 45 minutes and click "Continue". Then click "Manage Consumer Details":
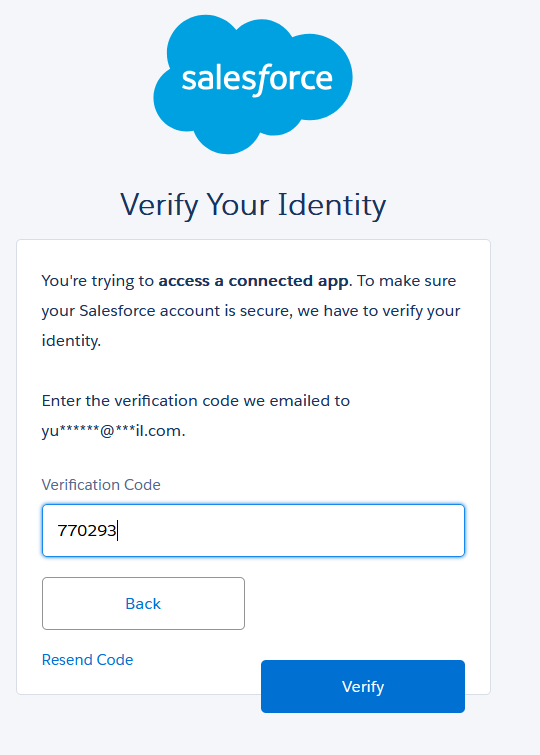
6. You must validate your identity (check your email to get the verification code):
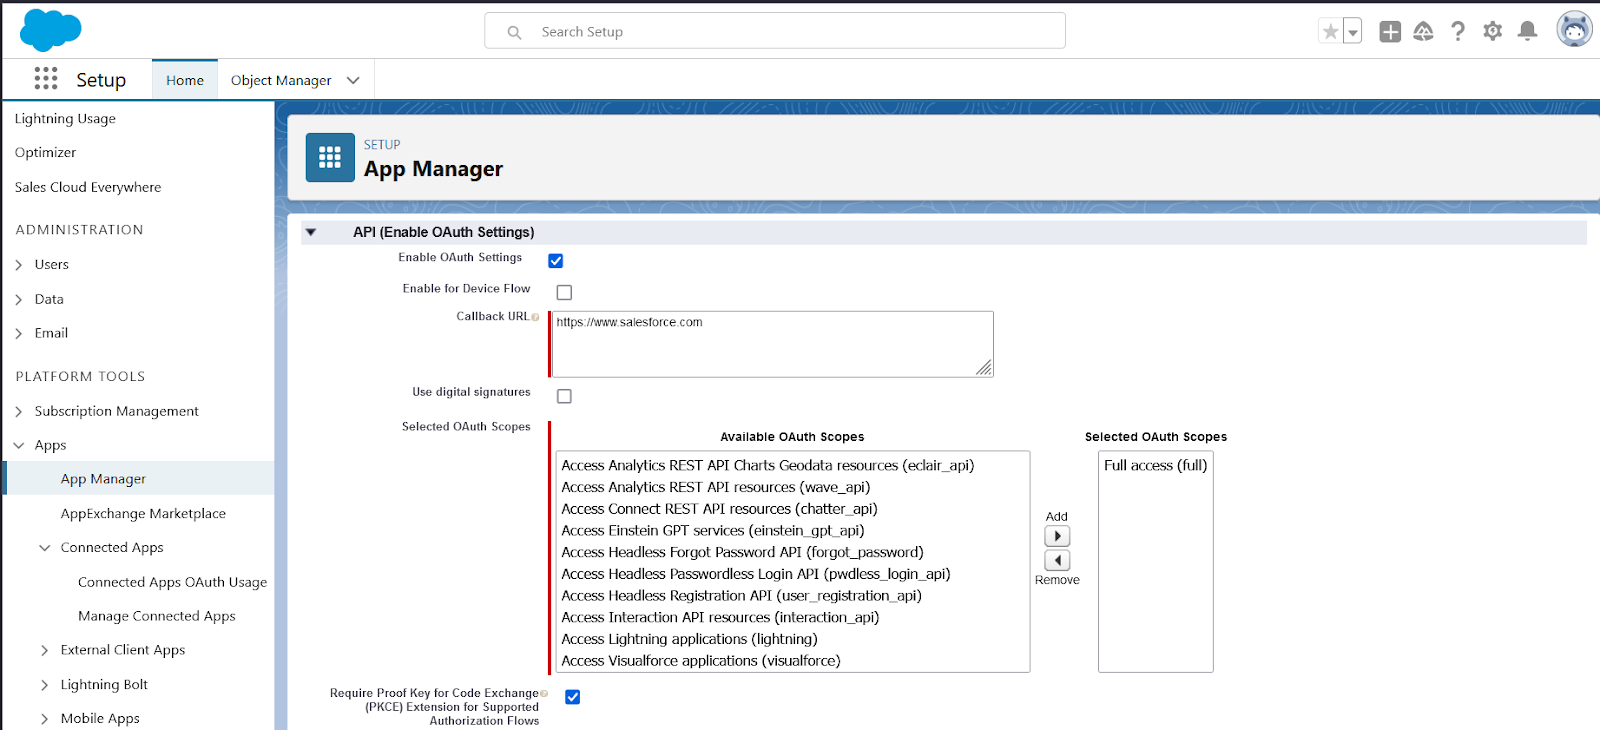
10. In the OAuth Policies section, pick the following options and click the "Save" button at the bottom:
a. Permitted Users: All users may self-authorize
b. IP Relaxation: Relax IP restrictions
Test the consumption of the Salesforce API on Postman:
1. If you do not have Postman, you can download it at https://www.postman.com/downloads/.
2. Start your Postman and test the login API to get a new token.
3. Create a POST call as indicated below:
a. grant_type: password
b. client_id: your consumer key
c. client_secret: your consumer secret
d. username: your username (the one you utilize to access your Salesforce instance web interface)
e. password: your user password (the one you employ to access your Salesforce instance web interface)
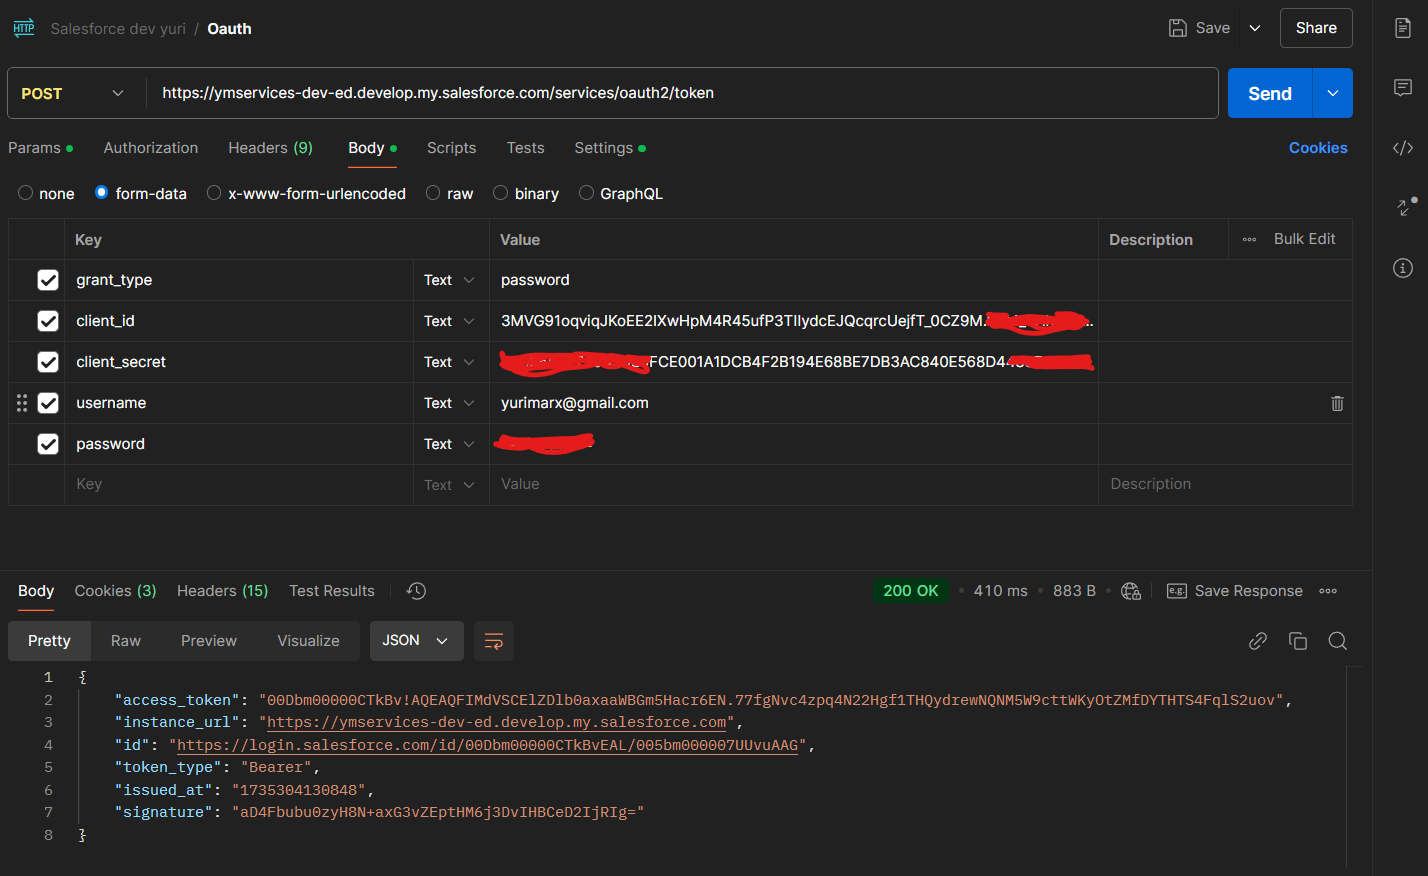

6. Check out the records with the data about leads.
7. All set! It is time to create an interoperability adapter with production to allow us to integrate Salesforce data with any other system, service, API, or data repository.
About Salesforce API
We will employ the following API to interoperate with Salesforce:
Authentication API to get Authorization token:
curl --location 'https://ymservices-dev-ed.develop.my.salesforce.com/services/oauth2/token' \
--form 'grant_type="password"' \
--form 'client_id="3MVG91oqviqJK………….fT_0CZ9M.80M_THhxS51LKc7IHk2c5qQt63wD_"' \
--form 'client_secret="6B8860E……………..B3AC840E568D44837094ADC"' \
--form 'username="yurimarx@gmail.com"' \
--form 'password="**************"'
Query API (this API finds records using the Salesforce Object Query Language (SOQL) which is similar to SQL language):
SELECT one or more fields
FROM an object
WHERE filter statements and, optionally, results are ordered
Example:
SELECT Id, Name
FROM Account
WHERE Name = 'Sandy'
A cURL sample:
curl --location --request GET 'https://ymservices-dev-ed.develop.my.salesforce.com/services/data/v62.0/query?q=SELECT+Id%2C+Name+FROM+Lead' \
--header 'Authorization: Bearer 00Dbm00000CTkBv!AQEAQFIMdVSCElZDlb0axaaWBGm5Hacr6EN.77fgNvc4zpq4N22Hgf1THQydrewNQNM5W9cttWKyOtZMfDYTHTS4FqlS2uov'
For more details about the language capabilities, check out the link below:https://developer.salesforce.com/docs/atlas.en-us.soql_sosl.meta/soql_s….
sObject API (this API executes CRUD operations and describes the Salesforce objects and their metadata).
The URL path is /services/data/salesforce version/sobjects/salesforce object/salesforce record ID (not to create). Please note that you must set the Authorization header with the login token. Examine the samples below:
1. Create record: curl https://MyDomainName.my.salesforce.com/services/data/v63.0/sobjects/Acc… -H "Authorization: Bearer token" -H "Content-Type: application/json" -d "@newaccount.json".
2. Update record: curl https://MyDomainName.my.salesforce.com/services/data/v63.0/sobjects/Acc… -H "Authorization: Bearer token" -H "Content-Type: application/json" -d @patchaccount.json -X PATCH
3. Delete record: curl https://MyDomainName.my.salesforce.com/services/data/v63.0/sobjects/Acc… -H "Authorization: Bearer token" -X DELETE
4. Get by Id: curl https://MyDomainName.my.salesforce.com/services/data/v63.0/sobjects/Acc… -H "Authorization: Bearer token" -X GET
5. Get metadata information: curl https://MyDomainName.my.salesforce.com/services/data/v63.0/sobjects/Acc… -H "Authorization: Bearer token"
More information about sObject API is available via the next link: https://developer.salesforce.com/docs/atlas.en-us.api_rest.meta/api_res….
Creating the interoperability adapter and production
Get the sample application:
To illustrate how to interoperate with Salesforce, first, you should get my sample app the iris-salesforce application, on Open Exchange via the link https://openexchange.intersystems.com/package/Iris-Salesforce. Download or clone the application from GitHub to see the implementation details described in the upcoming sections.
Creating the Interoperability Adapter for Salesforce
Since there is no official interoperability adapter for Salesforce on InterSystems IRIS, we need to create one:
Class dc.irissalesforce.SalesforceOutboundAdapter Extends Ens.OutboundAdapter
{


Property SFVersion As %String(VALUELIST = ",v62.0,v61.0,v60.0,v59.0,v58.0,v57.0,v56.0,v55.0,v54.0,v53.0,v52.0,v51.0,v50.0,v49.0,v48.0,v47.0,v46.0,v45.0,v44.0,v43.0,v42.0,v41.0,v40.0,v39.0,v38.0,v37.0,v36.0,v35.0,v34.0,v33.0,v32.0,v31.0") [ InitialExpression = "v62.0" ];
Property SFCredsFile As %String(MAXLEN = 1000);
Property SSLConfig As %String;
Parameter SETTINGS = "SFVersion:Connect,SFCredsFile:Connect:fileSelector,SSLConfig:Connect:sslConfigSelector";
Method PrepareRequest(sfToken As %DynamicObject) As %Net.HttpRequest
{
    Set sfReq = ##class(%Net.HttpRequest).%New()
    Set sfReq.Server = sfToken.instance
    Set sfReq.Https = 1
    Set sfReq.SSLConfiguration = ..SSLConfig
    Do sfReq.SetHeader("Authorization", "Bearer "_sfToken."access_token")
    Return sfReq
}


/// Query Salesforce with SQL query to get a JSON response with business data
Method Query(queryRequest As dc.irissalesforce.QueryMessage, Output queryResponse As Ens.StreamContainer) As %Status
{
    Set sc = $$$OK
    Set sfToken = {}
    Set queryResponse = ##class(Ens.StreamContainer).%New()

    Try {
        Do ..GetAuthotizationToken(.sfToken)

        Set sfReq = ..PrepareRequest(sfToken)
        Do sfReq.SetParam("q", queryRequest.Query)
        Do sfReq.Get("/services/data/"_..SFVersion_"/query")
        Do queryResponse.StreamSet(sfReq.HttpResponse.Data)
    }
    Catch ex {
        Set sc = ex.AsStatus()
    }


    Return sc
}


/// Get Salesforce data with ID to get a JSON response with business data
Method GetById(idRequest As dc.irissalesforce.ByIdMessage, Output queryResponse As Ens.StreamContainer) As %Status
{
    Set sc = $$$OK
    Set sfToken = {}
    Set queryResponse = ##class(Ens.StreamContainer).%New()

    Try {
        Do ..GetAuthotizationToken(.sfToken)

        Set sfReq = ..PrepareRequest(sfToken)
        Do sfReq.Get("/services/data/"_..SFVersion_"/sobjects/"_idRequest.ClassName_"/"_idRequest.Id)
        Do queryResponse.StreamSet(sfReq.HttpResponse.Data)
    }
    Catch ex {
        Set sc = ex.AsStatus()
    }


    Return sc
}


/// Create a new Salesforce object with json data
Method Create(createRequest As dc.irissalesforce.CreateMessage, Output createResponse As Ens.StreamContainer) As %Status
{
    Set sc = $$$OK
    Set sfToken = {}
    Set createResponse = ##class(Ens.StreamContainer).%New()

    Try {
        Do ..GetAuthotizationToken(.sfToken)

        Set sfReq = ..PrepareRequest(sfToken)
        Set sfReq.ContentType = "application/json"
        Do sfReq.EntityBody.Write(createRequest.Content)
        Do sfReq.Post("/services/data/"_..SFVersion_"/sobjects/"_createRequest.ClassName_"/")
        Do createResponse.StreamSet(sfReq.HttpResponse.Data)
    }
    Catch ex {
        Set sc = ex.AsStatus()
    }


    Return sc
}


/// Update the Salesforce object with json data
Method Update(updateRequest As dc.irissalesforce.UpdateMessage, Output updateResponse As Ens.StreamContainer) As %Status
{
    Set sc = $$$OK
    Set sfToken = {}
    Set updateResponse = ##class(Ens.StreamContainer).%New()

    Try {
        Do ..GetAuthotizationToken(.sfToken)

        Set sfReq = ..PrepareRequest(sfToken)
        Set sfReq.ContentType = "application/json"
        Do sfReq.EntityBody.Write(updateRequest.Content)
        Do sfReq.Patch("/services/data/"_..SFVersion_"/sobjects/"_updateRequest.ClassName_"/"_updateRequest.Id_"/")
        Do sfReq.HttpResponse.OutputToDevice()
        Do updateResponse.StreamSet(sfReq.HttpResponse.Data)
    }
    Catch ex {
        Set sc = ex.AsStatus()
    }


    Return sc
}


/// Delete the Salesforce object by id
Method Delete(deleteRequest As dc.irissalesforce.DeleteMessage, Output deleteResponse As Ens.StreamContainer) As %Status
{
    Set sc = $$$OK
    Set sfToken = {}
    Set deleteResponse = ##class(Ens.StreamContainer).%New()

    Try {
        Do ..GetAuthotizationToken(.sfToken)

        Set sfReq = ..PrepareRequest(sfToken)
        Set sfReq.ContentType = "application/json"
        Do sfReq.Delete("/services/data/"_..SFVersion_"/sobjects/"_deleteRequest.ClassName_"/"_deleteRequest.Id_"/")
        Do sfReq.HttpResponse.OutputToDevice()
        Do deleteResponse.StreamSet(sfReq.HttpResponse.Data)
    }
    Catch ex {
        Set sc = ex.AsStatus()
    }


    Return sc
}


/// Get OAuth token
Method GetAuthotizationToken(Output oauthToken As %DynamicObject) As %Status
{
    Set sc = $$$OK
    Set sfCreds = {}


    Try {
        Set sfCreds = {}.%FromJSONFile(..SFCredsFile)

        Set sfReq = ##class(%Net.HttpRequest).%New()
        Set sfReq.Server = sfCreds.instance
        Set sfReq.Https = 1
        Set sfReq.SSLConfiguration = ..SSLConfig
        Do sfReq.InsertFormData("grant_type", "password")
        Do sfReq.InsertFormData("client_id", sfCreds.clientId)
        Do sfReq.InsertFormData("client_secret", sfCreds.clientSecret)
        Do sfReq.InsertFormData("username", sfCreds.username)
        Do sfReq.InsertFormData("password", sfCreds.password)
        Do sfReq.Post("/services/oauth2/token")
        Set oauthToken = {}.%FromJSON(sfReq.HttpResponse.Data.Read())
        Set oauthToken.instance = sfCreds.instance
    }
    Catch ex {
        Set sc = ex.AsStatus()
    }

    Return sc
}


}
Explore the notes about this implementation:
1. The class extends Ens.OutboundAdapter because Salesforce is not used as the first step of the interoperability production (it does not initiate the integration process since it is output, not input).
2. Developers utilize the SF Version to choose the Salesforce version.
3. The SFCredsFile sets the credentials file with sensitive information to connect to Salesforce (instance name, username, password, client id, and client secret).
4. SSLConfig sets the SSL configuration to call the Salesforce HTTPS endpoint.
5. SETTINGS are used by IRIS to demonstrate the developer input fields for set values to the SF Version, SFCredsFile, and SSLConfig properties.
6. The PrepareRequest method creates the HTTPRequest object and establishes the common properties for all other methods.
7. The Query method calls the Query API with the Select sentence passed on QueryMessage.
8. The GetById method calls the sObject API passing the Salesforce Object class name and the unique Id required to get the record data.
9. The Create method calls the sObject API passing the Salesforce Object class name and the data in JSON format to save a new record with the business data.
10. The Update method calls the sObject API passing the Salesforce Object class name, the unique Id, and the data that will be altered.
11. The Delete method calls the sObject API passing the Salesforce Object class name and the unique Id needed to delete the record.
12. The GetAuthorizationToken method calls the oauth2 API passing the credentials data to get the authorization token needed to call all the other APIs.
13. The adapter methods return Ens.StreamContainer to support any content size.
Creating the Interoperability Operation for Salesforce
Since InterSystems IRIS does not have an official interoperability operation for Salesforce, we must build one with the help of the created adapter:
Class dc.irissalesforce.SalesforceOperation Extends Ens.BusinessOperation
{


Parameter ADAPTER = "dc.irissalesforce.SalesforceOutboundAdapter";
Parameter INVOCATION = "Queue";
/// Get Salesforce data from SQL query
Method Query(queryRequest As dc.irissalesforce.QueryMessage, Output queryResponse As Ens.StreamContainer) As %Status
{
    Set sc = $$$OK
    Set queryResponse = ##class(Ens.StreamContainer).%New()


    Set sc = ..Adapter.Query(queryRequest, .queryResponse)


    Return sc
}


/// Get Salesforce object data from Object ID
Method GetById(idRequest As dc.irissalesforce.ByIdMessage, Output queryResponse As Ens.StreamContainer) As %Status
{
    Set sc = $$$OK
    Set queryResponse = ##class(Ens.StreamContainer).%New()


    Set sc = ..Adapter.GetById(idRequest, .queryResponse)


    Return sc
}


/// Create Salesforce object with data from JSON
Method Create(createRequest As dc.irissalesforce.CreateMessage, Output createResponse As Ens.StreamContainer) As %Status
{
    Set sc = $$$OK
    Set createResponse = ##class(Ens.StreamContainer).%New()


    Set sc = ..Adapter.Create(createRequest, .createResponse)


    Return sc
}


/// Update Salesforce object with data from JSON
Method Update(updateRequest As dc.irissalesforce.UpdateMessage, Output updateResponse As Ens.StreamContainer) As %Status
{
    Set sc = $$$OK
    Set updateResponse = ##class(Ens.StreamContainer).%New()


    Set sc = ..Adapter.Update(updateRequest, .updateResponse)


    Return sc
}


/// Delete Salesforce object by Id
Method Delete(deleteRequest As dc.irissalesforce.DeleteMessage, Output deleteResponse As Ens.StreamContainer) As %Status
{
    Set sc = $$$OK
    Set deleteResponse = ##class(Ens.StreamContainer).%New()


    Set sc = ..Adapter.Delete(deleteRequest, .deleteResponse)


    Return sc
}


XData MessageMap
{
<MapItems>
  <MapItem MessageType="dc.irissalesforce.QueryMessage">
    <Method>Query</Method>
  </MapItem>
  <MapItem MessageType="dc.irissalesforce.ByIdMessage">
    <Method>GetById</Method>
  </MapItem>
  <MapItem MessageType="dc.irissalesforce.CreateMessage">
    <Method>Create</Method>
  </MapItem>
  <MapItem MessageType="dc.irissalesforce.UpdateMessage">
    <Method>Update</Method>
  </MapItem>
  <MapItem MessageType="dc.irissalesforce.DeleteMessage">
    <Method>Delete</Method>
  </MapItem>
</MapItems>
}


}
Examine the notes about this implementation:
1. The class extends the Ens.BusinessOperation (the base class for producing custom business operations).
2. The ADAPTER parameter is dc.irissalesforce.SalesforceOutboundAdapter. It is your custom Adapter with methods to integrate with Salesforce.
3. The INVOCATION parameter with Queue value means the message is created within one background job and placed on a queue simultaneously releasing the original job.
4. The methods Query, GetById, Create, Update, and Delete call the respective methods on the Adapter class (dc.irissalesforce.SalesforceOutboundAdapter) utilizing..Adapter.[name of method].
5. Each method has a specific message class:
a. Method Query: QueryMessage class with Query property used to execute the SQL sentence.
b. Method GetById: GetByIdMessage class with the property Id with the unique id value and ClassName with the object class name to be returned.
c. Method Create: CreateMessage class with the property ClassName for object class name to be created and the Content property with JSON business data to be saved.
d. Method Update: UpdateMessage class with the property ClassName for object class name to be made, the Id property to set the record to be updated and the Content property with JSON business data to be saved.
e. Method Delete: DeleteMessage class with the property ClassName for object class name and the Id property for the record to be deleted.
6. The XData MessageMap maps the methods to be called based on the MessageType sent to the Operation. For instance, if the Salesforce Operation receives a CreateMessage, the Create method will be called.
7. The message classes extend %Persistent to preserve the message history and Ens.Util.RequestBodyMethods to monitor, audit, and trace messages better.
Creating a Production to use the new Operation
Finally, to test our Salesforce business operation, we will build a new Production:
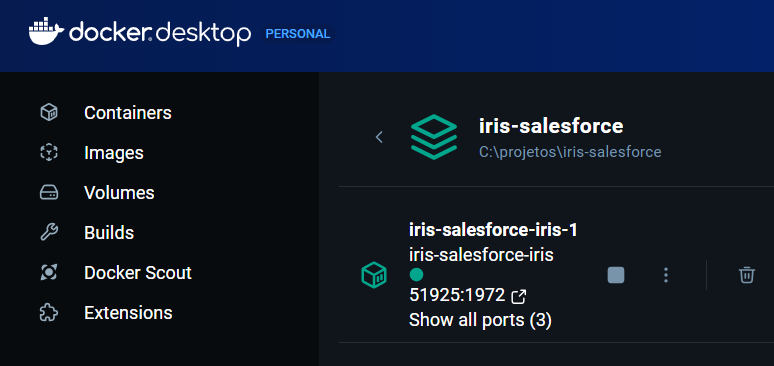
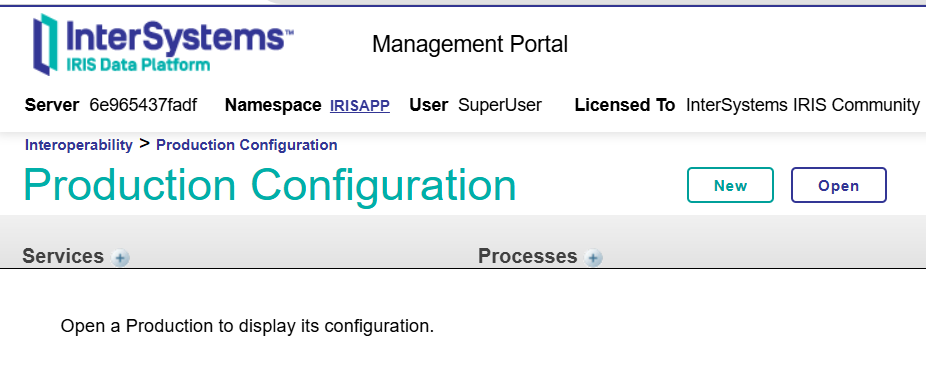
1. Check out the port used by IRIS (in my case, it is 51925):
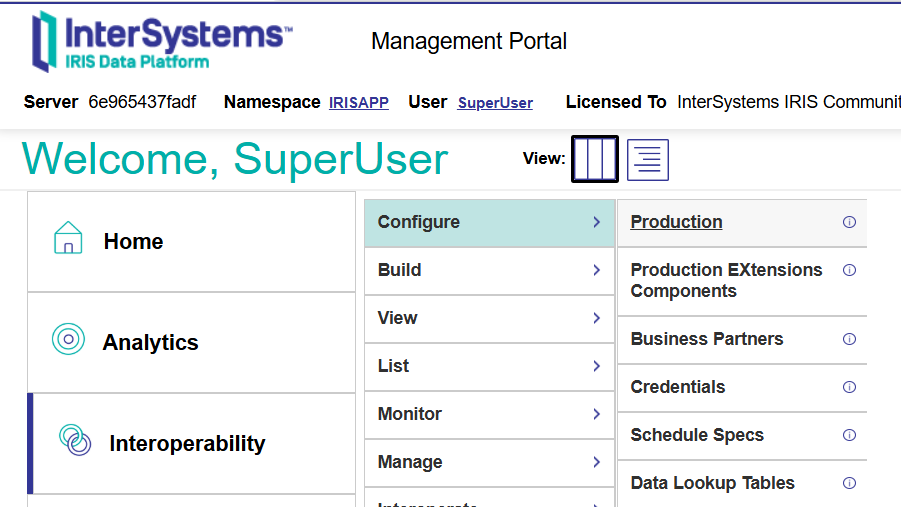
2. Go to the Management Portal http://localhost:51926/csp/sys/UtilHome.csp?$NAMESPACE=IRISAPP
3. Proceed to Interoperability > Configure > Production:
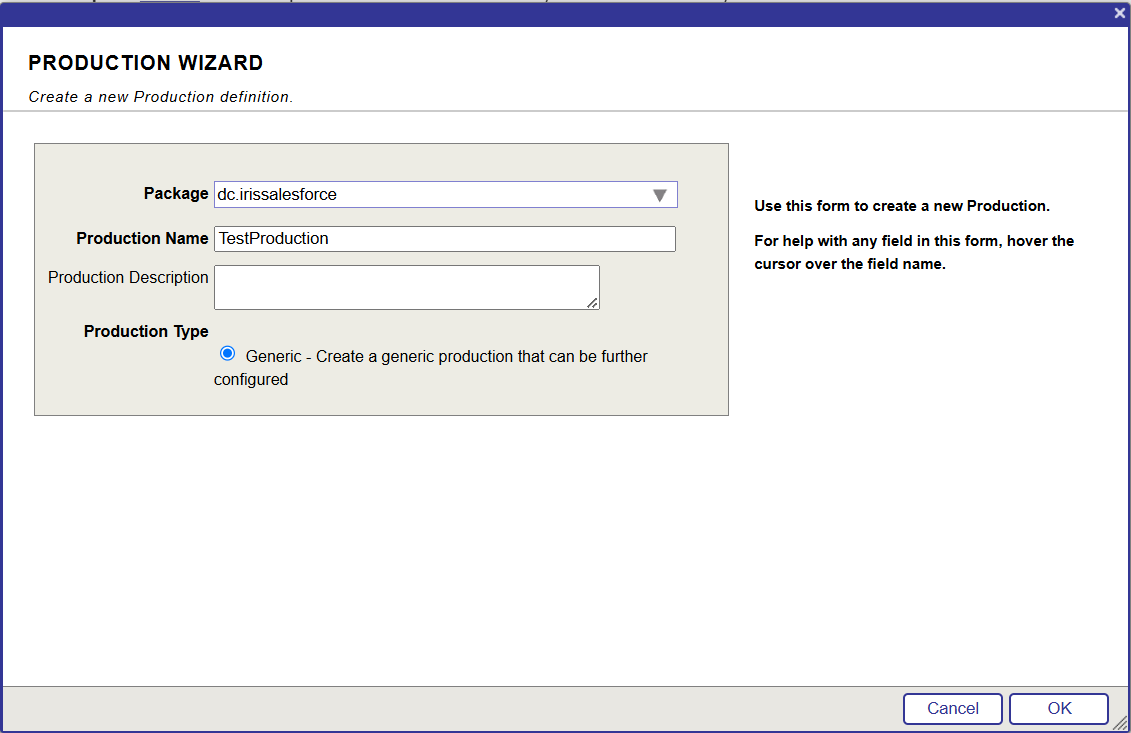
4. Click the New button:
5. Set the values for the new Production and click OK:

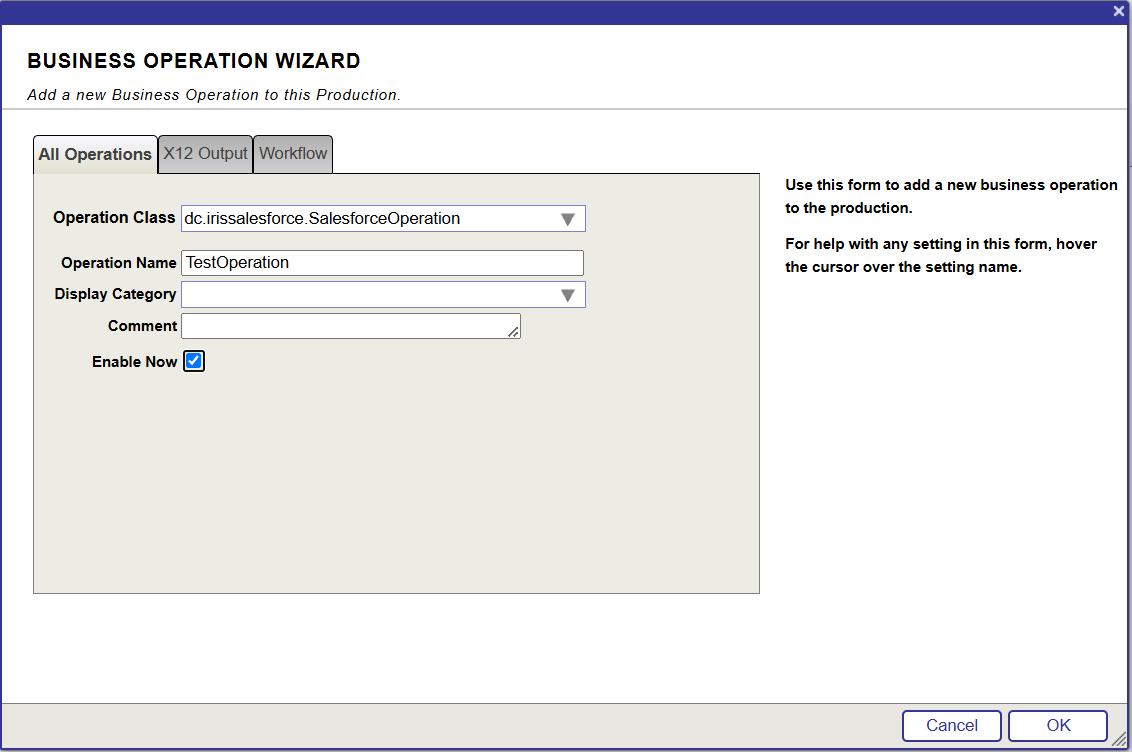
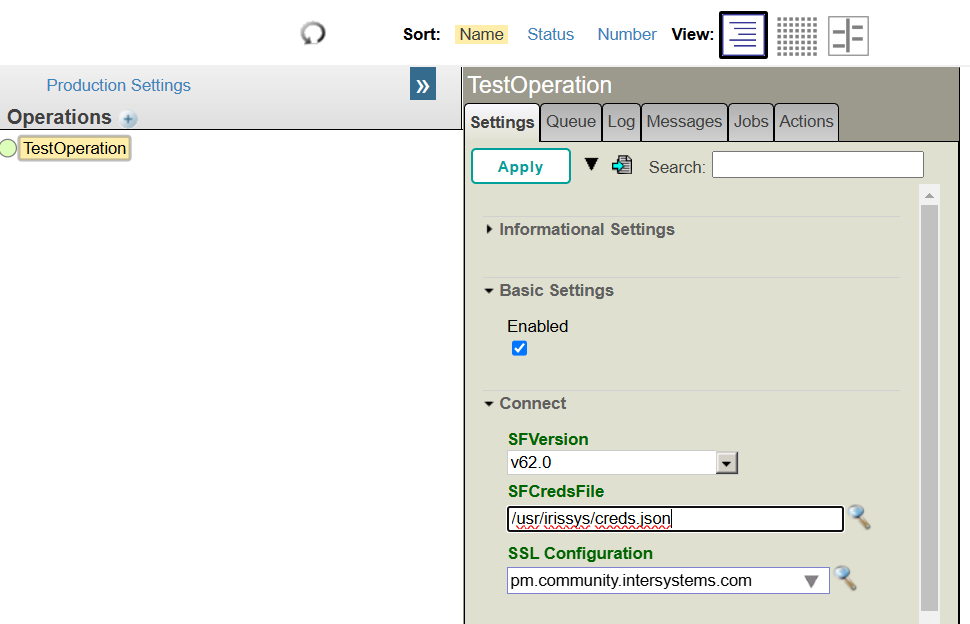
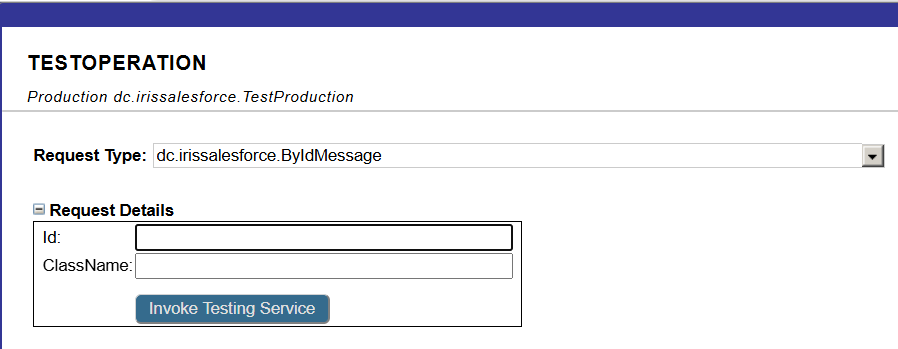
10. Select TestOperation, go to Settings tab > Connect section, and establish the following values:
a. SFVersion: v62.0
b. SFCredsFile: path for credentials file, (in my case, it is /usr/irissys/creds.json)
c. SSL Configuration: with the SSL configuration, (in my case, it is pm.community.intersystems.com)
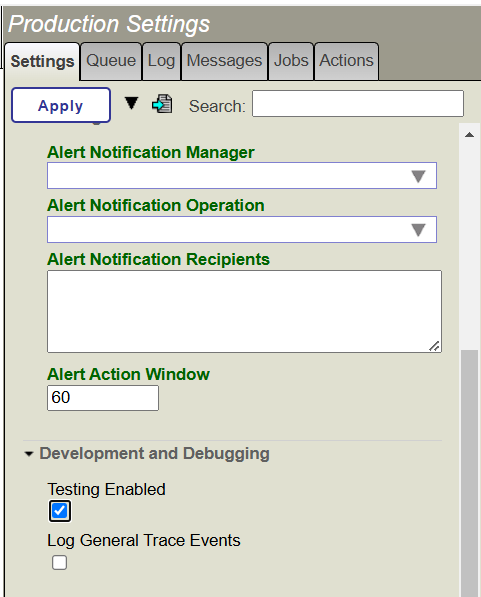
11. Click the Apply button to save the TestOperation configuration:
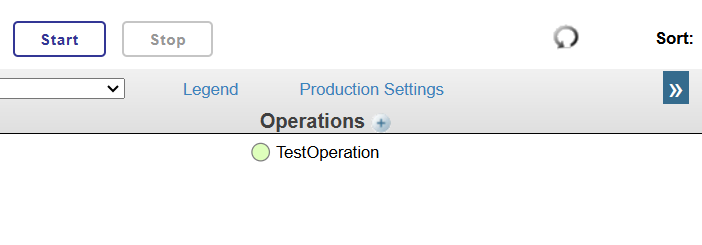
12. Click the production Start button to execute the operation:
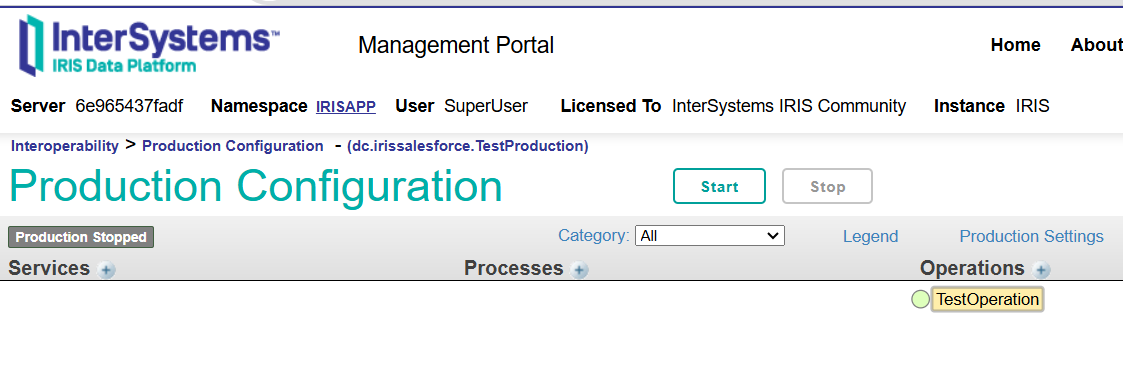
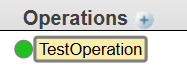
13. At this point, the Operation color should turn dark green:

15. Set the values to test Create:
Request Type: dc.irissalesforce.CreateMessage
Content:
{
	"LastName": "InterSystems",
	"FirstName": "IRIS",
	"Salutation": "Mr.",
	"Title": "Datafabric sales",
	"Company": "InterSystems",
	"MobilePhone": "555555",
	"Email": "test@gmail.com",
	"LeadSource": "Web",
	"Status": "Working - Contacted",
	"Rating": "Warm"
}
ClassName: Lead
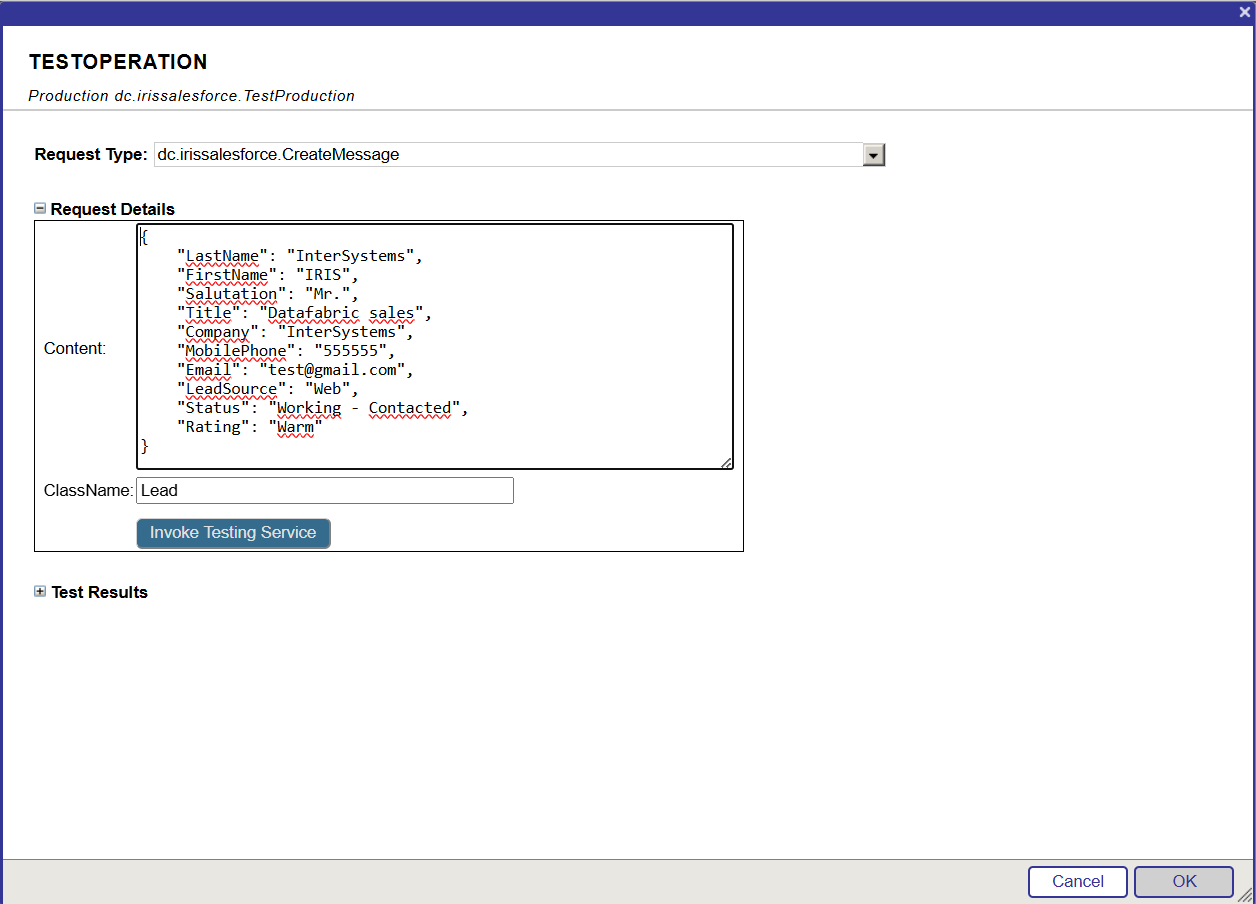
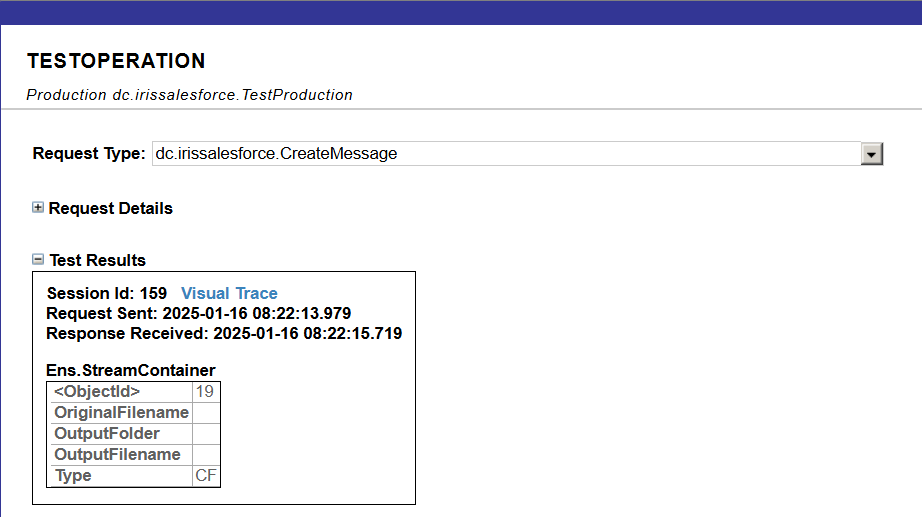
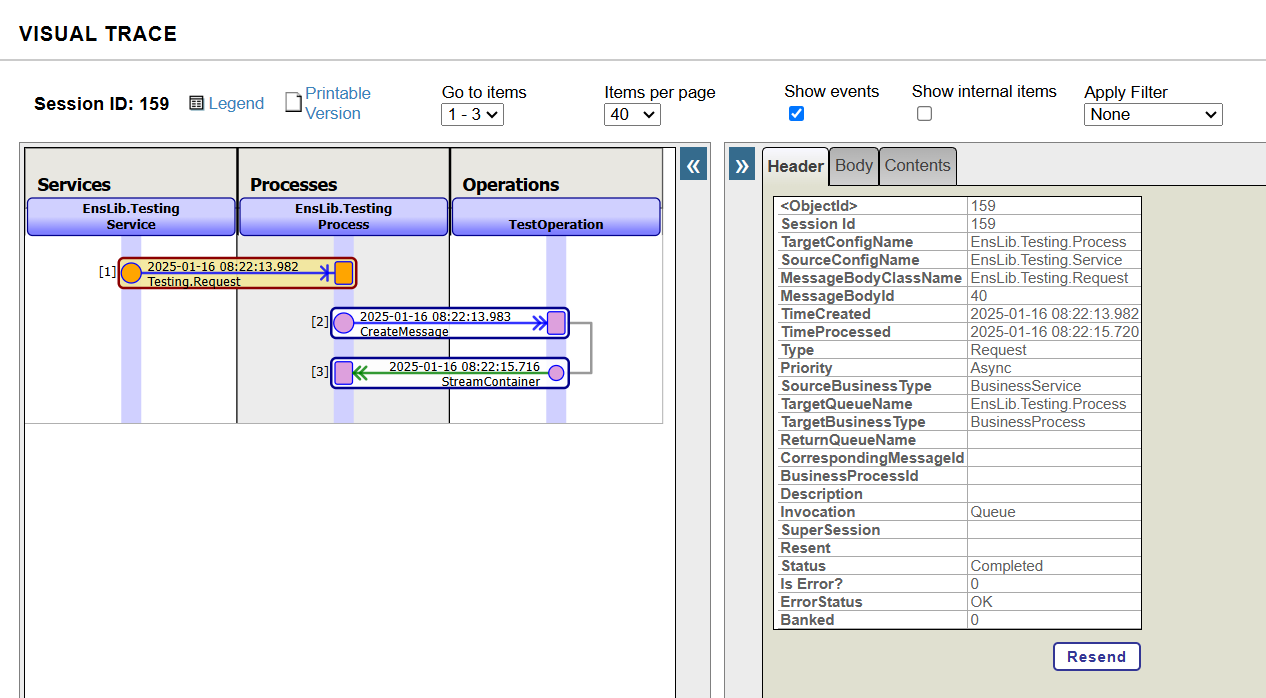
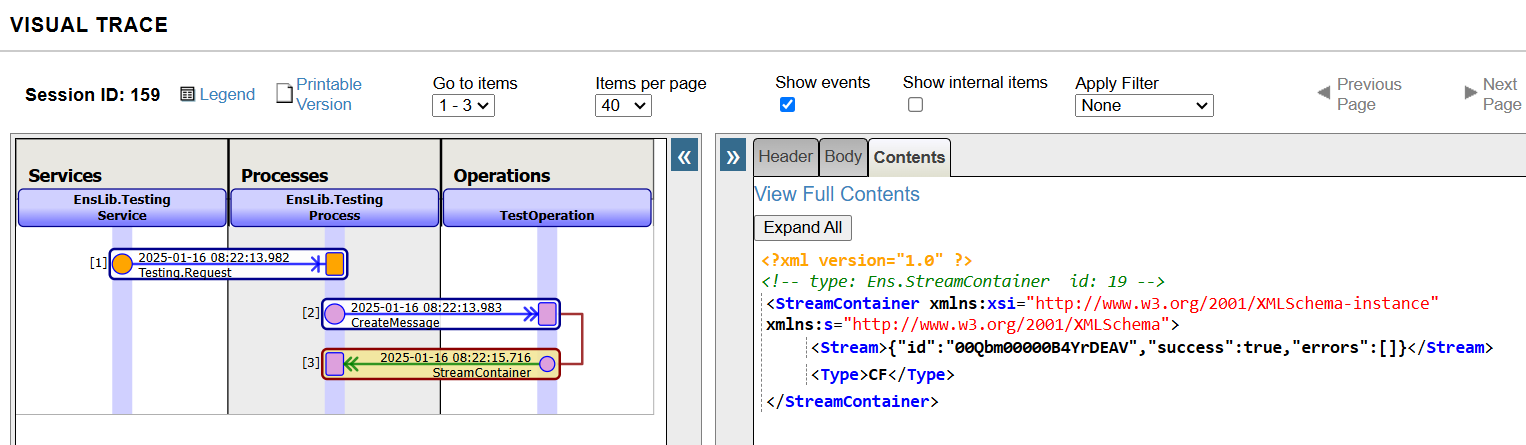
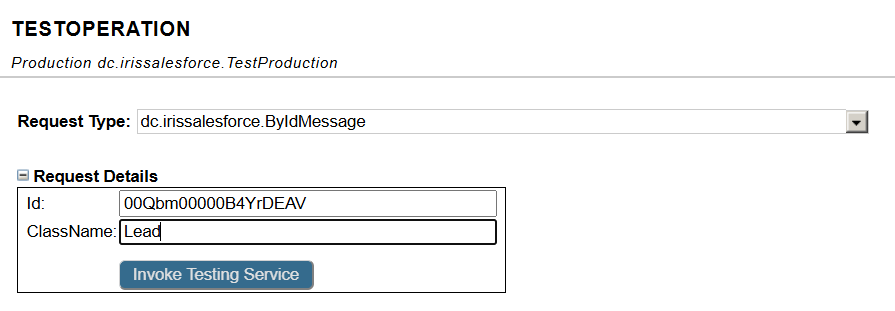
22. Click the button Invoke Testing Service and study the results:
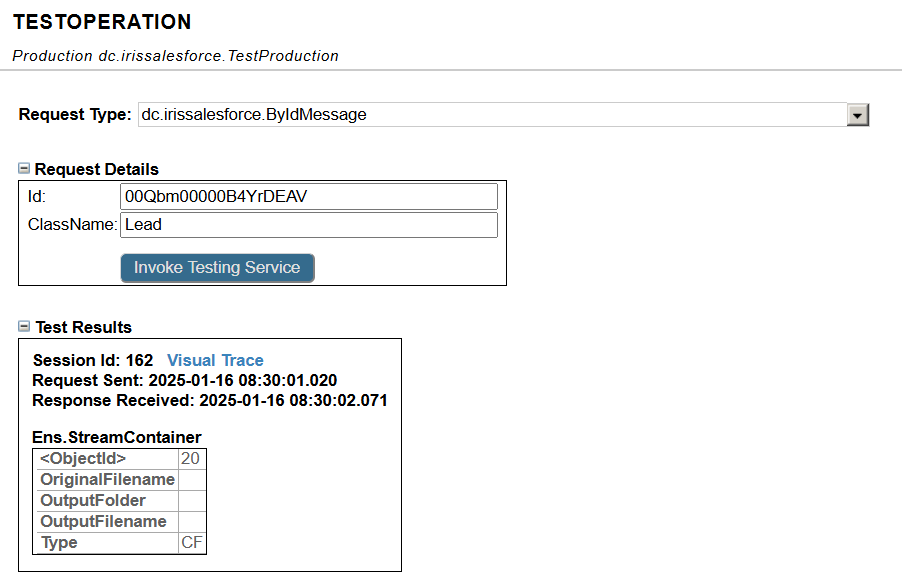
23. Click the Visual Trace, and pick [3] step. It will display the results on the Contents tab:
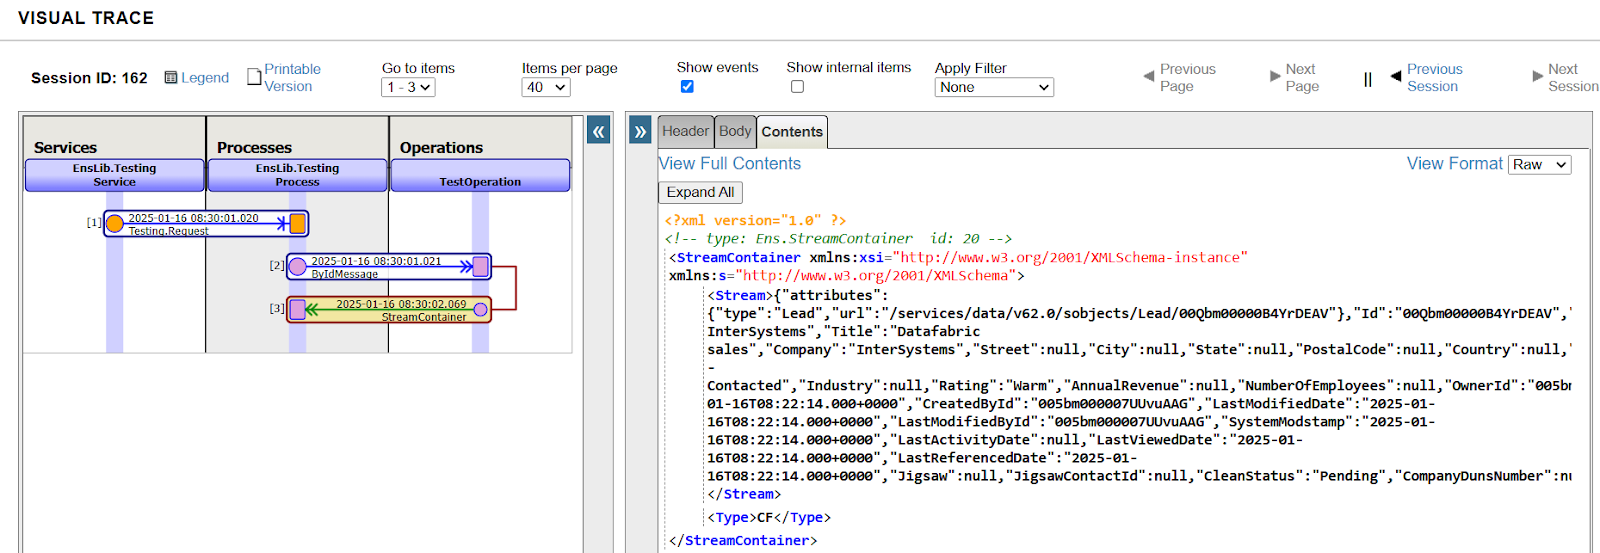
24. At this point, you should see the JSON content that you input in the previous steps.
25. Test the remaining message types and enjoy!