Learn to use a custom set of rules on CachéQuality
Currently, many of you has some knowledge about CachéQuality (which is being renamed to objectscriptQuality) for analyzing objectscript code using the rules we have predefined. Probably you have tested it and have found too many warnings in your projects. I'm sure there are issues which are really important for you and some others which you would like to dismiss.
We have more than 90 rules to test different code situations and warn about a problem or a possible bug in code. But using all the rules is not always the desired situation (as I said before, maybe some rules are not useful for your context).
There are very simple steps to configure your custom sets of rules, which can be applied to the projects you desire. It will help you to focus on the problems you matter. So, let's see what's a Quality Profile and how to configure your own.
What is a Quality Profile
After you run for first time your analysis, you will get probably thousands of issues raised. If you look into those issues, many of them are not really useful for your current project status: probably you have inherited code from many years of development or simply you want to focus only on some possible bugs which are important for you. So, probably you want to dismiss many of them for know.
When you run your analysis, it is done using all the rules that we have predefined on plugin delivery. But this set of rules doesn't need to be affordable for any project. In fact, it shouldn't.
A Quality Profile is a set of rules you want to use to analyze one or more projects. And you can have as many Quality Profiles as you need to assign to your projects on the way you need, accordingly to your own quality definition.
Ways of Quality Profiles
Before creating your first Quality Profile, you must notice that there are one important consideration to have in mind: you should decide if you want to inherit your Quality Profile or not.
In a inherited Quality Profile you will be able to activate or deactivate rules which are not managed by its parent. Also be aware that the default Quality Profile cannot be changed so if you want to create a parent-children profiles it is very recommended to create your own parent instead using the default Quality Profile.
Profiles inheritance is useful when you have multiple project and you want to create a minimal validation core which must accomplish any project in your company, but you want to allow more complex analysis in some of those projects. With that mechanism, each child profile can include additional rules to evaluate the code.
At runtime, both profiles works in the same way. The only difference remains in the way you manage the set of rules defined for each one.
How to create a custom Quality Profile
From the Quality Profiles menu you will find a Create button at the top right of the page.
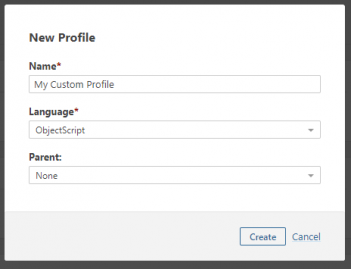
On click, you will be requested for the profile Name and the source code Language for which you are creating the profile. For now, we are leaving Parent as "None" to create our custom profile, otherwise you will be creating a inherited Quality Profile.
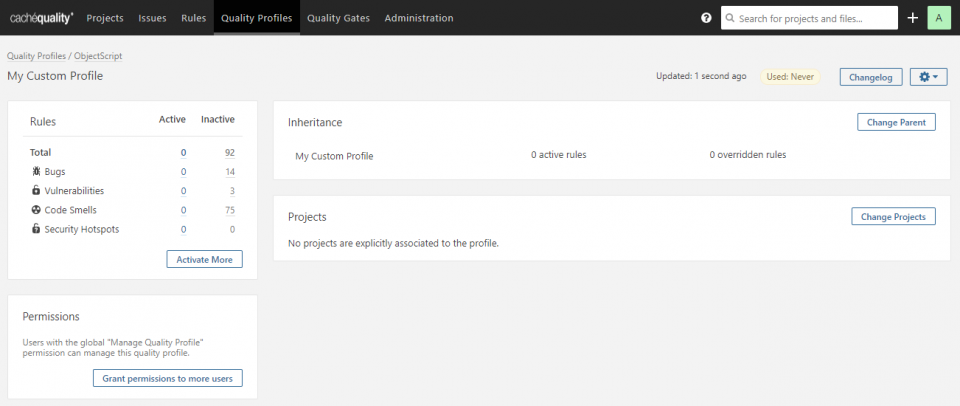
Your Quality Profile is created! On the left panel you can see the rules associated to your profile, which are none for now.
From this panel you can view the number of active and inactive rules, if it is an inherited profile or not, which projects are using the profile, who can manage this profile, and all the changes over the profile along time.
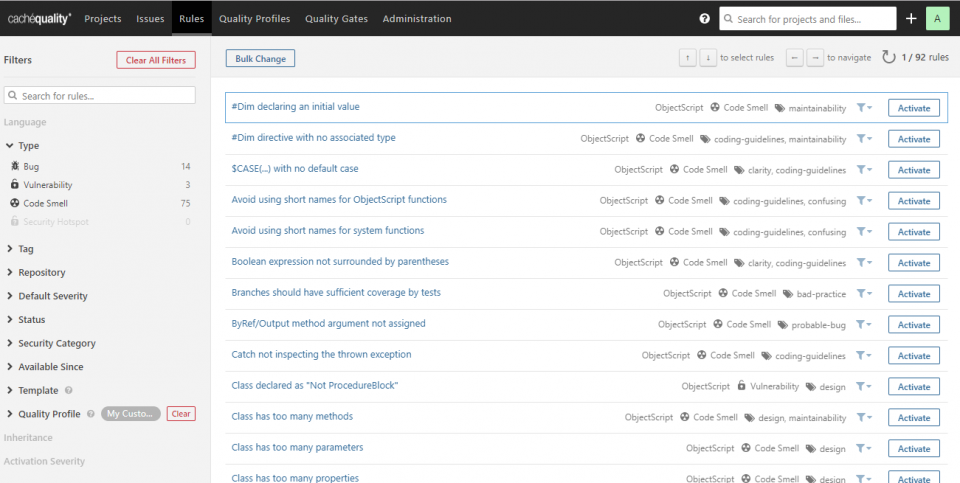
The easiest way to activate more rules is using the Activate More button and you will get to the Rules page filtered by your profile.
NOTE: You can also get to this list from Rules menu and then using the Quality Profile filter on the left.
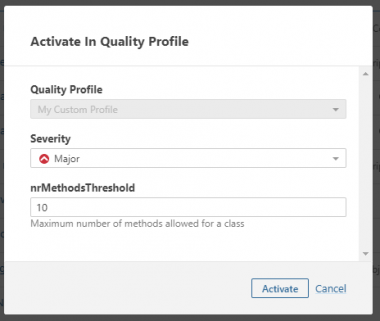
Find the rule you want to activate and click on Activate button. A popup will appear with the default parametrization where you are able to change the severity (you could differ in how important is a rule for you from what we defined by default). Also, for some rules, we show extra parameters which can be adjusted to your context.
In next example, we are activating "Class has too many methods". Notice that you have a parameter nrMethodsThreshold, which is specific for this rule. By default, we decided (based on common best practices) than more than 10 methods are too much for a class and should be splitted. But in your case you could decide to allow, for example, 30 methods before raise an issue.
After you activate the rule, the rules list is updated with the new status.
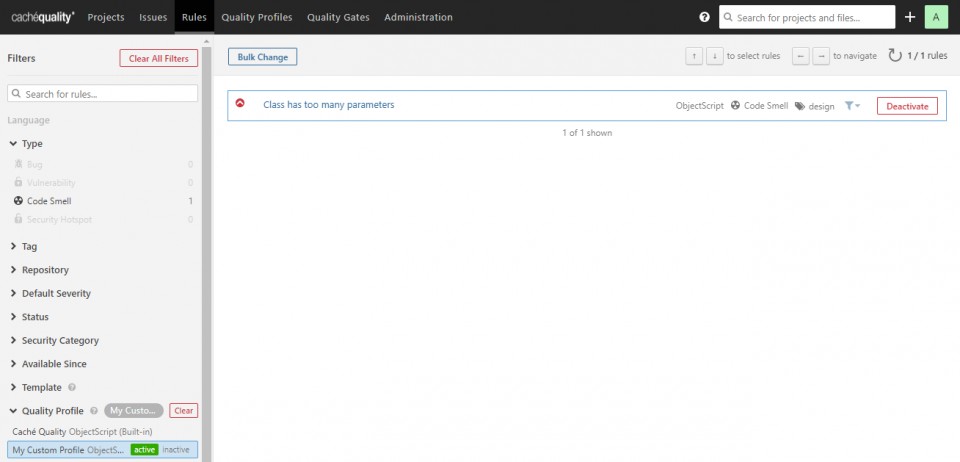
If you open on left menu the Quality Profile filter, you can see selected the quality profile you are working on. Next to it, you can select to show the active (see image below) or inactive rules (which is the default view when you are activating new rules).
Associate a Quality Profile to projects
From the Quality Profiles menu find and select the Quality Profile to manage. On section "Projects", use the Change Projects button to attach or dettach projects you want with this profile.
On next analysis, the associated projects will run the set of rules defined in the Quality Profile.
Manage Quality Profile from the project
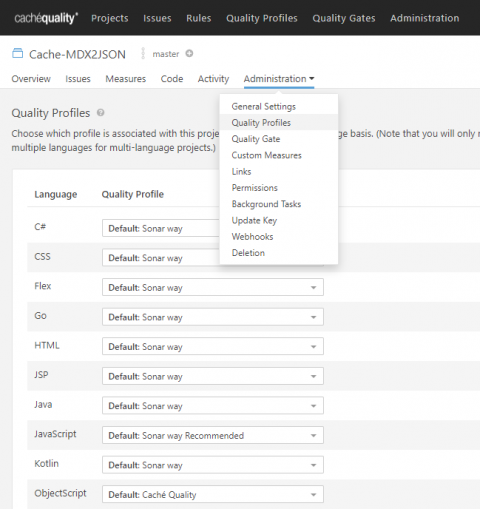
From the project menu, select Administration > Quality Profiles. It will show the source code languages supported on your installation and the profiles assigned for each language that could be found in your project. Change the association as per your preferences.
Remember that changes are saved as soon as you do the change. So be careful to leave the configuration as you really want.
And that's all!! If you have any doubt or want more information, please ask!!
You can also view this article here.
And check the related plugins for your preferred development tool:

