Converting .PPK key files for use with SFTP and SSH in InterSystems IRIS
In the WRC, we often see customers contact us because they are having been provided a .PPK file for use with SFTP connections, but they don’t know how to use that key within InterSystems IRIS. This article will explain why this represents such a problem, and explain how to use the .PPK key to generate a Private / Public Key pair in a format recognized by InterSystems IRIS.
The Problem:
You are trying to use InterSystems IRIS to connect to a remote SFTP server. The SFTP Server admins have provided you with a key file saved in .PPK format, and say that this key should be used to connect to their SFTP Server. When you try to load the provided key into InterSystems IRIS, the format is not recognized.
Why this happens:
PuTTYgen is a common key generator utility used for generating key files used for SFTP connections. When PuTTYgen generates these SSH keys, it does so by creating a single .PPK file, which is in its own PuTTYgen format.
InterSystems IRIS can utilize SSH key files for SFTP Key Pair Authentication. The “Pair” here refers to two separate key files, a Public Key and a Private Key. InterSystems IRIS relies on the Public Key being in OpenSSH format, and the Private Key being PEM encoded.
Since PuTTYgen has generated a single key file in .PPK format, and InterSystems IRIS requires two key files in different formats, this is where customers get stuck. Luckily, the PuTTYgen utility can extract a Public Key and Private Key from the .PPK file, leaving both keys in formats recognized by InterSystems IRIS.
How to extract a Public / Private Key Pair from a .PPK key file using PuTTYgen:
1. Open PuTTYgen, and choose the option to "Load in an existing private key file":
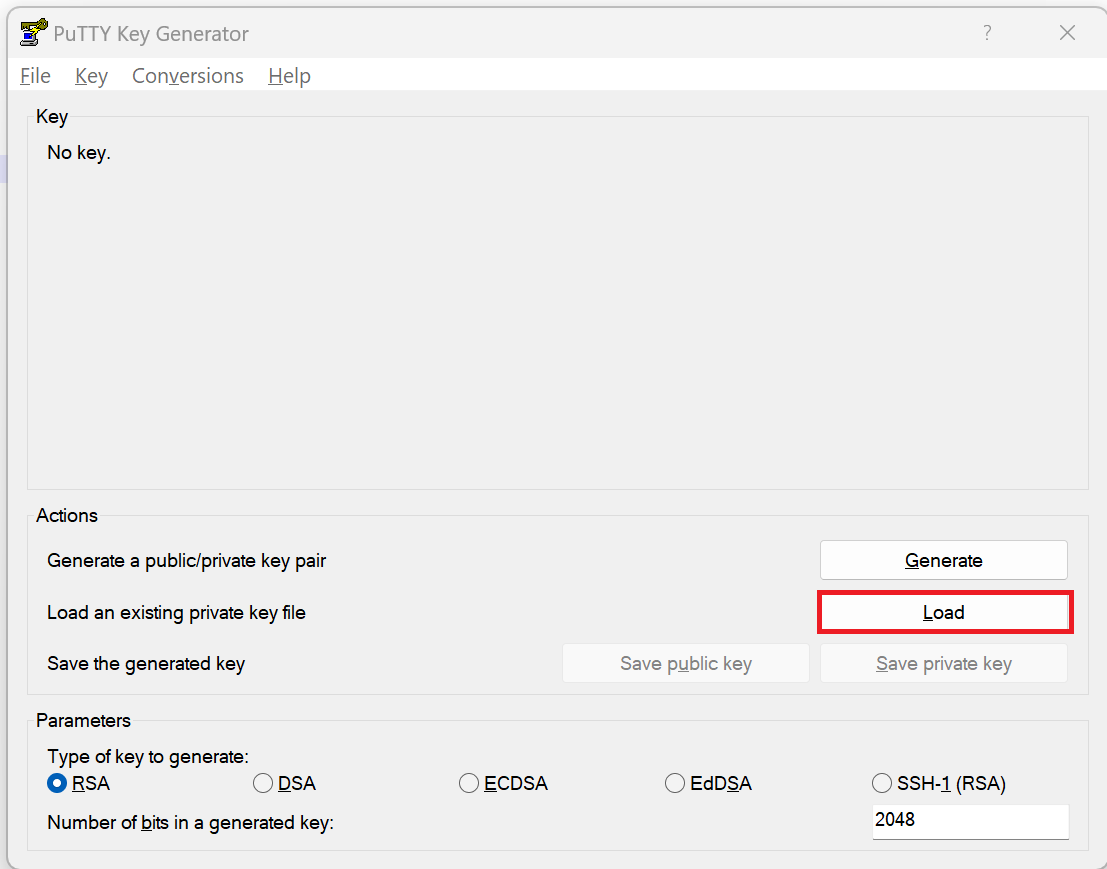 2. In the menu to select the key file, select the .PPK file that you have been provided.
3. The PuTTYgen page should now be populated with additional information. At the top of the window, there should be a section "Public key for pasting into OpenSSH authorized_keys file":

4. Copy the entirety of the contents of that box (which might require scrolling down further) into a text file and save that file for later. This will be your OpenSSH-formatted Public Key in step 8.
Note that while this step involves saving a Public Key, the “Save public key” button does not save this Public Key in the correct format. The only way to obtain the Public Key in the format recognized by InterSystems IRIS is copying and pasting the contents of the “Public key for pasting into OpenSSH authorized_keys file:” box.
5. Optionally, set a passphrase to protect the Private Key file. In the same PuTTYgen window where you obtained the Public Key, adding a passphrase to the “Key passphrase” and “Confirm passphrase” boxes will cause the Private Key file to be saved in an encrypted format. Adding a passphrase and encrypting this file also requires that the passphrase be used to decrypt the contents of the private key file every time it is used. InterSystems IRIS can utilize a Private Key File with or without encryption, so this step is purely optional.
6. After deciding on whether a passphrase is necessary, navigate to the Conversions drop-down menu -> Export OpenSSH key:
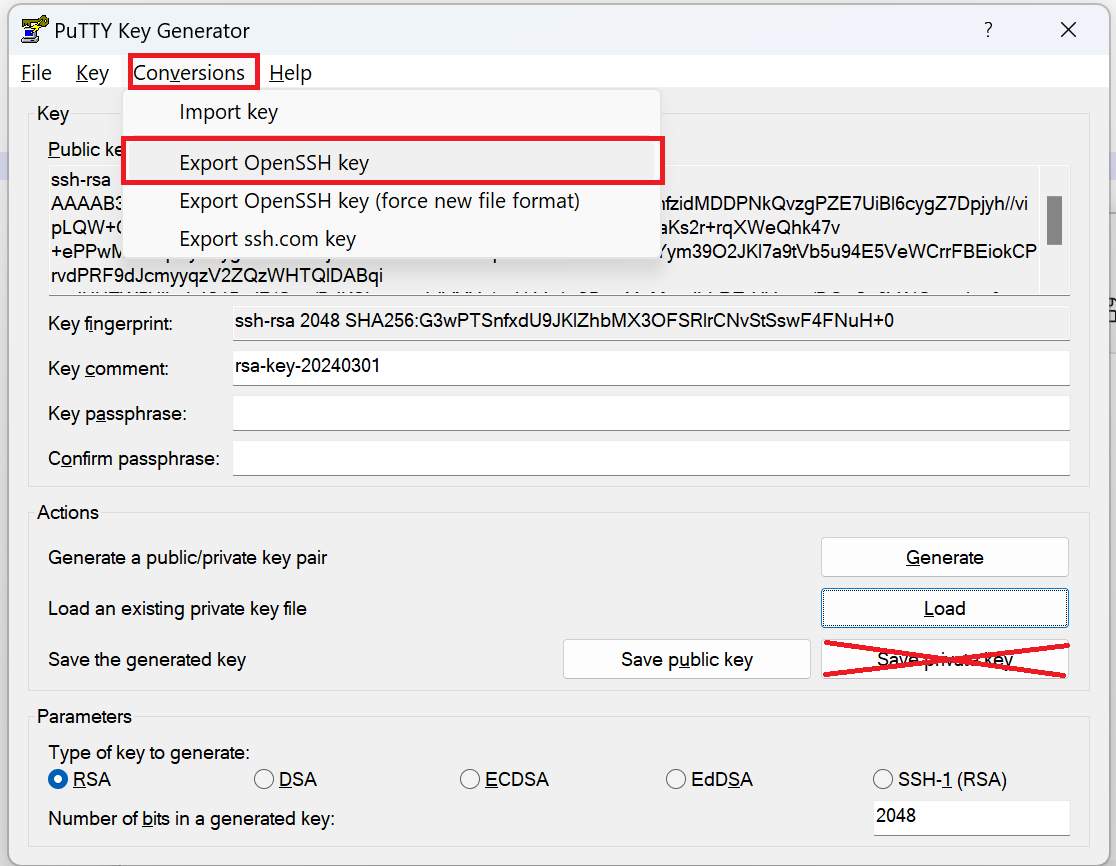
7. Save off the file for step 8. This will eventually be your PEM-encoded Private Key file. If done correctly, the file should have ASCII armor like so:
-----BEGIN RSA PRIVATE KEY-----
<Data from key in Base64-encoded format>
-----END RSA PRIVATE KEY-----
As in Step 4, the “Save private key” button might look tempting as this is an accurate description of what this entails. However, the format of the file created by the “Save private key” button is the same .PPK format we started with.
8. Configure your SFTP settings in InterSystems IRIS to use the OpenSSH-formatted Public Key and PEM encoded Private Key you saved in steps 4 and 7 above. For FTP Business Components in Interoperability Productions, these would correspond to the SFTPPublicKeyFile and SFTPPrivateKeyFile settings, respectively. If you’ve configured a passphrase in Step 5, the passphrase is provided as the password for your Credentials setting.
Normally these steps are sufficient to allow for customers to establish SFTP connections. If you continue to encounter problems with SFTP connections after getting the keys in the proper format, InterSystems Support will be happy to help you troubleshoot further.